
AirTex interior.... Do it yourself project??

My 1976 PA-28-151 still has the original interior and I'm looking to upgrade. I definitely need to do the seats but am considering getting the full interior from AirTex. Searching the forum, I found a few people who detailed the install. But I'm looking for advice on whether this is a true do it yourself project or one that should be left to the professionals. I'm fairly handy as I own a hardware store. But the only upholstery experience I have is re-felting my pool table.
For anyone who has taken the project on, what was your approximate total time invested? And if you had it to do over, would you? Or would you pay for install?
Thanks in advance!!
Jeff B. Montana
Comments
Hi and thanks for writing with your question. I've done four Pipers with complete airtex interiors and they've all come out great. I recommend it highly and it's not hard work, but it is detailed and time consuming. I can be a reference for you and help get you through the project. Let me know if you decide to proceed and we can talk on the phone and make sure you're ready.") Good luck!
Good luck!
Scott Sherer
Wright Brothers Master Pilot, FAA Commercial Pilot
Thanks Scott. I just ordered the samples today. So I'll get in touch with you before I commit to this project. I'm hoping to not bite off more than I can chew.
Jeff B. Montana
I'll get you through it, no worries. And it will look awesome when you're done.") Let's talk before you order so that you avoid some pitfalls.... I'll be available all next week to talk. No worries!
Let's talk before you order so that you avoid some pitfalls.... I'll be available all next week to talk. No worries!
Scott Sherer
Wright Brothers Master Pilot, FAA Commercial Pilot
I have dabbled in only carpet replacement. Was cut to fit, with minor adjustments. AIrTex good choice.
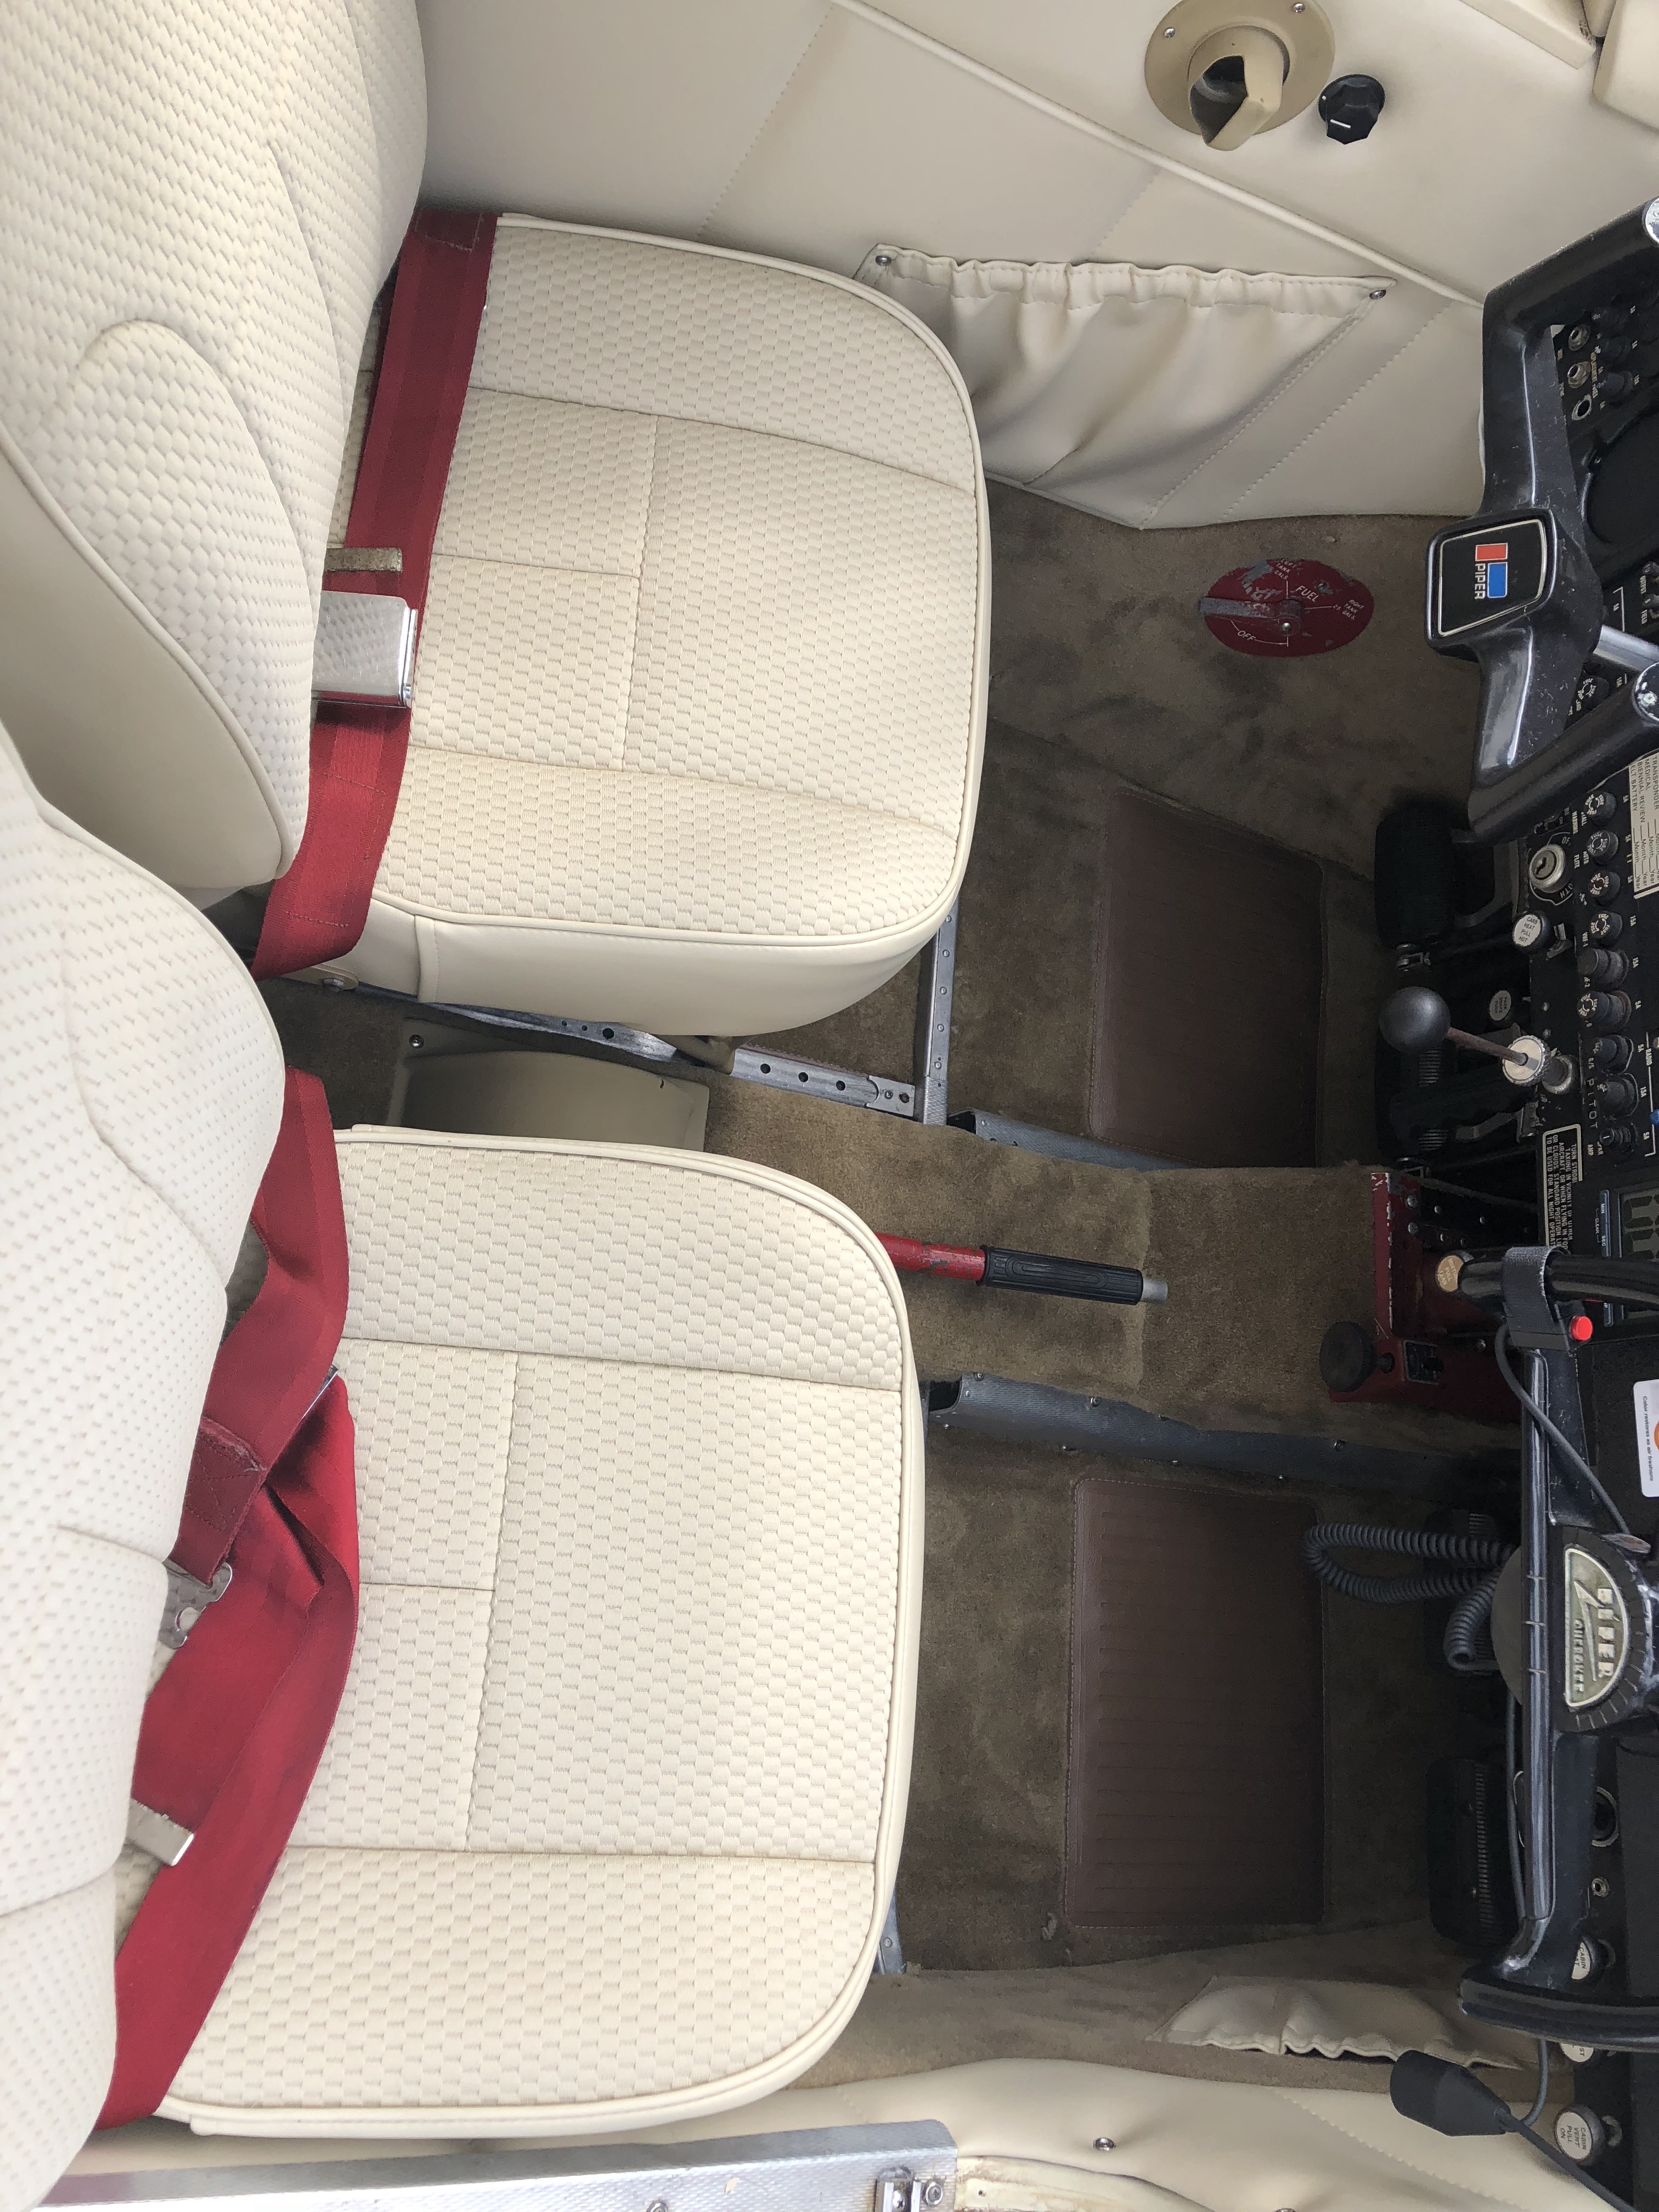
Put my first complete Airtex Interior in my 1965 Cherokee 180 last year (but did not replace headliner). While I am handy at fixing stuff around the house, I had never done upholstery or attempted a plane interior. The Airtex package was amazing - the panels were exact fits to my plane, the prefabbed seat upholstery fit on my frames like a glove, and the result was absolutely excellent. I did the Airtex package while I was doing an owner-assisted annual in my hangar, since I had to remove seats etc, anyway. I probably spent 5 hours cleaning the old carpet cement and gunk off the aluminum floor, cleaning the seat channels,etc., about 5 hours for the pilot, copilot, and back bench seat recovering (sanding and painting the frame, cleaning the rollers, installing the sling material and then doing the upholstery with the supplied tool and fasteners), and about 30 hours on the carpet and side panel installation, including repainting plastic trim, vents etc. I'm retired so this process was done over a two week period. The scariest part is determining where and then cutting holes in these beautiful side panels for vents, door handles, audio plug boxes etc. Like the old carpenter said measure twice and cut once (although I probably measured four or five times, then made tiny cuts and checked fit before expanding the cuts to the required size). While a lot of the carpet is precisely trimmed to fit, I had to do some fitting and trimming particularly around the front console and where the carpet goes under the rudder pedals. If I had to do it again, I would do it again, partly because it is dang expensive to have someone else do it and I now get bragging rights for what I did, lol.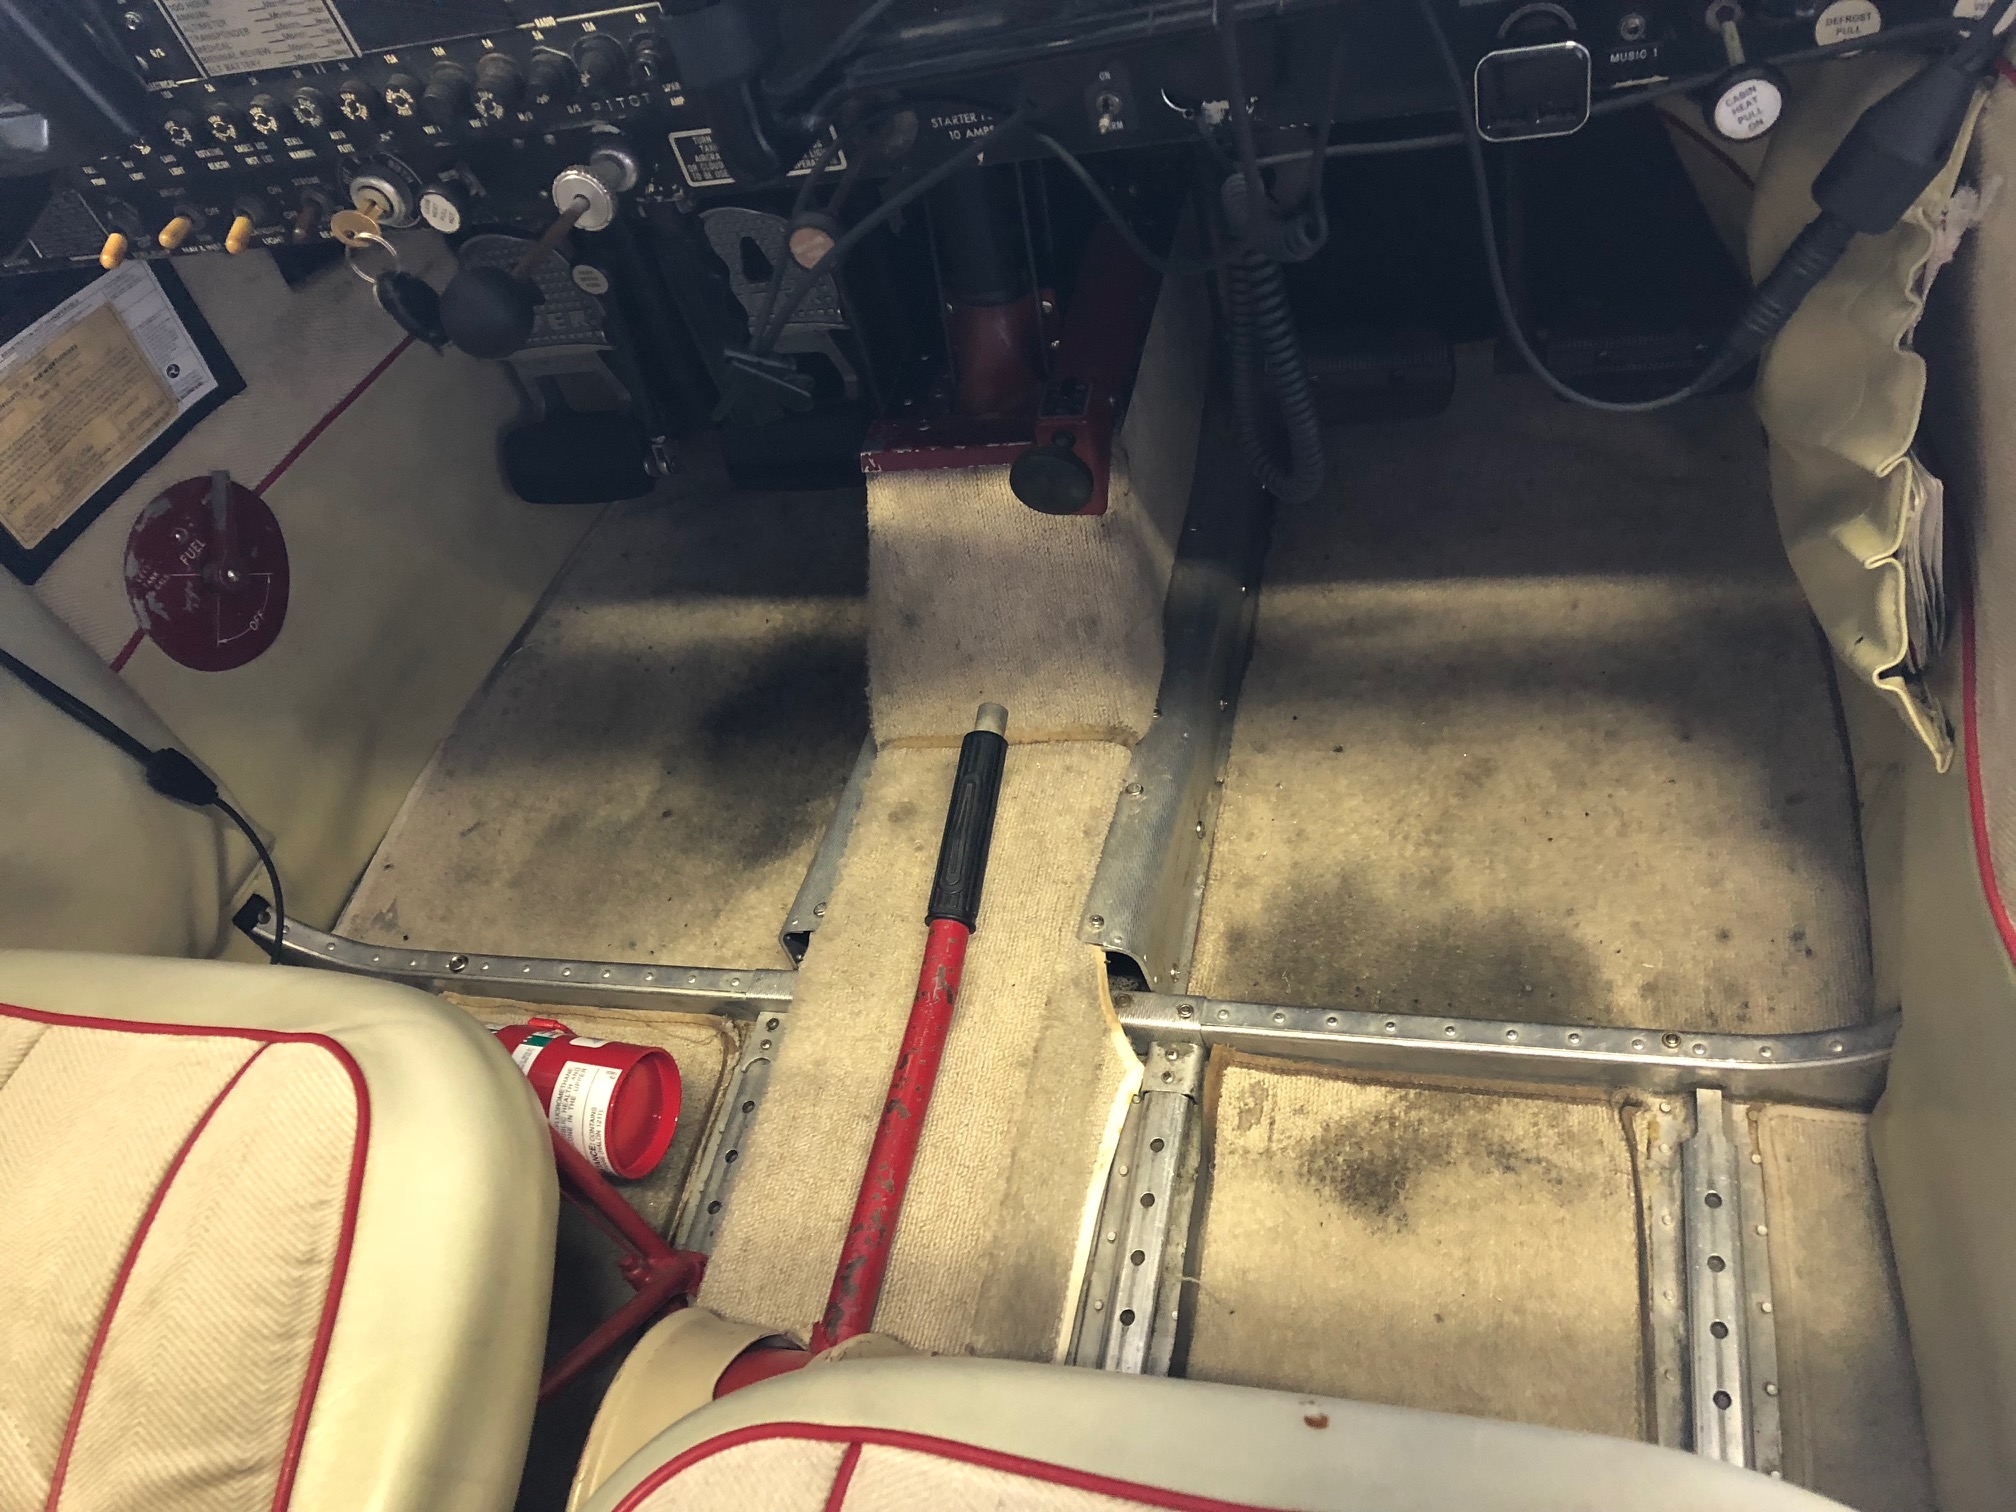
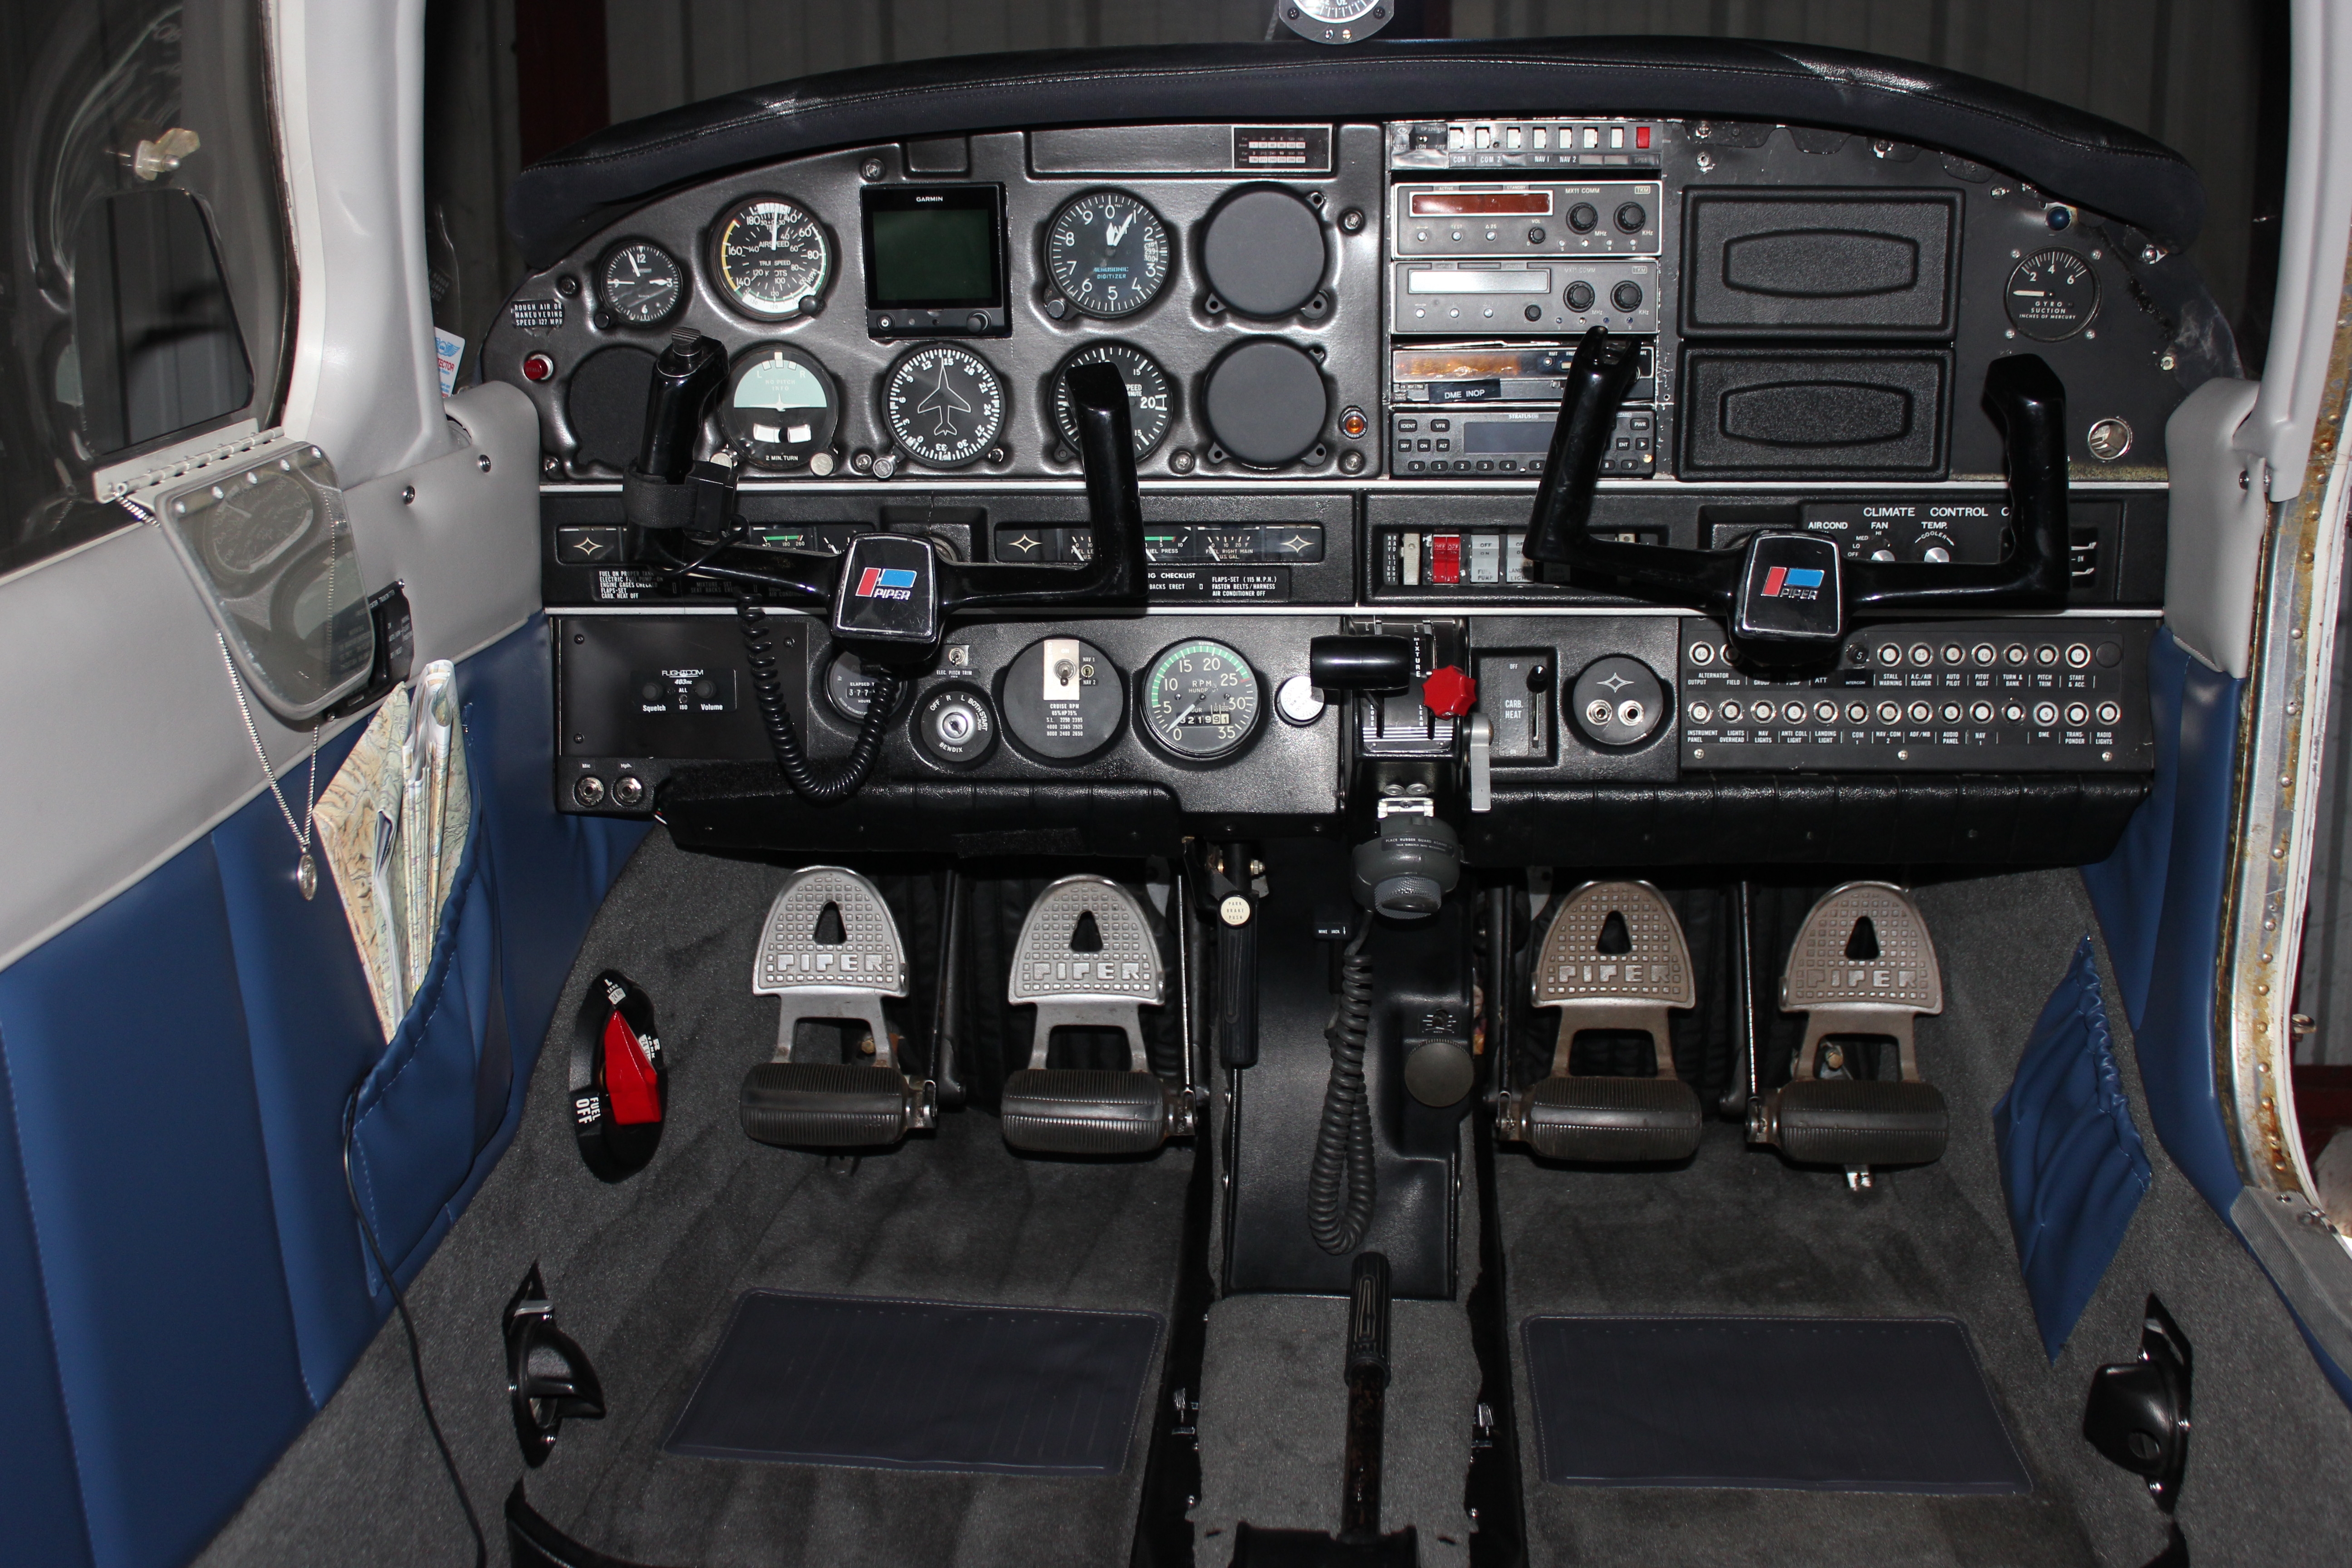
I re-did the interior of my 1974 Archer and concur with others that the Airtex products are great though I had my seats re-done separately by Oregon Aero. As others have already said, it's extremely time-consuming. Don't underestimate how much time it will take (and brain cells you will lose) to get the old glue scum out. It was worth it and I'd do it again. My before and after photos follow. Up next is a panel update to cover my new dual G5 installation (not shown).
Bob,

You're probably not going to like this, lol, but about removing the old glue. I brought it to my shop when I had everything out and they cranked up their air pressure driven glue removing device. It's a special power sander that doesn't do any damage to the metal, it just rubs off the glue and polishes the metal. It took 15 minutes and they did it free.")
Scott Sherer
Wright Brothers Master Pilot, FAA Commercial Pilot
And you'll never read this anywhere either, but do not glue the carpeting to the floor. Rather, get rubber insulation sheets from Airtex and cut them to fit the carpeting. Then attach velcro to the insulation and the floor. Now you have double sound and heat insulation on the floor and your mechanic can remove the carpeting in a minute to inspect for corrosion or make a repair.")
Scott Sherer
Wright Brothers Master Pilot, FAA Commercial Pilot
Yeah, I agree with that. I had to take the glue out from under the old carpet. The odor was from the solvent. I did NOT use glue for the new carpet. I did need to use some for mounting the headliner velcro strips.
I love the seat covering choice! It is on my list for the near future...the same fabric
Hi. Assuming you're talking about my seats, here's a better picture of them (note still no rear interior panels at this point). They were done by Oregon Aero in leather to match the Airtex panel colors. They have a special cushioning system that makes a tremendous difference in comfort. It was horrifically expensive but came out great.
Bob.
Sorry, I just realized you weren't talking about my seats since there weren't any in my first set of pics. Oh, well, there they are anyway.
Bob.
Hi Bob, nevertheless, Oregon Aero did an A+ job on them. I'm jealous!
Scott Sherer
Wright Brothers Master Pilot, FAA Commercial Pilot
I was referring to WhiteRed’s seats..the cloth interior. But your leather looks great!
Thank you all for the input.... And the awesome before/after pictures! My wife and I have been looking at the samples from Airtex and I'm leaning toward starting with just the seats and see how that goes first. They need to be replaced the worst as they're torn in a few spots and the left seat feels like the foam is all but gone from the bottom cushion.
I wanted to go full bore and order the complete kit, but my wife is more rational and reminded me that I do rent the plane out as well. I'd be way to anal about it to share my toy anymore if I did the complete interior now!
Bob, what are the two colors you used in your interior? I'm wanting to do a two-tone gray and blue and am looking at Slate for the gray and Cadet for the blue.
Jeff B. Montana
WhiteRed65, When you say 5 hours for pilot, co-pilot and back bench. Is that 5 hours each or total? Either way, it doesn't sound too bad. I definitely have time for that. But 5 hours total sounds much better. ha ha.
Jeff B. Montana
Hi, Jeff.
I found the original drawing I sent to AirTex so that they knew what I was trying to do (with the colors). I believe their part numbers and colors are the same as they were back when I placed the order. Note that the seats did NOT come from AirTex. Those were done by Oregon Aero in leather but they custom matched to the AirTex colors which I already had in the hangar when I ordered the seats. The panels, headliner, and carpets were all AirTex.
Bob.
Jeez, that's not quite right either. The color designations are correct but the seat pan and surround colors on the drawing are reversed from what I ended up with (see the picture). The labeled arrows to the panel are correct.
Sorry for the (my) confusion. It's a miracle I ever got it put together...
Bob.
Thanks Bob!
Jeff B. Montana
Responding to MTjb82's 5 hour question, it was 5 hours for all of the seats combined. The two largest tasks were (1) disassembling, cleaning/stripping and preparing the seat frames with their dozens of rusty squiggly internal springs for painting using a wire wheel on a drill, emery cloth and a small wire brush for nooks and crannies, and (2) at the end of the process doing the hog ring fastening on the underside of the seat bottoms as it requires a lot of carefully planned little cutting and folding around the seat legs and assorted braces before stretching tight and anchoring with the supplied rings and special pliers (with a fair number of breaks for tired hand muscles as this process requires some hand strength). No single step of the seat process is that difficult - its just a lot of little fussy work, and I worked slowly and cautiously thinking a step or two ahead to make sure whatever I was doing was correct and would not make more work or problems down the line.
And responding to Kentwkalb, I think you will like the textured cloth inserts that we used in our seats. We have flown them in summer's 90+ degree Fahrenheit weather as well as this winter's 15 degree weather without our butts sweating or freezing like they do on some leather or vinyl seats, lol !!
Thanks. Yes the cloth would be my choice! I have sheepskin covers now...work well. My seat fabric is in great condition, just cushioning flattened.