Basic Piper Question…
Hi All,
”Basic Piper Question” being code for “I should know the correct answer, but kinda don’t…” as this can probably be easily answered by either one of the Aeronautical Engineers on here or a New Member with 12 hours and about to Solo.
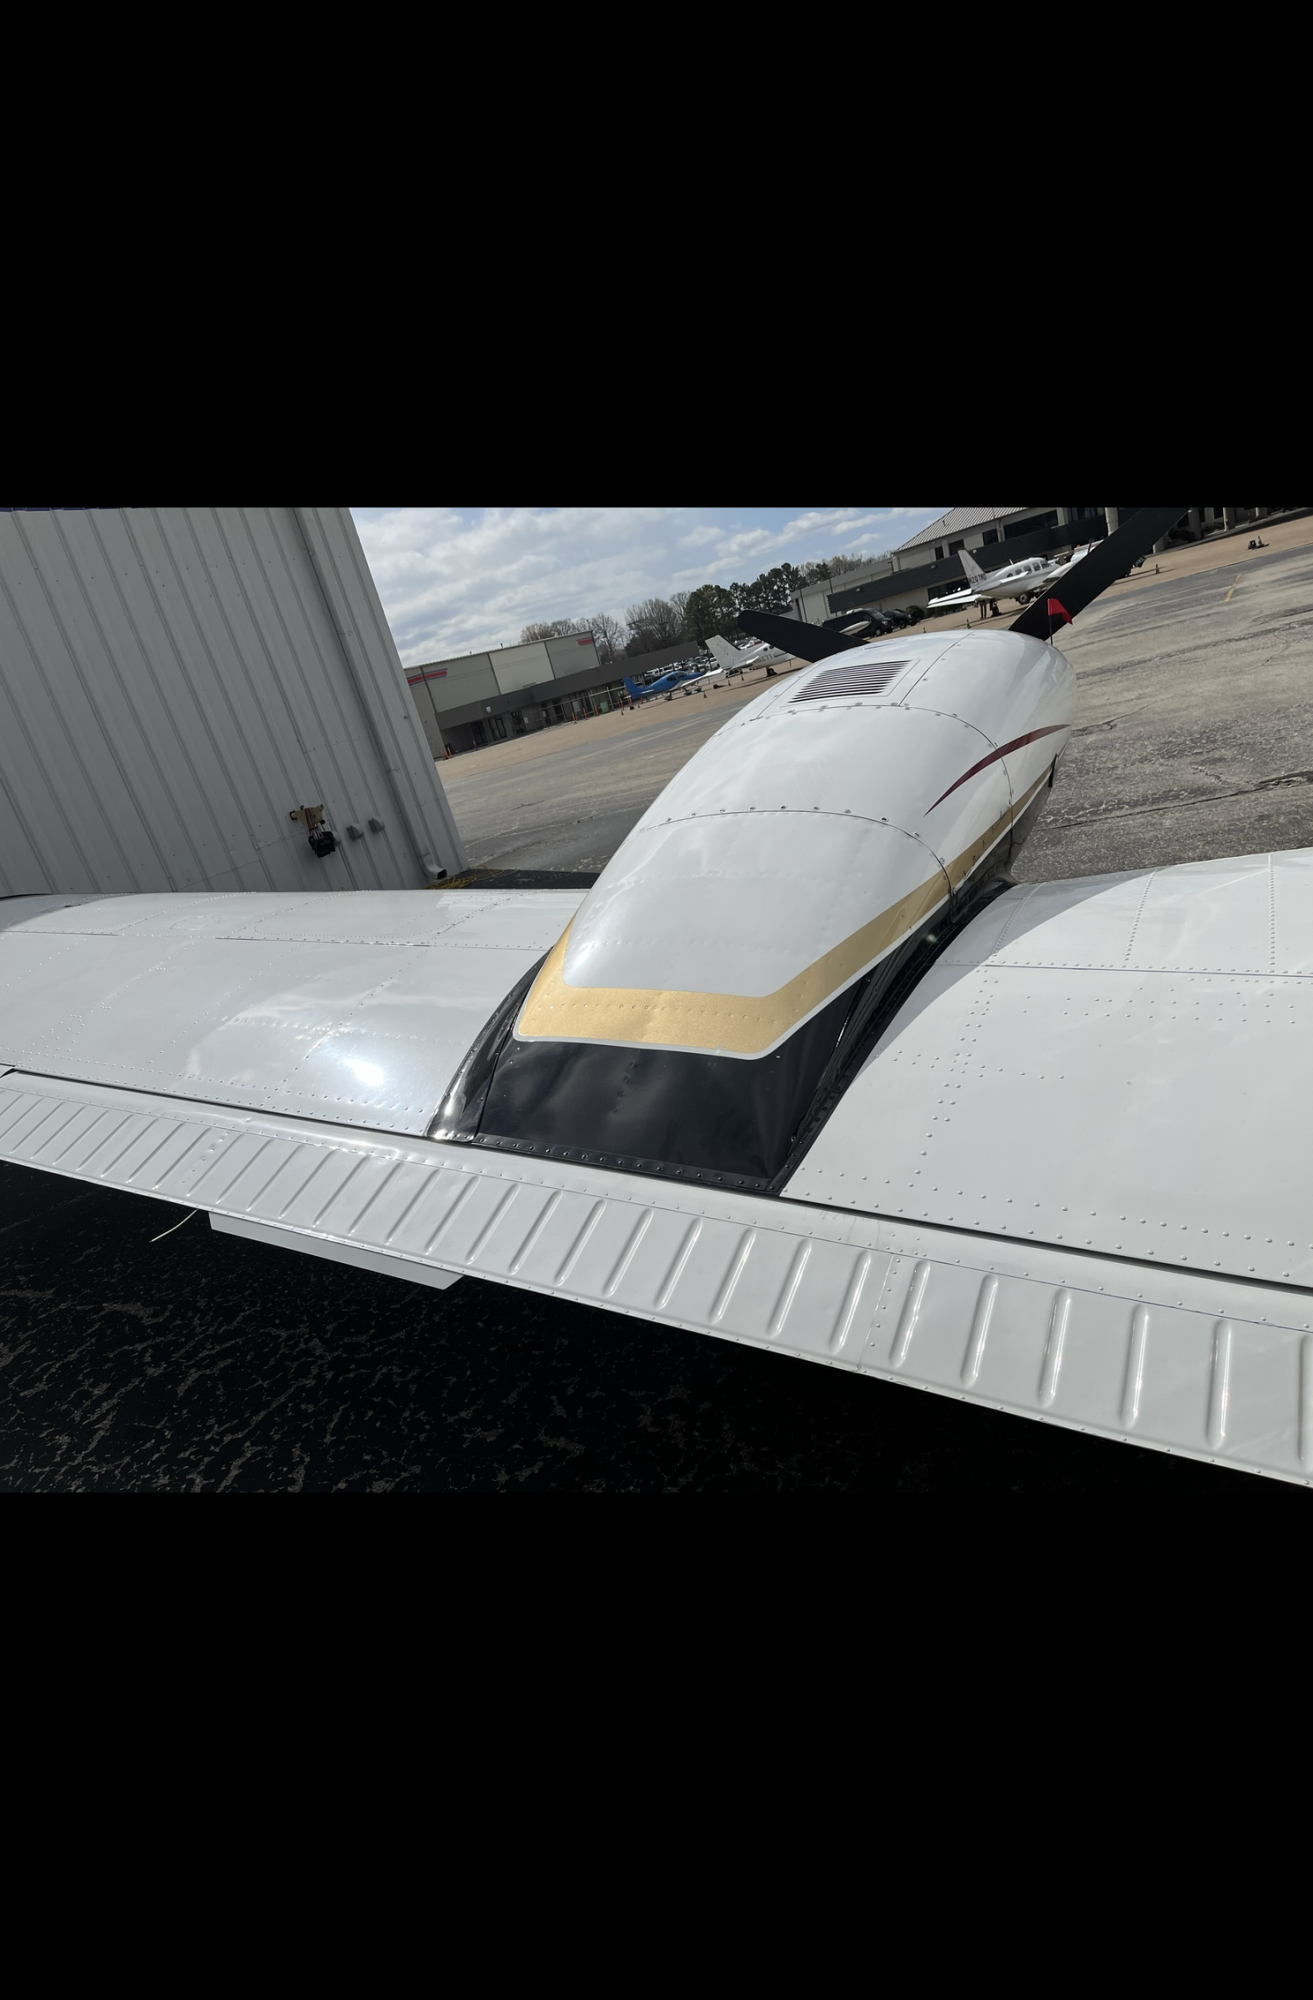
Ive flown a variety of Piper products now for over 50 years, had many good Instructors. Prior to my first Solo in a -140, during the Preflight Walkaround I asked the CFI “What are those “things” on the Flaps and Ailerons, you know these divet like cutouts, they’re on the Tail too?” He correctly replied “Those are to strengthen the control surface.” I said “Oh, OK!”, learned something new and we moved on…
Now, a few years later I’m wondering what those are called and if Piper has a name for them, and why they are even utilized?
Ive found in Flying, like many things in Life, you may know the “What” but, unless you know the “Why”, you really don’t know…
If anyone has any additional thoughts on the “What AND Why” I’d appreciate the discussion.
Ive read a bit on it, found conflicting information online and really can’t find anything from Piper. Of course Cessna and Beech use that theory of design too, Boeing not so much!
Here’s a picture of the Trailing Edge Flap, for reference, on my Piper Seneca, some of you may recognize the Signature FBO Ramp at KTYS in the background! Good People there! This particular design runs only along the Flaps and Stabilator on my airplane, not the Ailerons, they run full span on many others, like the Cherokees. I know all airplanes are different and have spent many hours in Windtunnel testing, now Computer Modeling, to arrive at the best design. Just wondering if someone could share some good gouge with the group so when a passenger asks “What are these for??” We give them the Best Answer!
Thanks in Advance!
Stay Safe, Fly Fun!
George
N8434M KLPR


Comments
Those stampings help make for a stronger surface that resists oil canning in a similar way corrugated cardboard is stronger vs flat.
They also help in fabrication as the control surface is made with end ribs and the leading edge spar/nose. This design choice enables using solid rivets and the surface can be jigged to keep the surfaces true. The nose spar is the hardest but can be accessed with a long rivet bucking bar from the edges.
In the experimental world and larger planes, etc it is more common to use more ribs - including interior to to the control surface ribs. There are a couple ways to address this during build but one way to completely rivet the front side rivets (with the back open) and then "back-rivet" the backside from left to right (or right to left) holding the skin back for access.
The other path popular in light sport is using pull rivets which can be an excellent choice if accounted for in the design.
The RV-10 I was building used the 2nd technique (Backside rivets last) and the Zenair 750 SD uses the last technique with pull rivets. Most of the kits out there have CAD-CAM matched holes these days and the machines/designs have the impact of the sheet metal bends down to a science for perfect fit. A pull rivet design matched drilled flap can be built in 1-2 hours (not including primer, etc). You basically pull the parts out, attached the skin to the ribs with clecos and zip down the line with rivets one at a time replacing the clecos.
Replacing a skin on a Piper is harder as you need to match drill the new skin into the existing holes but once you have done this it would go quickly.
Ribs are often stamped for strength too and "flueted" for shape/strength. I don't think there is an aero advantage for Piper with the current design and likely a slight disadvantage in drag.
Inspecting for cracks is important for pre-flight and any shaped part is often at higher risk for cracks.
Picture is a piper replacement flap part (Piper LH Inboard Flap Skin PN 65587-00, 65587-000)
You can see the holes at the left/right are pre-drilled for the ribs but the leading/trailing edges are not. The leading edge is matched drilled to the spar.
Here is the RV-10 flap design:
This is a link to building an RV-10 flap that describes everything in fantastic detail. The entire airframe is built from similarly detailed plans. Once you realize how simple and logical it is it could very well be the most expensive link you ever click on... don't say you have not been warned! ;)
https://www.vansaircraft.com/wp-content/uploads/2021/10/22_10.pdf
Eric Panning
1981 Seneca III
Hillsboro, OR (KHIO)
Hi Eric!
Thank You for the Outstanding Brief!
I learned a lot!
On your suggestion, I will stay far away from your RV-10 Link! As a matter of fact after I commit your post to memory, I will delete it and throw my iPhone in Lake Erie just so I don’t ever, ever click on it! 😜
Im squandering enuff of my children’s inheritance here on my Seneca while having way too much fun!
Besides being 103 years old I don’t have 5 more years to build one.
Friends have RV’s and they LUV ‘EM! 👍
Thanks again Eric for the Dual!
Stay Safe, Fly Fun!
George
N8434M KLPR