1978 Arrow III - N3030M

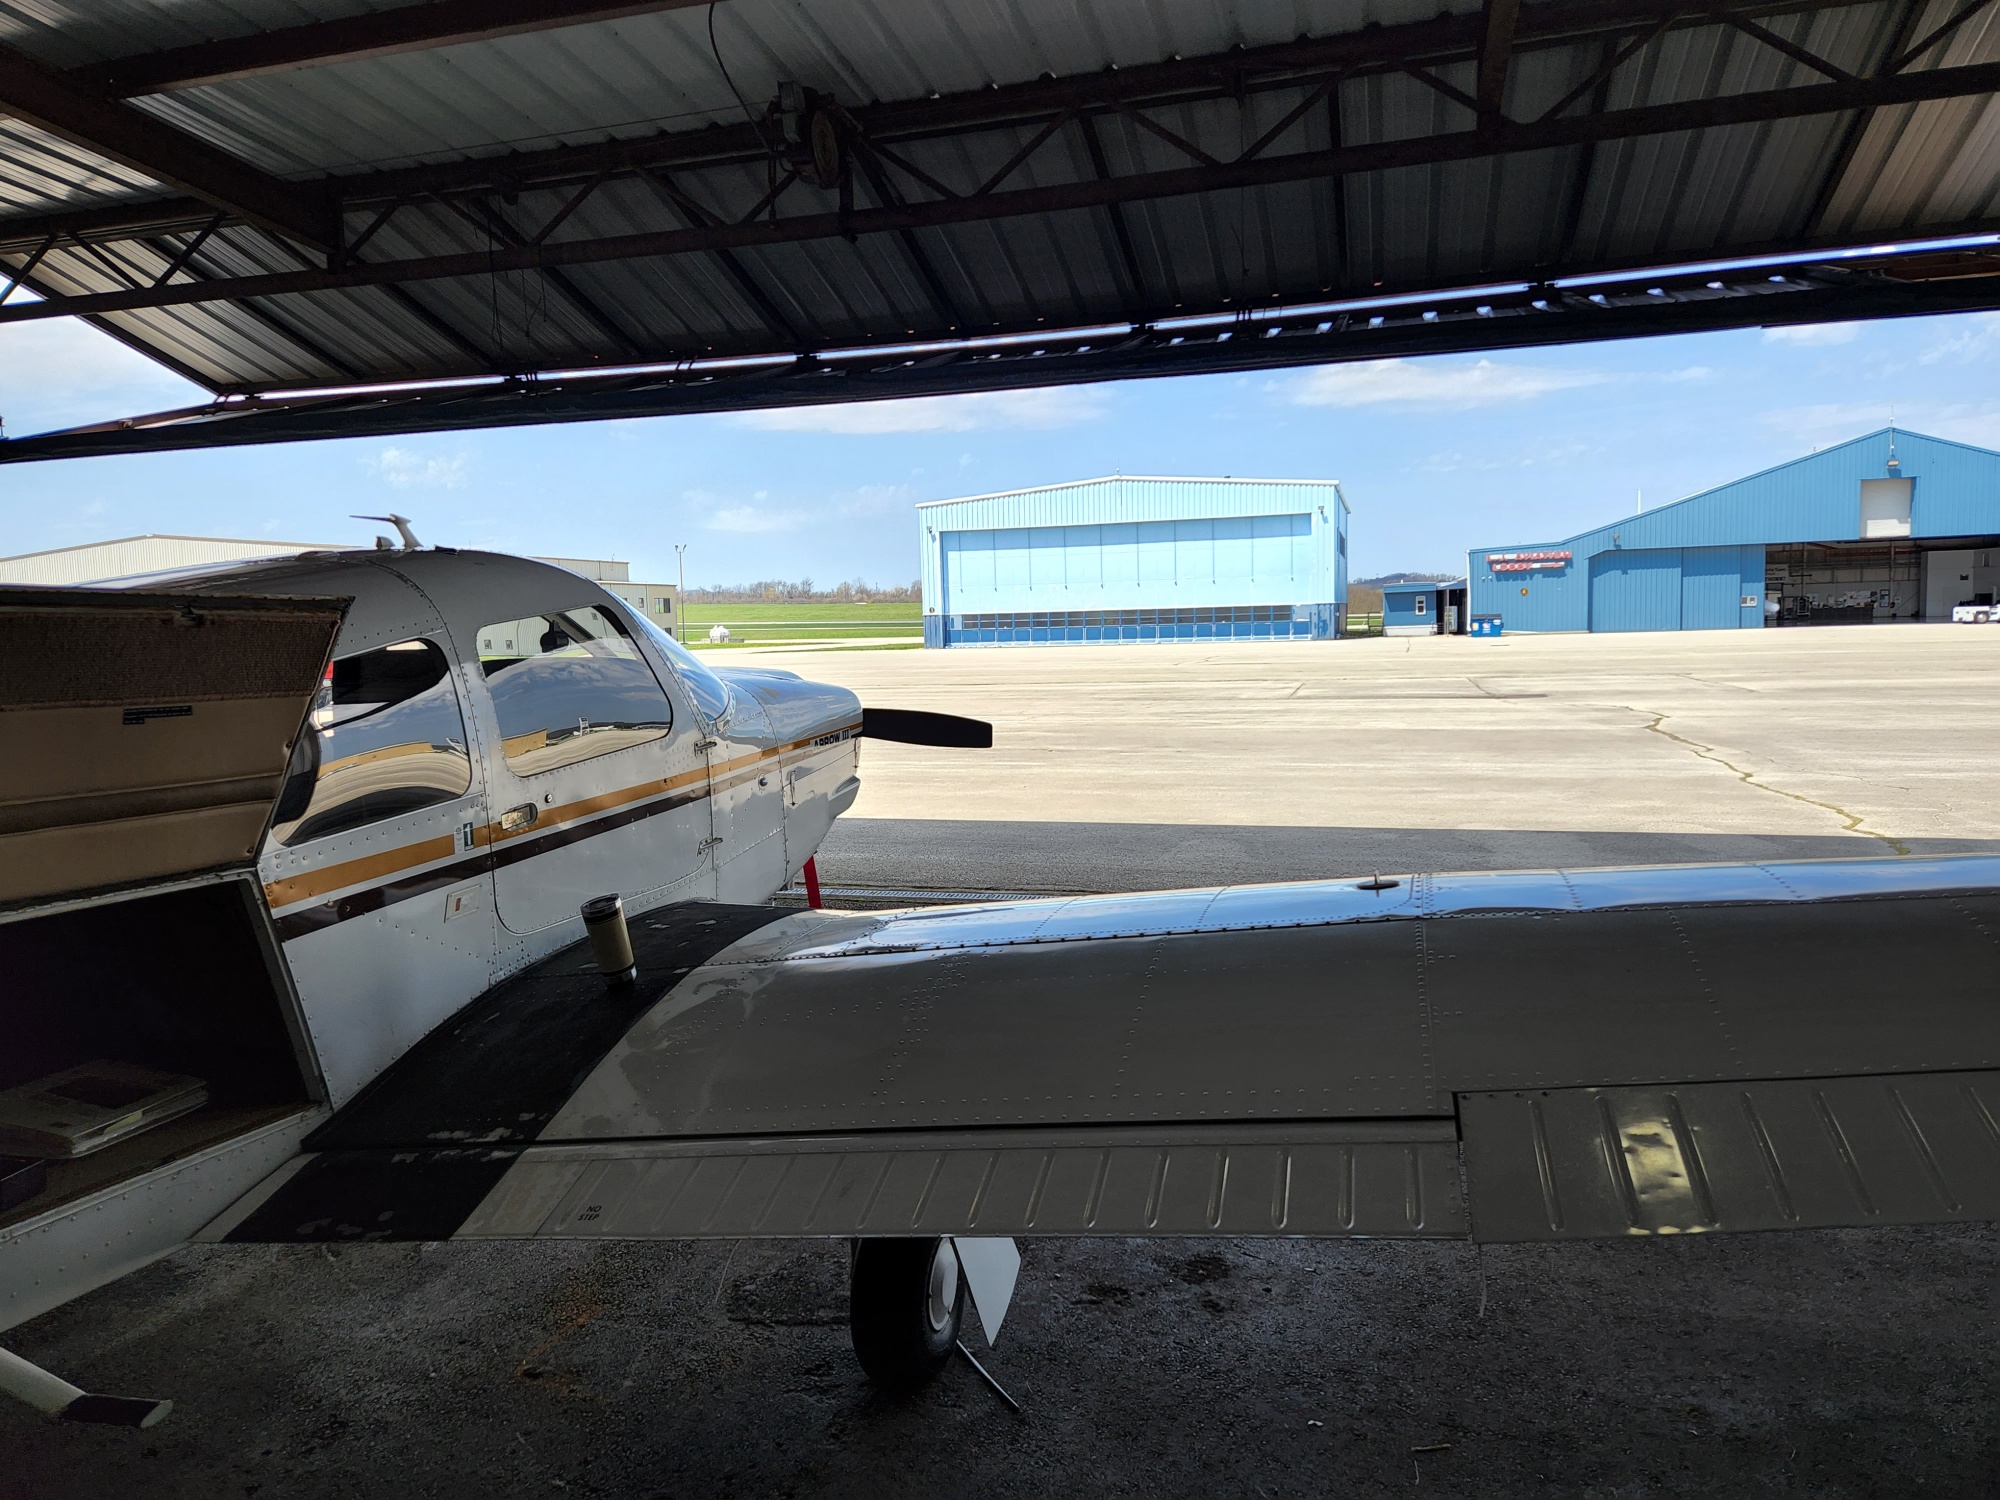
Hey everyone! I'm the new owner of N3030M, a 1978 PA28R-201 out at KLBE. I'm taking my check ride in a couple weeks, can't wait to transition to this!


Comments

  • Congrats on your Arrow purchase! From the pic, it looks nice!

    Post more pics, and good luck on your check ride!

    Jim "Doc Griff" Griffin
    PA28 - 161
    Chicago area

  • Congrats, Jared! :) Looks great. Have you flown her yet?

    Scott Sherer
    Wright Brothers Master Pilot, FAA Commercial Pilot
    Aviation Director, Piper Owner Society Forum Moderator and Pipers Author.

    Need help? Let me know!

  • I also have a 28r-201, if I can help in anyway just reach out!!

  • Congrats! I think you will love your Arrow/

    Ben

  • Haven't flown her yet, but the ferry pilot said she was great. I'm weeks away from getting my PPL so I've just practicing my landings in the C-172. I'll get more pictures up soon. Thanks for the warm welcome.

  • I'm on the P-28 page on Facebook and amazing posted these interior posts and found the guy who installed it. I thought the interior was MAYBE a couple years old... it was installed in 2007 and still looks absolutely amazing!

  • I guess if there is one question I can ask, I don't necessarily want to do a $25k custom paint job (well... I want to, but certainly don't need to, lol). I would like to cover all the small areas of exposed metal though. Is that something any of you guys have done? Don't want to fill in divots, or reskin anything, but don't want to hit it with some rustoleum either.

  • Inlineaviation:

    Touch-ups are a natural part of aircraft ownership, no different than a vehicle.

    I'll be happy to help you out. As an FYI, if the areas to repair are relatively small, you can obtain very satisfactory results with good prep and a rattle can.

    A few questions:

    1. Do you have any experience doing paint work, or is this a DIY learning experience?
    2. Are you looking for a proper paint repair or just something quick and dirty?
    3. How large are the affected areas? Pics would be very helpful.

    Jim "Doc Griff" Griffin
    PA28 - 161
    Chicago area

  • I've done some light work with little paint touchup pens on cars, but understand how to prep an area, tape it off to stop bleeding or overspray. I'll grab some pics. I'm not looking for a masterpiece, just something that covers bare metal, something that looks presentable.

  • Perfect, I'll be happy to help you.

    Jim "Doc Griff" Griffin
    PA28 - 161
    Chicago area

  • Here are some examples of the paint that needs touched up. Not sure what I can do for the textured surface.

  • You can buy replacement wing walk material. Some of those areas need extensive prep/prime and paint. You might need to work with a local paint expert to get as exact a match as possible (and maybe multiple batches for different areas).

    I think you could easily make it look sharp at 20+ feet and with careful matching/blending maybe 10ft away. It is likely the general paint condition in all other areas (not re-painted) would dominate any closer.

    It sounds like your expectations are realistic and with some careful matching I think you can get good results.

    Eric Panning
    1981 Seneca III
    Hillsboro, OR (KHIO)

  • edited May 2022

    Inlineaviation:

    From the pictures, I can see that those areas were touched up previously. Eric's advice is good, and I'll add to it. Your choices on the wing walk are peel and stick, or brush/roll on. I prefer peel and stick, but both are good and will last a long time.

    This response is pretty long, so you may want to grab a cocktail before reading.

    I'm not busting anyone, but there is open evidence that the previous touch up was not prepped properly. You'll note that there are strips of paint missing that exactly match the shadow of a piece of masking tape. This is an indicator that residue was left on the surface from masking tape prior to paint application. Paint does not stick well to bare aluminum, as evidenced above. Aluminum requires very unique prep, and I also do not see any evidence of either the proper prep or a primer coat. If you take one thing from this long post, here it is: the most important part of a good paint job is proper prep.

    You have choices:

    1. Do it yourself.
    2. Have it done professionally.

    Having the work done professionally is up to the pro, so I won't expound. You mentioned earlier that you wanted to try this on your own, and that you have some experience touching up. The caveat is that this is aluminum, and is completely different, so here's what you'll need to do it properly.

    1. Strip the areas that you want to touch up. Your choices for stripping are either chemical or sanding. If you can see where the previous touch up was done, you'll need to strip the paint up to that point, and feather the paint a few inches beyond. Feathering means gently sanding until the transition from paint to aluminum in not noticeable to the touch.
    2. If you choose a chemical stripper, make sure it is designed for aluminum and for aircraft. Airplane paint strippers work slowly (sometimes overnight), so be patient. Follow the directions of the product. I highly recommend that you mask anything plastic or windows first with a layer of paper, then covered with aluminum foil, tightly sealed because some chemical strippers will destroy plastic. Also, if using chemicals, you may need to neutralize the area when done, then deep clean either way.
    3. If you choose to sand the old paint off, I would recommend wet sanding starting with something like 400 grit, and once you get close to bare metal, switch to something like 1000 grit. It will take time, but don't be too aggressive or in a hurry. Sanding is generally safer because you have far more control than with chemical stripping.
    4. When you get the area to repair down to bare metal, stop. Clean the area and let it dry.
    5. Clean and prep the bare aluminum with a product made specifically for aluminum, like Alumiprep. Once the area is cleaned, do not touch it or apply anything like masking tape. If you do, wipe the area down well using a clean cloth and Isopropyl alcohol.
    6. Bare aluminum needs to be treated with either Alodine or an aluminum etching primer like Alumigrip. Follow the directions very closely with either product. Both products can be hazardous, so use proper PPE and work in a well ventilated area.
    7. Do not sand the Alodine once it is applied.
    8. Mask off the areas you don't want painted and well beyond. Overspray can stick to parts many feet away from the area being sprayed. Apply a primer made for aircraft directly onto the Alodine. Follow the directions on the primer can.
    9. If you used a product like Alumigrip primer, you may skip the Alodine steps.
    10. When the primer has dried, you may lightly sand out the imperfections. I recommend wet sanding with 1000 grit or higher, and reapply the primer as necessary. If you sand through the primer down to bare metal, simply reapply the Alodine and primer or Alumigrip on the bare spots. Repeat as needed until all bare aluminum is covered.
    11. Let the primer dry again, and lightly sand with 1000 grit or higher until smooth. Then use compressed air and a light touch on a tack-cloth to remove any dust or debris prior to applying the paint topcoat. Again, do not touch the prepped area with your hands or apply anything like masking tape. If you do, wipe the area down well with Isopropyl alcohol and let it dry.
    12. You may use a high quality automotive paint, but I highly recommend using paint designed for aircraft. Sherwin Williams Acry Glo is very popular and works very well on GA aircraft. They have a number of of other products like Jet Glo, however, Jet Glo typically requires an environmentally controlled area, and is more for use on jetliners and high performance aircraft. Acry Glo is much more forgiving, and will work great on your plane. Most of these paints are 2-part, some are 3 (paint, reducer, hardener). Make sure you understand and purchase everything necessary before you start.
    13. If you bring in a small piece of your plane that has the paint color you wish to match, the paint shop can usually color match for you. If your plane still has a factory color (Piper used Matterhorn white a lot), you may purchase a ready-mixed color.
    14. Check the masked off areas, and re-mask if needed. Follow the directions on the paint can for mixing. Also follow the directions for application. If there are none, here is a good method to obtain a very nice finish: Start with a light coat, and let it "tack up". Follow it with a 2nd light to medium coat, and let it "tack up" as well. Finally, apply a "wet coat" and let it fully dry. If you are not familiar with painting, I highly recommend practicing your spraying technique on a small piece of scrap steel or aluminum. No need to go wild prepping it. Practicing will give you a feel of what to adjust in your spraying technique to avoid orange peel, drips and sags. If you use paint with a hardener, it will have a "pot life", so make sure you either use it or dispose it before that point. Do NOT put it back into the can.
    15. If there are imperfections in your top coat paint, you may gently wet sand (3000 grit or higher) and buff. If the imperfections are large or you accidentally sand through the paint, wet sand it, prep, and apply another top coat. If the paint is dry, and no re-coating is required, remove the masking and admire your work! If you follow everything above, your paint repair work will look great and last for decades.

    As far as the screw heads and cowling latches, some of those screws (definitely the cowl latches) are stainless steel. Stainless steel generally does not take paint well. I removed and buffed my cowling latches, and left all the bright stainless screws natural. Years later, they still look great.

    For the small touch-up areas, I would use a small paint brush and dab Alodine on the spot, let it dry, then touch up the top coat paint with a small brush.

    In a previous life, I did paint work for a living, and am happy to pass on my knowledge. The key truly is in the prep work. I hope this helps you.

    We'll be expecting pictures of your completed work!

    Jim "Doc Griff" Griffin
    PA28 - 161
    Chicago area

  • Jim,

    Thanks for the detailed writeup... I read it a couple times and I'm definitely leaning towards having a professional handle it. I'll make some calls and see how far I want to go down this rabbit hole.

    Jared

  • Jared;

    Sometimes having a pro do the work is your best option. My plane was painted 5 years ago, and despite all my years of experience, I chose to have it done professionally.

    But if you feel you'd like to give it a try, I'd have someone who has done paint work previously assist you. Make sure (s)he has painted aluminum before. The prep is quite different.

    Let us know how it turns out!

    Jim "Doc Griff" Griffin
    PA28 - 161
    Chicago area

Sign In or Register to comment.