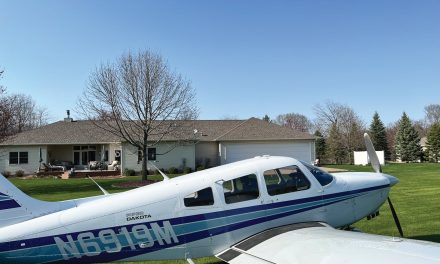
This “rebuilding a Piper engine” article is from Greg Piehl, who lives in St. Petersburg, Florida, with his wife Debbie, spent three years restoring and upgrading their 1959 Piper Comanche 250. After 34 years, the first flight of N6494P took place at Zephyrhills Airport, three days before leaving on a trip to Oshkosh, Wisconsin, just in time for AirVenture in July and August 2021. This is part five of seven parts.
Like the first two installments of this series, we’re making this article free to all website visitors.
Subscribe today to read the entire series, which chronicles:
How to Disassemble and Transport a Legacy Piper
How and Why to Strip Your Plane Yourself Before it Gets Repainted
Restoring the Interior of a Legacy Piper: How You Can Save Money
Comanche Panel Upgrades
Comanche Engine and Mounts: What Happens During an Upgrade
Comanche Reassembly: What a Legacy Piper Looks Like When It’s Taken Apart
1959 Comanche Fully Restored
What You Will Learn in This Article: Rebuilding a Piper Engine in a Comanche
Can you repaint a Piper engine?
What kind of paint do you use to repaint a Piper engine?
How do you test an engine after a rebuild without mounting it back onto the plane?
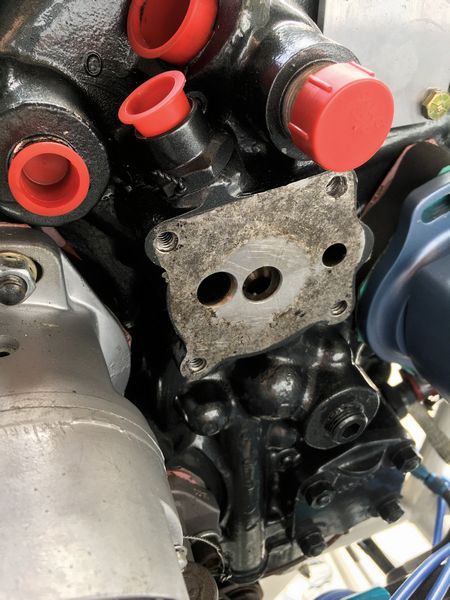
How can you improve the oil-change interval from 25 hours to 50 hours on a legacy Piper?
Our journey has reached the engine of Greg Piehl’s Comanche. There were a few companies involved in this stage. Some of the engine parts were sent around the country, reconditioned, and sent back to Florida, where Piehl worked on it.
“I was authorized to do anything I wanted to this airplane, under the inspection and authorization of my A&P/IA, Neil Humphreys,” Piehl said. “So I sent the crankcase off to DivCo in Oklahoma City (www.divcoinc.com), the crankshaft to Rick Romans Inc. (Tulsa, Oklahoma), and I’m fortunate enough that at my home airport, we have one of the finest engine facilities in the country — Zephyr Aircraft Engines (Zephyrhills, Florida, www.zephyrengines.com).”
LJ Warren, owner of Zephyr Aircraft Engines, is a friend of Piehl’s. Piehl said, “he gave me a lot of advice like where to find parts, and I subbed a lot of work to him, such as magnafluxing connecting rods and checking all the gears, and that inspection is required for a complete overhaul.
“I subbed out a lot of the work — the crankcase, the crankshaft, the rods, all the internal components — to a specialist. And I purchased six new Superior Millennium cylinders and pistons for the overhaul; I didn’t want to use the originals, in fact I sold those off to an airboat shop in central Florida.
“When I purchased the new cylinders, Zephyr Aircraft Engine said, ‘Do not install cylinders and pistons right from the factory, you want to have them blueprinted.’”
Piehl said Zephyr did a triple-angle valve job in rebuilding this Comanche engine, blueprinting the pistons and cylinders, and stuffed the pistons in the cylinders, ready for him to assemble onto the rods and the crankcase.
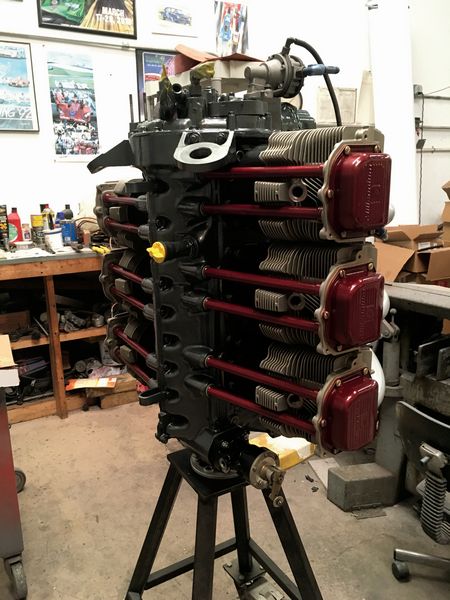
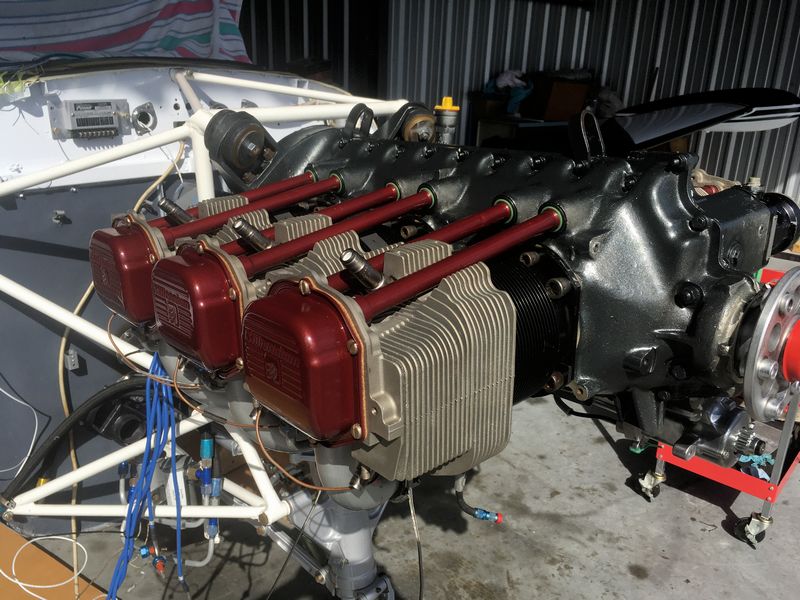
Also note that this engine has some really cool colors. “I didn’t really want to paint the engine all Lycoming gray,” Piehl said. “I wanted to do something like I saw in the EAA Museum, where they have a display of every aircraft engine ever built, on stands. I actually contacted them and asked them what color that is. They gave me a guy to call at Lycoming, and he said, ‘I can’t tell you the color of it, it’s proprietary. But I can send you a color chip to match.’
“So I matched it, and when looking at it, I thought, ‘Darn, that’s pretty much the color that I used on the airplane, let’s just use the same paint!’ So I didn’t have to invest in any engine paint.”
What Piehl means is that he used the same paint as the exterior in places on the engine that don’t get overly hot. “The engine case is running oil temperature, which is right around 180 degrees. The paint I use is Imron, with an epoxy primer. It’s so tolerant of any heat that it’s not going to hurt it, so I used the same paint.”
Piehl also wanted to stress that “this article is very abbreviated. A complete overhaul must also include inspection and measurements on all engine components. This requires the use of micrometers, calipers, thickness gauges, and other measuring equipment to ensure that all parts meet the tolerances required by the engine manufacturer. Also, the inspector must have experience using this equipment.”
Quotes in the captions are from Piehl.
Rebuilding a Piper Engine in a Comanche: Photo Gallery
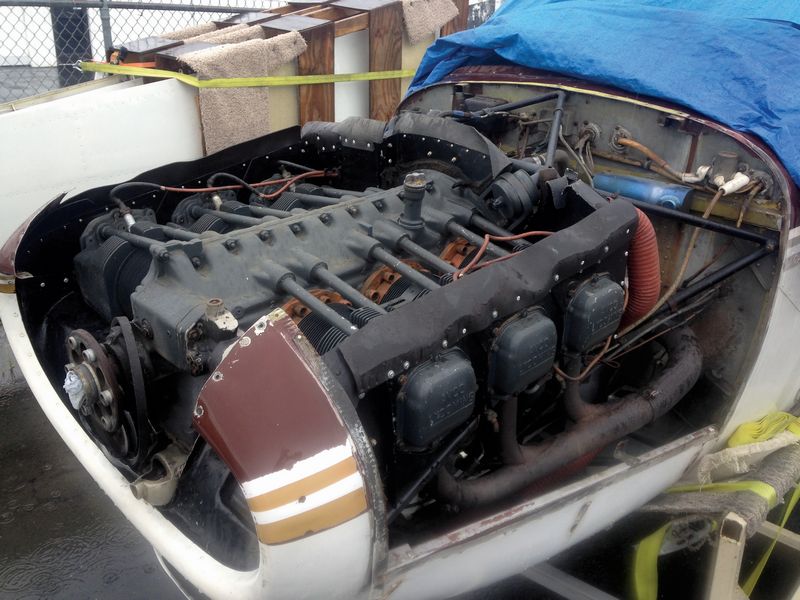
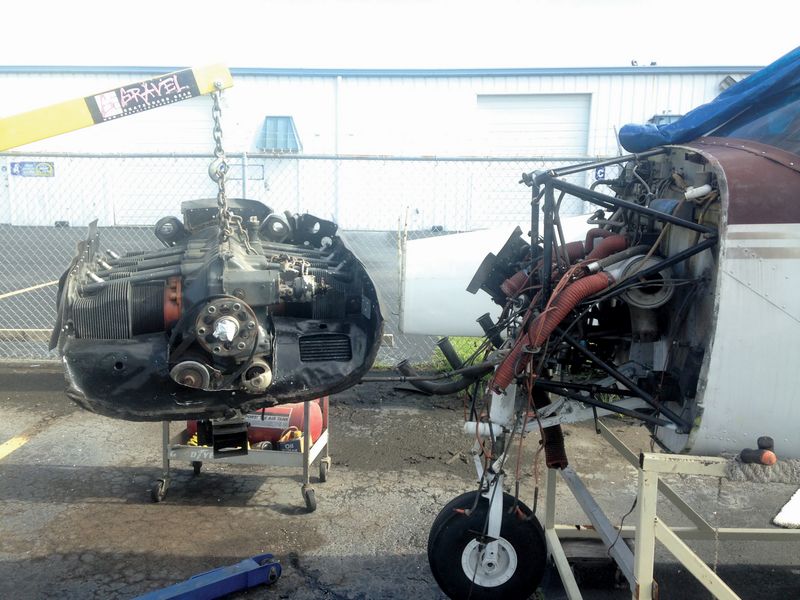
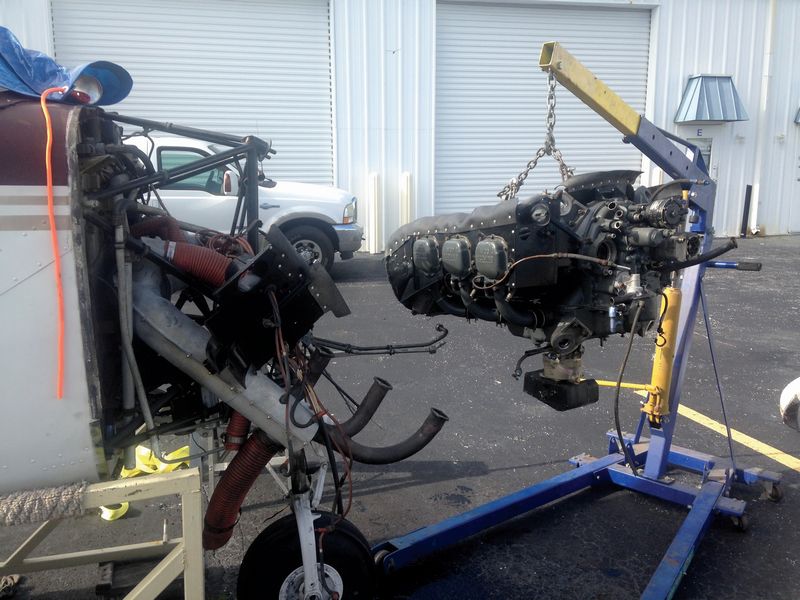
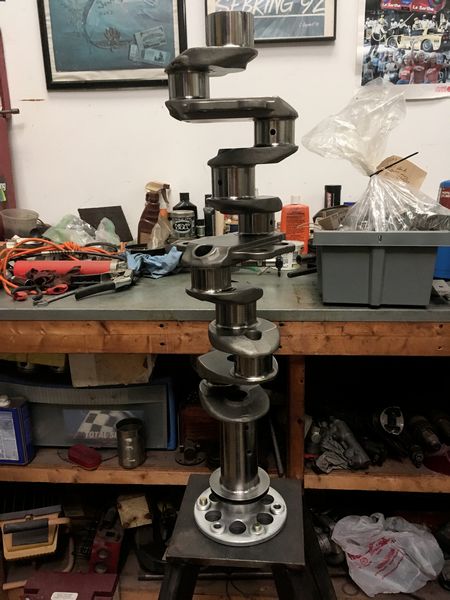
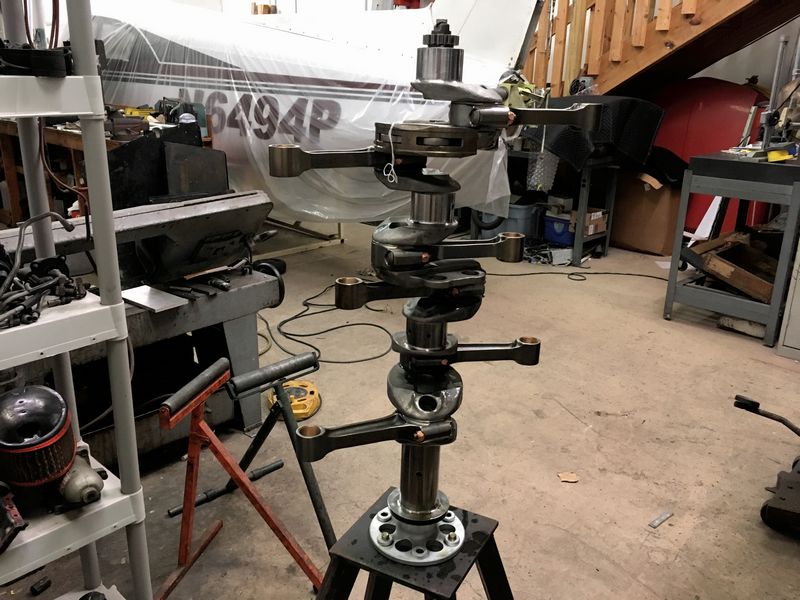
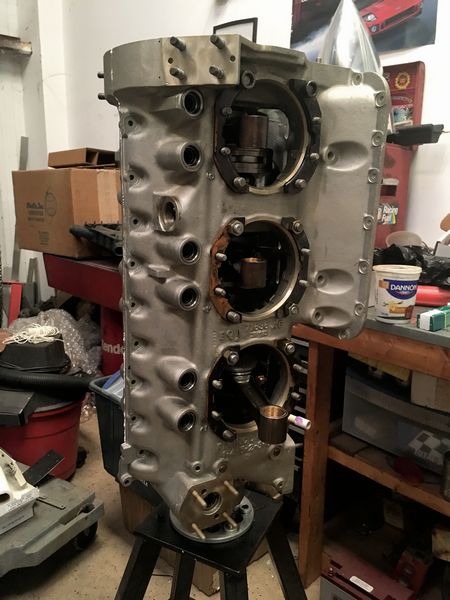
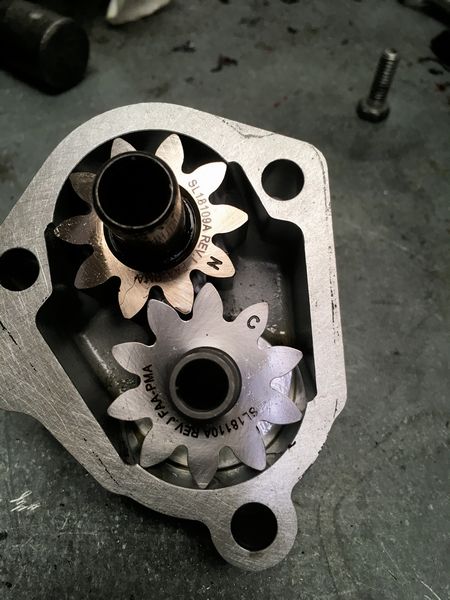
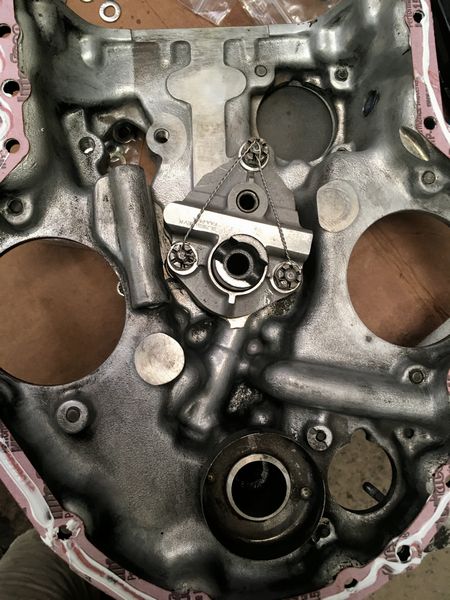
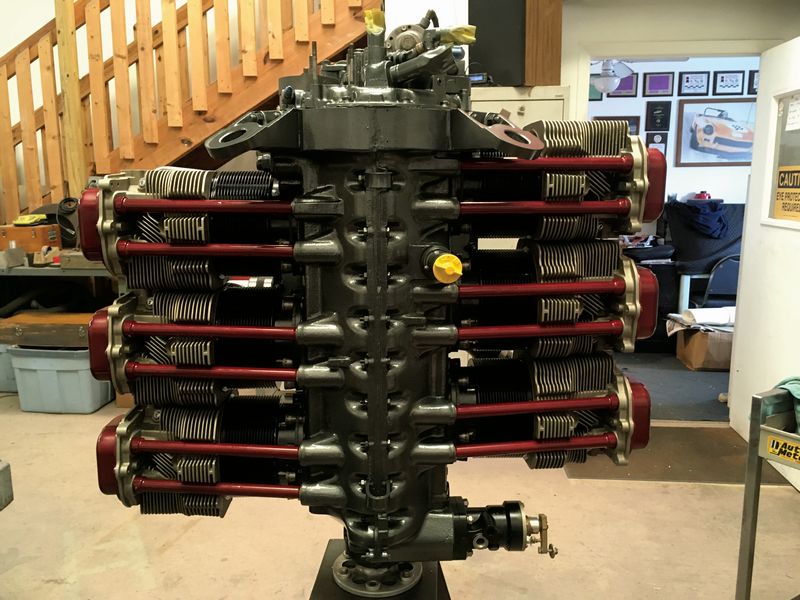
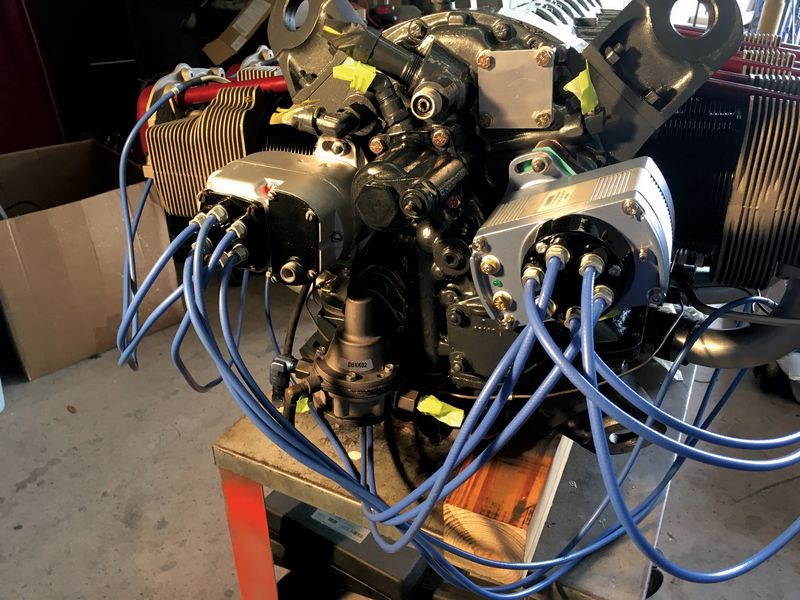
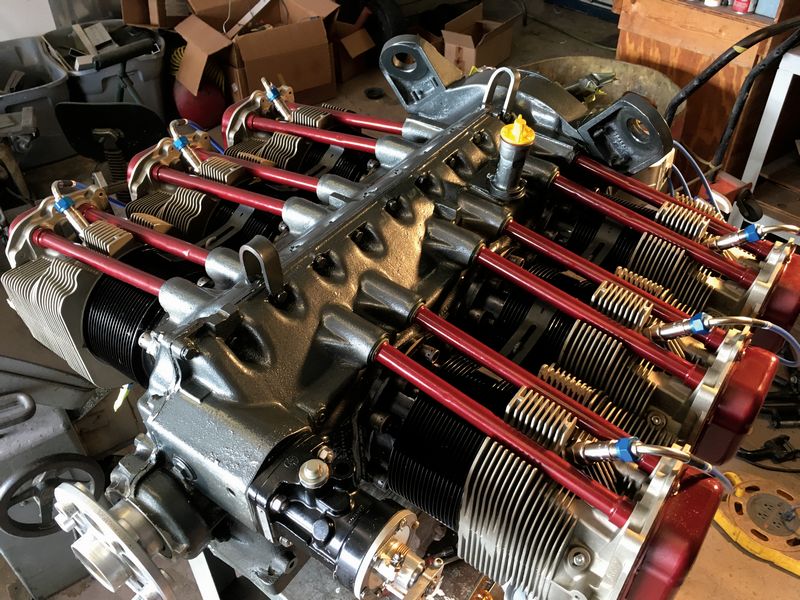
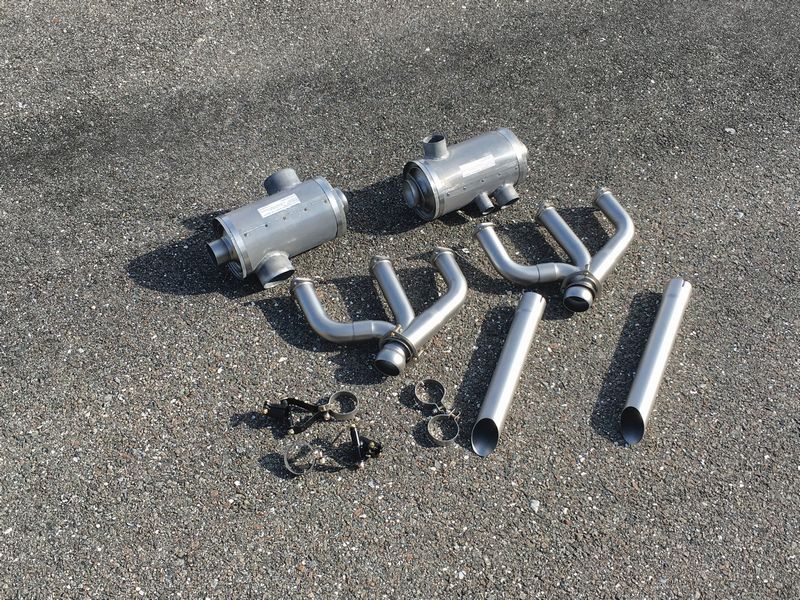
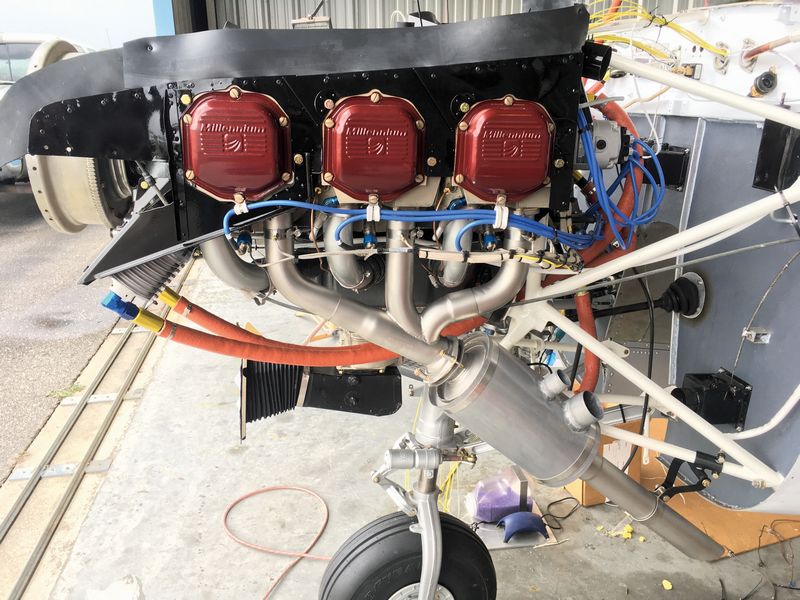
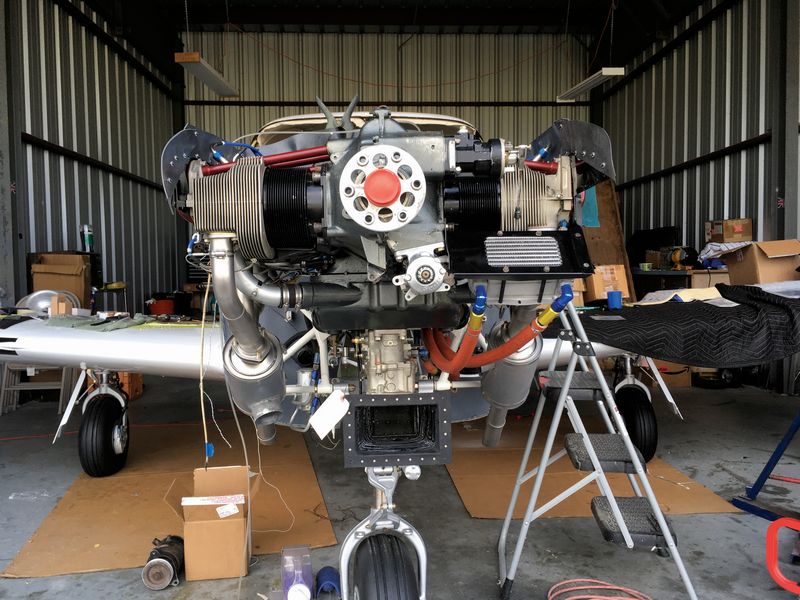
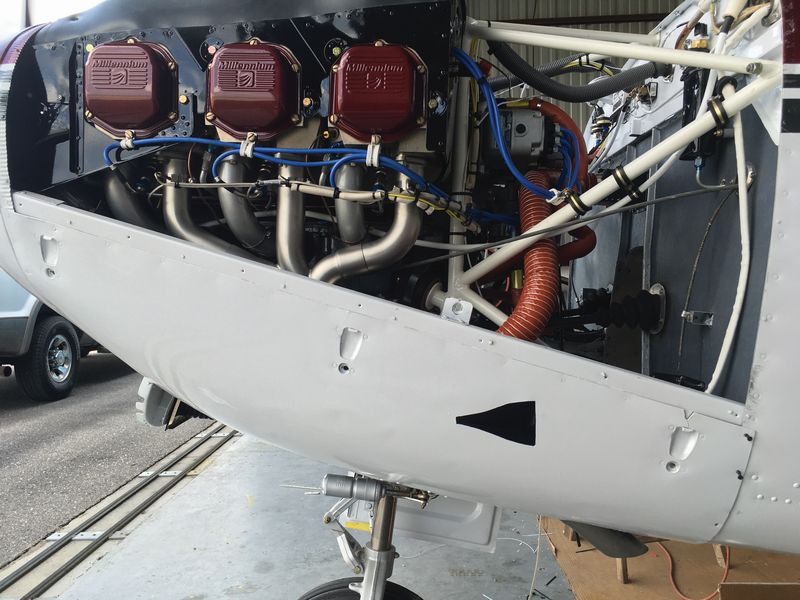
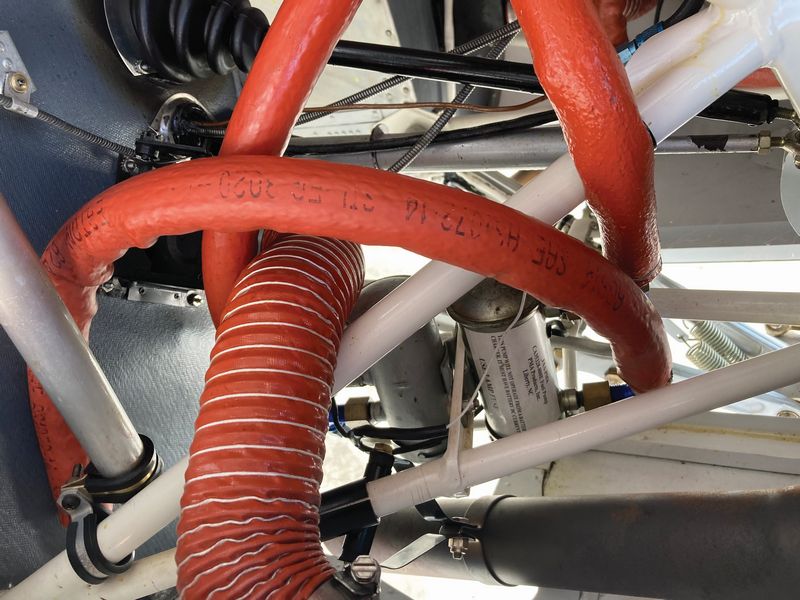
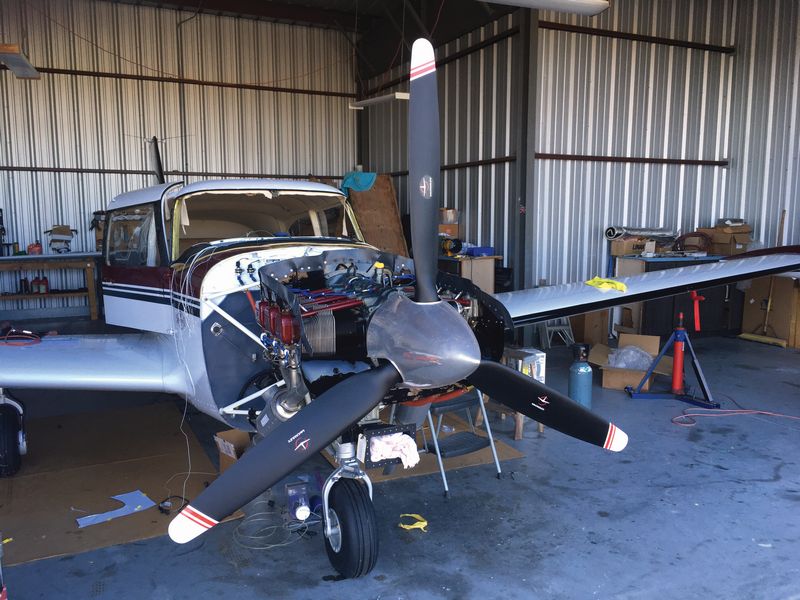
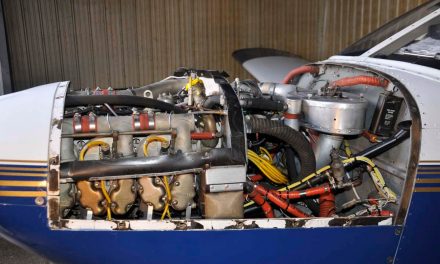
The engine before it got removed.Removing the engine to take it into the shop.Removing the engine to take it into the shop.“The crankshaft, reconditioned by Rick Romans. They make it new. It’s sitting on the engine assembly stand; you assemble an aircraft engine standing on the prop flange, and you work around it, like you would a Porsche engine. The flange has been re-plated. It’s now basically a brand-new 1959 crankshaft.”Now with the connecting rods bolted on, sitting in Piehl’s machine shop. “This is Step 1 of assembly — put the rod end bearings in, install them on the crankshaft, and then torque them to spec.”“The crankcase halves bolted together around the crankshaft. You can see the rods sticking out of the holes. Now, in addition to putting the crankcase halves around the crankshaft, you have to nest the camshaft in there, also. “So on the right-hand side of this photo, you can see the lifter holes, about 1-inch diameter holes, six of them, vertically. The camshaft is directly underneath that; that’s the top of the motor. The left-hand side is the top of the motor; the right-hand side (where that flange is) is the oil sump.”“This is simply a photograph of the new gears of the oil pump. I needed to show that to my mechanic.”“The inside of the accessory case, which is the back of the motor where all of the accessories are bolted on, so we’re looking at the inside of it, upside down.”Skipping a few steps in the series of events, this photo shows the engine on its stand, nearly assembled. “The cylinders are on; the fuel pump is on. New cylinders. The cylinders are silver on top and black on the bottom. The silver part is the cylinder head, which is an integral part of the whole cylinder assembly, but that’s unpainted, that’s just bare aluminum.”The engine, viewed from the top.“The bottom of the engine. The oil sump, and on the cylinder heads are six holes. On the center of the oil sump, there are four studs, and a hole blocked off, that’s where the carburetor bolts to, on the bottom side of the engine.”“This is the accessory case on the back of the motor. On the bottom is the fuel pump. The blue wires coming off the left-hand side — that’s a Bendix magneto. And on the right side is the new Surefly electronic ignition. I have the STCed Surefly electronic ignition, in replacement of the Bendix magneto, on that side. Note also, the block-off plate installed where the vacuum pump has been removed.” “Another top view picture of the engine, with the spark plug leads attached because the ignition systems are now installed.”“Engine tests will take place at Zephyr, and you can’t run an aircraft engine without a load on it, so they put on what’s called a test club, which is just a really heavy propeller. There’s a Lycoming-specified, run-in test procedure where they run it at various, specified rpms for a specified amount of time, and they monitor oil temperature, oil pressure, cylinder-head temperatures. They’re monitoring the entire engine. They’re testing it out for leaks and performance, and it’s the initial break-in. They loved this engine; they said, ‘This engine really sounds healthy.’” See a video of the engine being fired up at the top of this article.Now hanging on the motor mount.“This shows a modification. Back in 1959, Lycoming wasn’t using spin-on oil filters — I don’t even know if they were invented yet then. They used a suction screen, which is still in there. I took that plate off and bought the oil filter adapter that’s used on all engines now, and it turns it into a screw-on. It dramatically increases the life of your engine by filtering the oil (to today’s standards); you go from a 25-hour oil change to a 50-hour oil change.”The original single exhaust really heats up the inside of the plane. The original exhaust had an AD that requires regular checks and modifications, and this exhaust system was now 60 years old. I was going to wait, because the dual-exhaust system is about $4,000, so I was going to put the original on there for a few months until I came up with the $4,000. So I hung the engine on the airframe, and I started bolting it up, and the first piece I put up to the engine had a crack in it. When I told Debbie about the crack and the need for a new dual-exhaust system, she hesitated for a while, and then she told me she would buy the new system. She really wanted me to finish this plane!”“The new exhaust system installed, though the scat hoses aren’t on it yet. There are two mufflers with a downpipe and the headers, so you have dual exhaust, it makes it sound like a hot rod.” This exhaust system is from Dave Pratt of Aviation Performance Products, Melbourne, Florida (www.aviationperformanceproducts.com). It keeps heat out of the cabin by channeling the mufflers down in the airflow and the heat goes out at the bottom of the cowl.The exhaust system is mostly installed, without the front baffle on it.“Basically, everything is installed. This prop is brand new.”“On the bottom of this cowl, you can see where the exhaust pipes are sticking through. There are two little scoops underneath there, one on each side that needed to be relocated, where the exhaust pipes come through, and those scoops provide fresh air to the lower footwell on both the left and right side. These NACA Ducts were installed to move the air intake to this location. Not only that, but it removes the cowls on the bottom of the engine cowling for a potential speed increase.”“At the very bottom of this picture, you can see the exhaust pipe, and right above that are the two fuel pumps, which had to be moved slightly.”
Rebuilding a Piper Engine: Propeller Installation
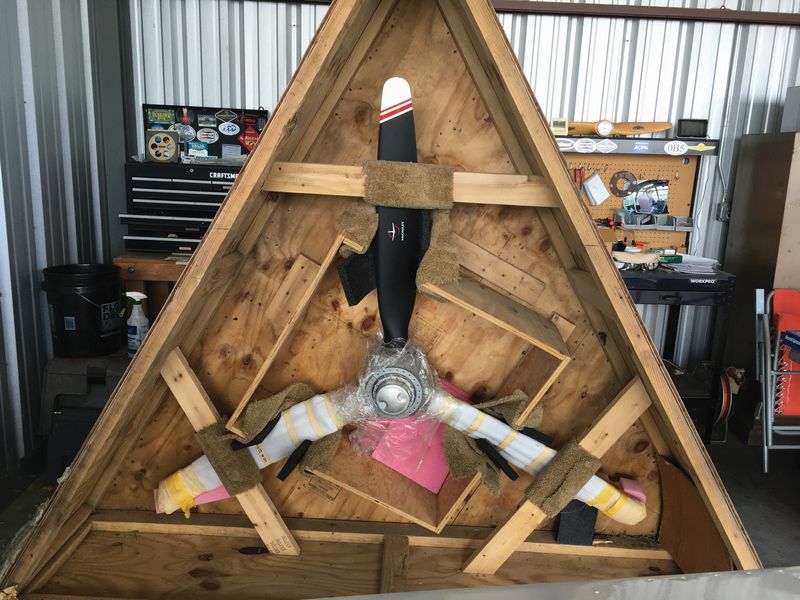
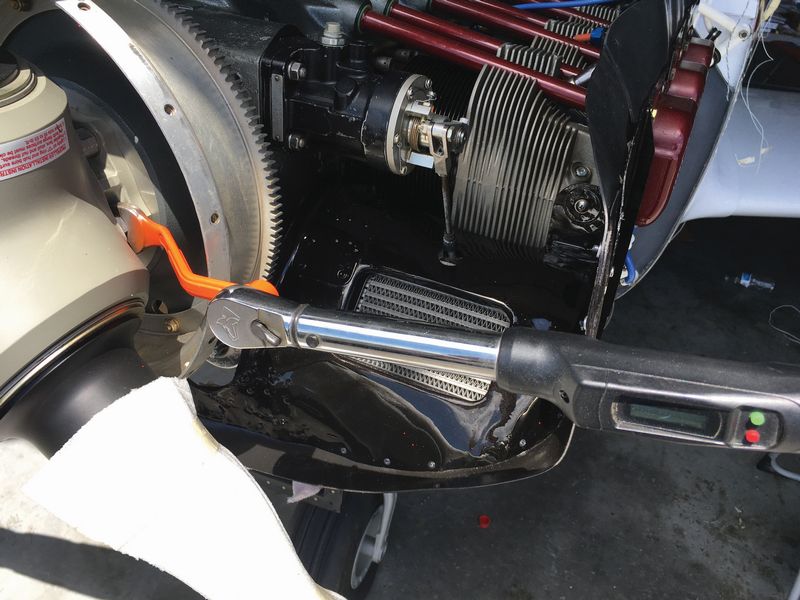
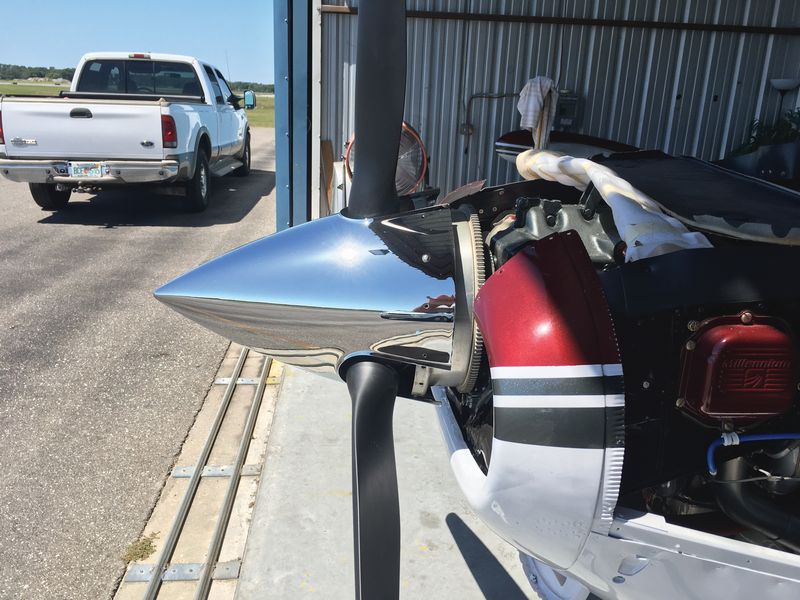
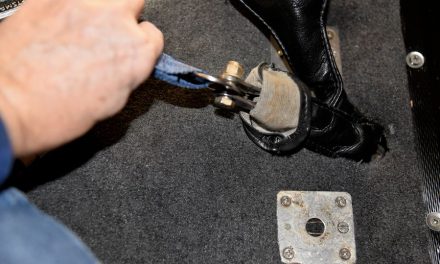
“This is how I received it. I actually bought this as new/old stock from a gentleman who had sold his Comanche and he had never installed this, so he sold it to me, and that’s how he shipped it to me. This is the McCauley three-blade prop that is STCed for the Comanche 250.”“The prop installed with the spinner (before the latter was polished).”“Some props make it very hard to get to the hardware that bolts to the crankshaft. So in order to properly torque them, I made the tool. You can see that orange tool I made out of an old wrench, and I welded on a socket. I made it a very specific length so I could accurately convert my extension into the proper foot-pounds of torque.”“After I polished the spinner. I’ve always admired a polished spinner. I spent a lot of time detailing this.”
Rebuilding a Piper Engine: Motor Mount Installation
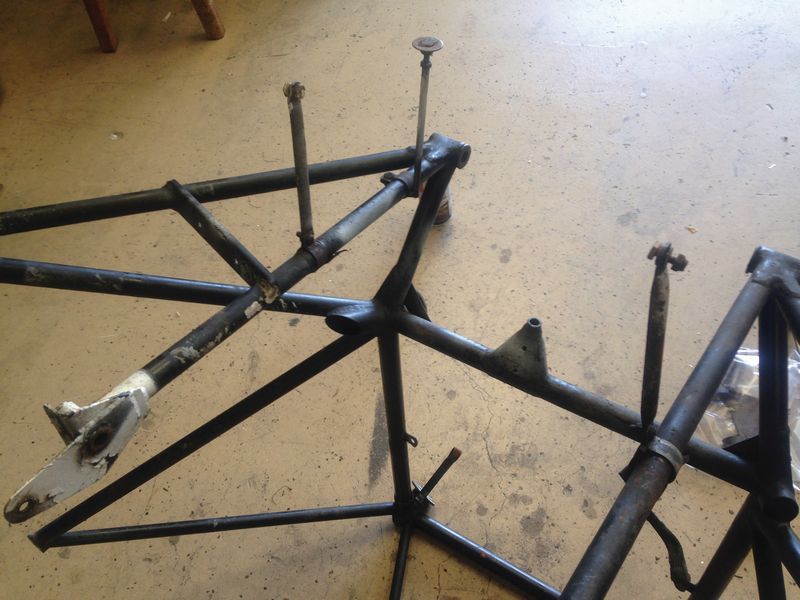
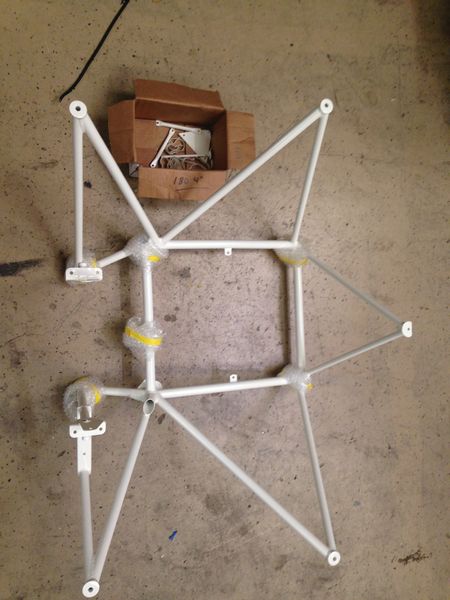
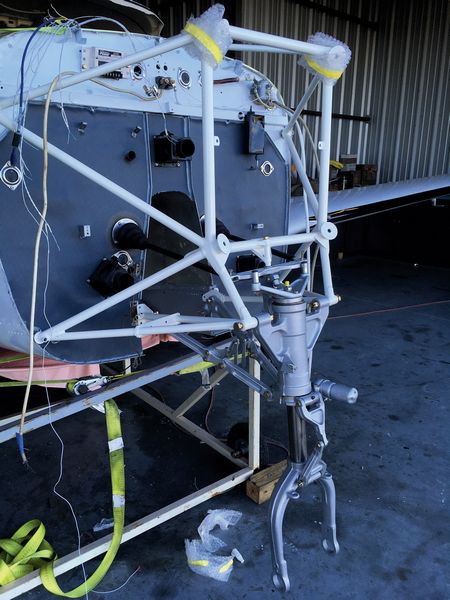
“This was as removed. The motor mount had been bolted onto the firewall for 60 years.”“I paid a guy to have it sandblasted. This is after a dye-penetrant test on all welds, I epoxy primed it and painted it with Imron.”“Now hanging in position, with the cowlings loosely framed in. ““The nose landing gear actually attaches to the motor mount, so it supports not only the engine, but the entire front of the plane.”


