
Longtime Piper pilot discusses how to replace a Piper Cherokee door seal, with 16 pictures to help guide your way.
By Mike Jones
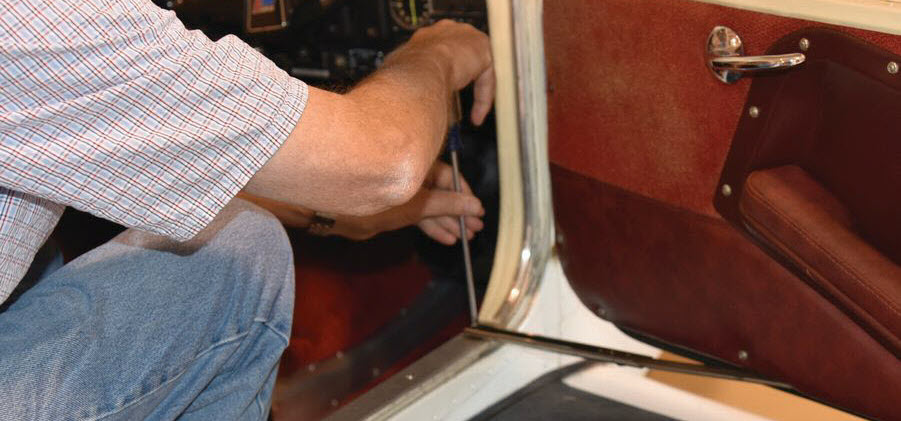
Having a pleasant return flight from Pittsburgh in my Cherokee 180, I glanced over my right shoulder to see an arc of clear blue sky surrounding the upper-right corner of the door. This observation went along with the sudden realization that the far-right carpet piece directly under the door was missing. During the rainy overnight, it had become soaked from a leaky door seal, and in my haste to dry it out before departure, I somehow left it on the ramp! “I guess it’s time for a new door seal,” I thought, “and maybe some carpet!”
Getting Started on a Piper Cherokee Door Seal
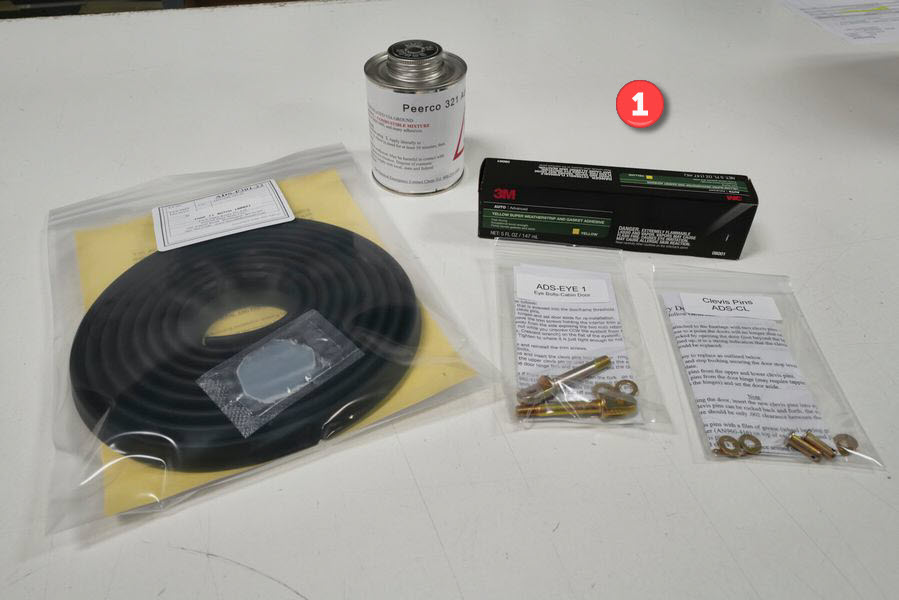
While there are several door-seal options available, the seals I chose are offered by Knots2U at Burlington airport (KBUU) in Burlington, Wisconsin (Photo 1). Not only have I had good luck with their products in the past, but I am also just a short flight to Burlington from my home base in Kenosha, Wisconsin.
I discussed the replacement process with the folks at Knots2U face-to-face and learned that it is imperative, after removing the existing door seal, that you check for wear on the door hinges, replace those if necessary, and realign the door to the airframe before attempting to install the new seal. The instructions for doing all this come with the seal. After providing my aircraft serial number, the correct Knots2U part number was located and purchased, along with the Knots2U recommended glue remover and seal adhesive.
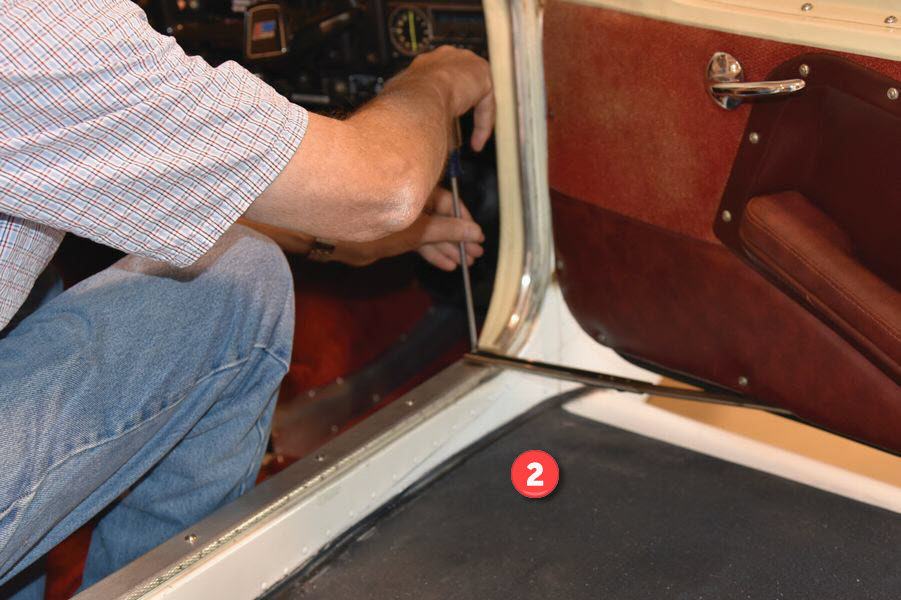
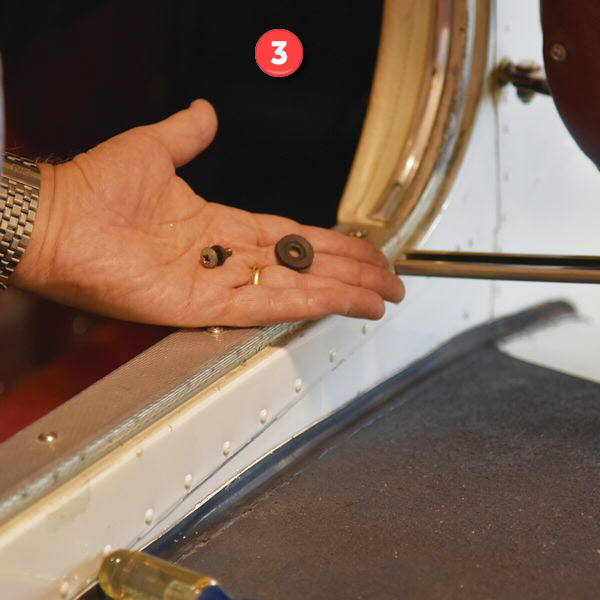
Back home, I read through the instructions and carefully followed the procedure to check for wear in the door hinge. You detach the lower door brace by removing one screw (Photo 2). Be sure to capture any washers, the screw and bushing, and put them in a safe place where they will not get lost (Photo 3). You will not need to reinstall them until the job is done.
Gently lift up on the door while it is open part-way. There should be no play in the hinges. If, while you do this, you can see the door wobbling back and forth as I did, you know the hinges are worn and need replacement. Fortunately, Knots2U also has the hinges, washers, and nuts in one kit, and clevis pins, washers, and cotter pins in another! I flew back to KBUU and picked up what was needed — you should check for hinge wear first, so you can order all parts at once.
Click on a photo for a Piper Cherokee door seal popup slideshow.
Removing the Piper Cherokee Door Seal and Hinges
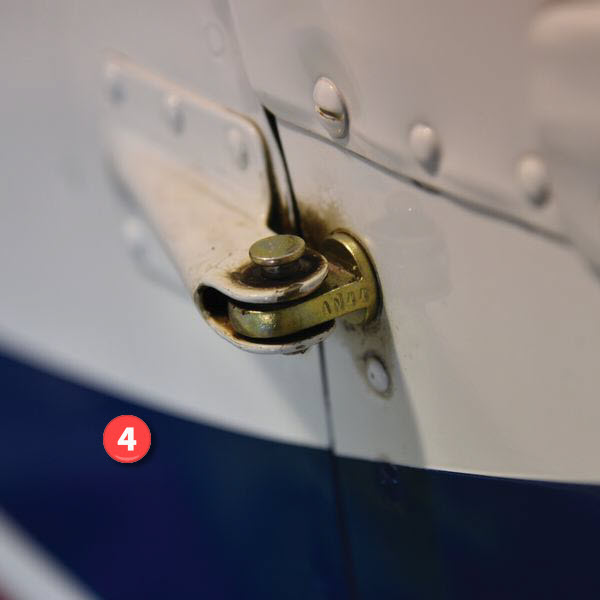
To properly remove the old seal and install the new, the door must be removed from the airframe, even if your hinges are OK. Remove the cotter pin from the bottom of the hinge clevis and, while supporting the door to relieve the stress, tap the clevis out from the bottom (Photo 4). In my case, someone long ago had replaced the clevis pins with AN bolts and nuts! If you have that configuration, simply remove it, and be careful not to mar the paint on the airframe while you do this work. (Ask me how I know.)
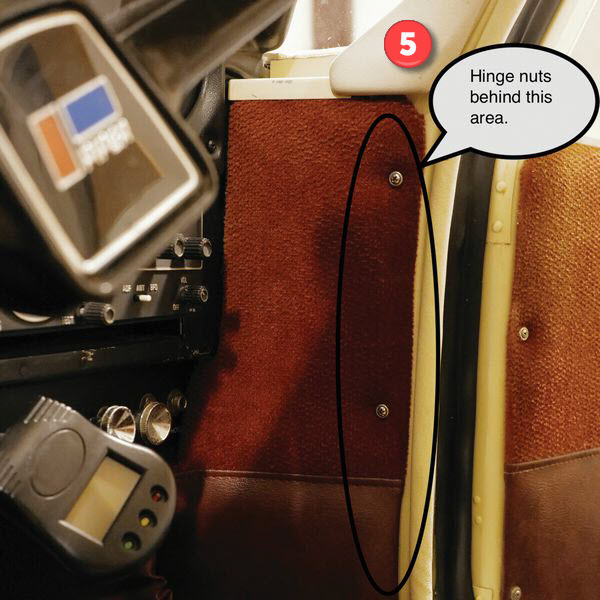
To remove the hinges from the airframe, you must loosen the interior trim panel just forward of the door frame, enough to get a tool on the back side of the nut securing each hinge (Photo 5). While keeping the nut from turning, place an adjustable wrench over the external hinge and unscrew it. Do not drop the nut inside the side panel or you may have to remove the entire panel to retrieve it. It really helps to have another set of hands, and I have to thank our own Scott Sherer for coming over to help out and share his experience with replacing hinges on his Arrow.
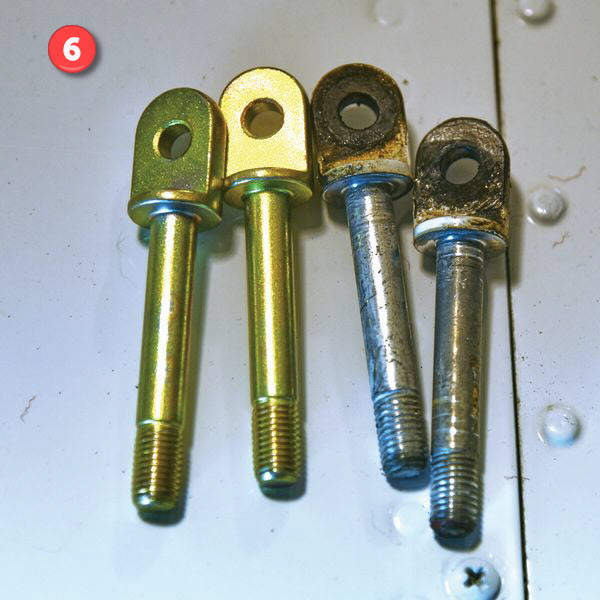
The new hinge kits will have everything you need, including the hinge itself, nuts, and washers in two thicknesses for vertical adjustment of the door (and also for placing behind the hinge to make the door flush with the airframe surface). It also contains the clevis pins, cotter pins, and instructions. Install the new hinges and, as the instructions point out, you do not have to crank tightly on the nuts to hold the hinges in place, just snug them up. See the old hinges and the new hinges in Photo 6.
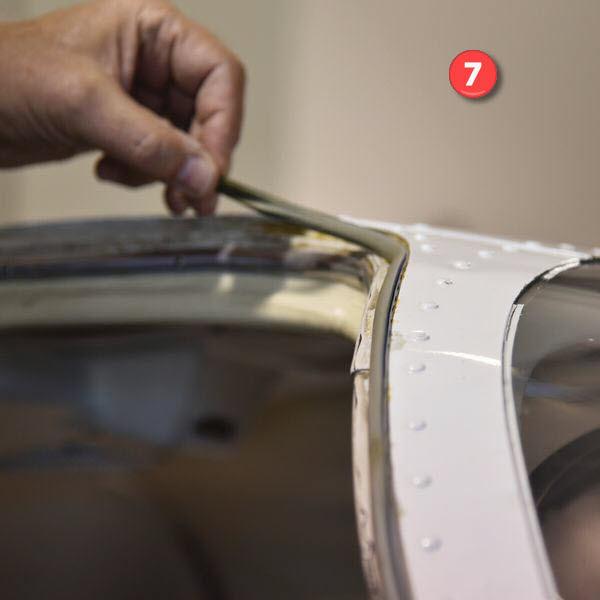
Do not replace the interior trim just yet, as you will have to remove and install the door several times to choose the proper washers to align the door to the airframe. But first, you must remove the old seal. Many of us, in an attempt to cure a leaky door, have also added sealing material to the airframe opening itself, but all of that material has to be removed as well (Photo 7).
Click on a photo for a Piper Cherokee door seal popup slideshow.
Removing the Old Seal
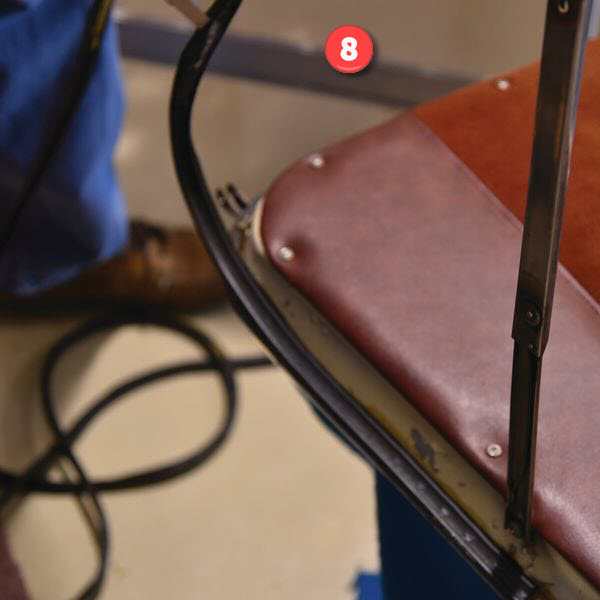
Removing the old adhesive is a slow process. Be prepared to work on it for as long as it takes and try not to cut corners or attempt to speed up the process as, in the end, you will only make more work for yourself (Photo 8, Page 32).
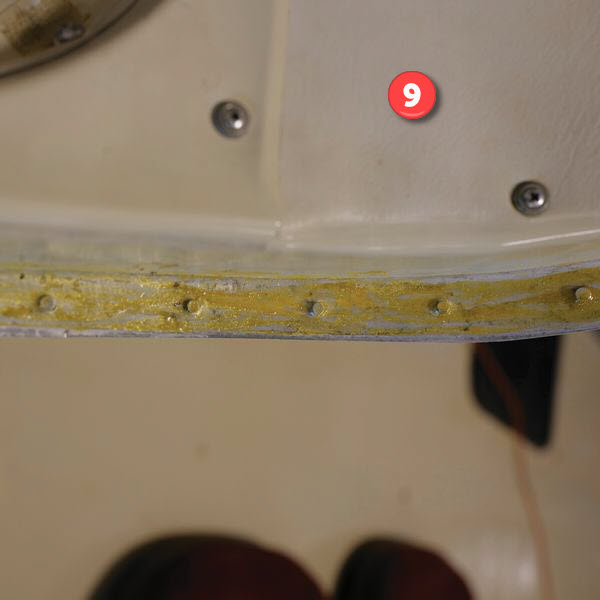
Begin by laying the door on a soft blanket at a comfortable working height. Grab the old door seal with a pair of pliers or vise grips and see if you can pull it off in sections. If you must scrape it off, use a plastic tool so as not to scratch the surface of your door. In my case, the seal came off pretty easily because of its age. However, the old adhesive did not! ! (Photo 9, Page 32). Removing the old adhesive so you have a clean surface for the new seal is where most of your effort will now be focused.
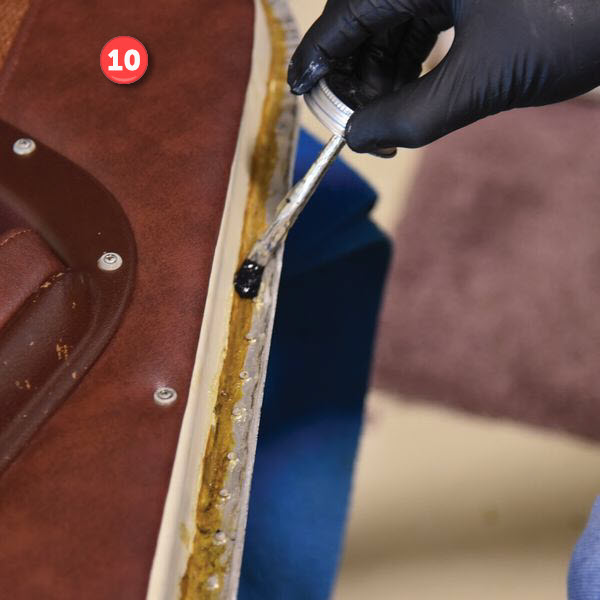
Knots2U sells a glue remover that is not inexpensive, but it works very well and without the fumes associated with MEK or lacquer thinner. Amazingly, it did not remove the paint! Of course, it depends on the kind of paint, so a test in an inconspicuous area would be appropriate.
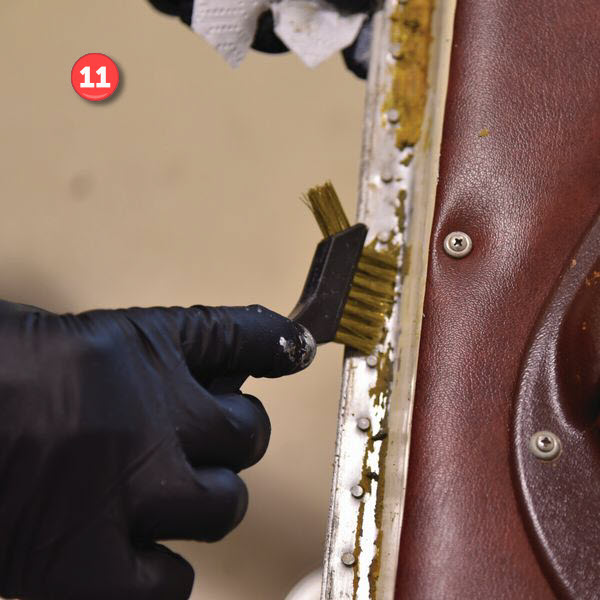
Wearing rubber gloves and eye protection, apply the gel-like remover with a brush along an 8- or 10-inch section and let it sit for 10 minutes (Photo 10). The old glue will soften, and you can rub it off like it was old rubber cement. Of course, there will be stubborn areas which require a second treatment, and some mechanical help using a plastic scraper or brass bristle brush (Photo 11).
Working on these small sections, completely remove all of the old adhesive from around the door. It should be very clean, but there may be some areas that are just stubborn — that is OK, but don’t give up too soon!
Click on a photo for a Piper Cherokee door seal popup slideshow.
Door Alignment
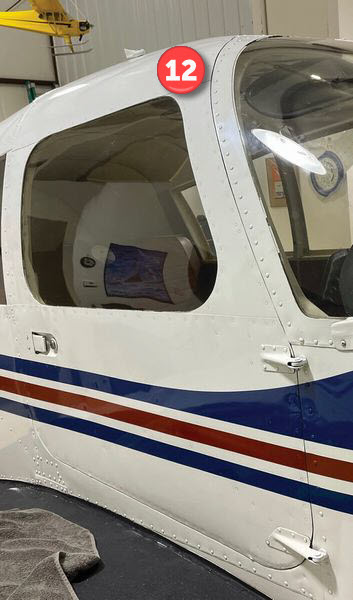
You are now ready to follow the detailed instructions that come with the new Piper Cherokee door seal and align the door to the airframe. To do this, you select different hinge washers provided in the kit until the door, when it is shut, has a uniform gap between it and the airframe, and the surface of the door is both parallel to and even with the surface of the fuselage along the hinge line.
During this process, you may have to remove and install the door several times, while you utter profanities at the washers and tight-fitting parts, etc. Don’t be discouraged! Though it will not be absolutely perfect, because the doors were basically handmade and hand-fitted at the factory, the fit will be very good and likely much better than before the hinge replacement (Photo 12).
The rest of this article can be seen only by paid members who are logged in.Have a website login already? Log in and start reading now.
Never created a website login before? Find your Customer Number (it’s on your mailing label) and register here.
Still have questions? Contact us here.
Mike Jones is an instrument-rated commercial pilot for both fixed-wing and helicopter, a remote pilot, and current CFI. He has enjoyed flying his 1966 Cherokee 180 between its 36 annual inspections. He also ran a webinar for Piper Owner Society members — watch “A Taste of Homebuilding Through an Autopilot Install.”

