 By Dave McFarlane – President, McFarlane Aviation, Inc. – www.mcfarlaneaviation.com
“A Cessna nose wheel is supposed to shimmy.”
“You can’t really stop it.”
“All the Pipers do it.”
No doubt you’ve heard these or similar comments many times. My response, however, is always in the form of the same simple question: Did it shimmy when it was new?”
Nose gear shimmy is destructive and not normal; and yes, it can be stopped. Never allow any amount of nose gear shimmy to continue. The quicker you take action, the easier it will be to stop it.
I’ll share the routine details of what to look for and how to fix the mechanical issues that allow shimmy to develop, but first, let’s talk about the physics of nose gear shimmy.
Years ago, after a lot of frustration and experimentation, we discovered what was causing our shimmy problems. We observed that uncorrectable nose gear shimmy seemed to only happen on hard surface runways and rarely on turf runways. Our customers also reported that they could stop the shimmy by either taking weight off the nose gear with the elevator OR by applying the brakes and putting more weight on the nose gear. It didn’t seem logical that just changing the weight on the nose gear could affect shimmy. After all, the airplane is designed to function with different loading on the nose gear and the weight change doesn’t significantly change the nose gear’s geometry.
We guessed that our customer’s shimmy might have been stopped by the fact that the changing nose weight had also changed the tire’s shape. We assumed that when the tire shape changes, so does the contact profile of the tire to the runway. We had already done all of the “normal things” to perfect the nose gear and shimmy-damper system rigging and mechanicals, so we then inspected the customer’s tire. It seemed fine and had no unusual wear patterns, but we still had shimmy. In frustration, we removed some tread rubber from the tire to experiment. Though it didn’t seem to be a logical solution, it worked and the shimmy went away!
Besides feeling as though your airplane is trying to vibrate itself apart, there are some other interesting dynamics going on during the shimmy action. When the nose tire is shimmying down the runway, it oscillates between pointing left and then pointing right many times per second while the airplane is going straight. The greater the tire angle diverges from straight ahead, the greater the shimmy inertia and energy. Since the oscillations are equal in divergence angle and time duration, the rubber on your tire is being scuffed in a uniform and distinct pattern that repeats itself with each revolution of the tire. This wear pattern shape is directly related to the tire shape created by the amount of weight on the nose tire, the tire pressure, and the speed of the aircraft. The frequency of the shimmy is a derivative of these factors.
Perhaps you’ve noticed a “braking feel” to the airplane when severe shimmying is happening? This is caused by the nose tire skidding sideways during the more extreme angle-divergent portion of the shimmy cycle. Since shimmy generally takes place for a short time, the early stages of this wear pattern are microscopic and hard to detect visually or by feeling the tire tread by hand. After the first shimmy, the then-created wear pattern tends to start the oscillating action when the airplane speed and nose gear weight matches the speed and weight that the airplane was traveling when the shimmy wear pattern was created.
You might have also noticed that shimmy starts at about the same landing or taxiing speed each time. As a result, the shimmy gets worse every time it happens—even if the mechanical issues that let it start shimmying the first time have been corrected and the shimmy damper is working and trying to do its job. The shimmy damper simply isn’t strong enough to prevent shimmy when a nose tire has an established shimmy wear pattern in the tread. Unfortunately, early shimmy wear patterns in the tire are virtually undetectable.
Prevention Tips
The key to avoiding shimmy problems is to prevent them from starting in the first place. Fortunately, routine information for doing so is provided in the service manuals. The following is a synopsis of some of the more prevalent tech notes on the subject:
- First, look for any un-dampered nose gear movement. This is motion of the nose tire without the shimmy damper moving. Looseness in the nose gear system cannot be detected with the nose wheel off the ground, unless the pressure is released from the nose strut. When you move the nose wheel right and then left, the shimmy damper should also move. If there is any un-dampered motion, tighten or replace the worn components (i.e. torque link bushings and spacers, the steering collar, and shimmy damper attachments).
- Next, remove the shimmy damper attachments. Check the shimmy damper for proper fluid and proper operation. Check the damper for seal condition and excessive wear in the piston and damper bore. The damper shaft must have considerable resistance to motion when moved quickly, but should still move easily when moved slowly.
- Nose gear rigging is also important to prevent shimmy. If the steering rods or bungees are biased, damaged, or holding improper tension, a shimmy can start. The aircraft service manuals do a good job of describing proper nose gear rigging procedures.
How to find the airplane’s centerline and the nose tire’s straight ahead position
One of the hardest parts of proper rigging is determining exactly where/when the nose tire is positioned straight ahead. First, we create an airplane centerline by dropping a plumb bob from the center of the firewall to the ground (Center can be determined from either the rivet pattern or by measuring from the motor mount attachments.) We again drop the plumb bob from the center of the tail tie-down hook. Next, we mark both of the plumb bob points on the shop floor and create a chalk line mark between the points—this is your airplane’s centerline. Extend the centerline forward as close to the nose tire as possible.
Then, place a straight 2×4 stud or a piece of straight angle iron against the side of the nose tire. Adjust the nose wheel and tire until the 2×4 is parallel with the airplane centerline. Check your results by placing the 2×4 on the other side of the tire. The 2×4 acts as a tire angle multiplier giving you measurable results.
Parallelism can be checked by simply measuring the distance between the 2×4 and the chalk line in two places. Be sure not to move the airplane while you make your nose gear alignment adjustments.
- Bad bearings or adjustments can allow un-dampered tire movement. Wheel bearings must be in good condition and properly adjusted. Tire balance is also critical for preventing shimmy as an out-of-balance tire puts cyclic centrifugal loads on the tire tread. Out-of-round tires will do the same thing. One of the objectives of shimmy prevention is to avert any type of cyclic loads going into the tire system. McFarlane makes an inexpensive suspension tire balancer that works well for this – P/N TOOL108. Visit mcfarlaneaviation.com for more information.
- Check the tire itself for casing shifts or other damage as follows:
- Take weight off the nose tire for a period of time to let the tire take its proper shape.
- Assure that the tire is inflated to the proper pressure for the aircraft.
- Spin the tire by hand and look for any significant lateral divergence (tire wobble) or vertical divergence (out of round). The tire must rotate true, but a little out-of-round is normal.
- If tire casing shape problems are detected, let the tire stabilize longer without weight. If that doesn’t correct the problem, the only fix is to replace the tire.
- If the tire casing seems to run true and the tire is determined to be airworthy in all aspects, remove the shimmy wear pattern in the tire tread.
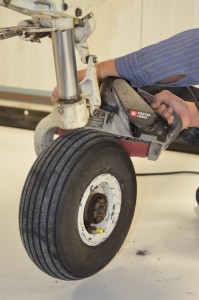
So, how do you remove rubber from a good tire and get rid of this mysterious tread wear pattern that nobody can see or feel? We use an electric disc grinder from our welding shop, but any large sanding disk (or belt sander) with a course-grit disc would work. There will be some rubber flying around the shop so this is a good job to do outside. Also, get someone else to do it if you have allergic reactions to latex or rubber products.
Block the nose gear off the ground without weight and give the tire time to stabilize its shape. Again, assure that the tire has the correct inflation pressure. Touch the grinder to the tire at an angle that rotates the tire and removes rubber. With a little practice you will be able to control the tire’s rotational speed with small grinder angle adjustments. If you allow the tire to rotate too fast, very little rubber will be removed. On the other hand, if you allow the tire to rotate too slowly, it’ll be hard to remove the rubber evenly. Taxi speed tire rotation seems to work best.
You can actually remove small out-of-round tire conditions by being steady with the grinder and allowing it to work harder on the tire’s high spots. The grinder must be worked across the tire tread as evenly as possible. NEVER grind into the sidewall of the tire! You can feel advanced shimmy wear patterns before you start and they will take more work to remove than the patterns you cannot feel. The tire must feel smooth and even when you are done. Only experience will tell you how much rubber to remove.
When you’re finished, be sure that the tire has good tread depth and verify that there’s no inadvertent damage to the tire. It’s also a good idea to re-balance the tire after grinding the tread and before returning the aircraft to service. Once you clean up the rubber grindings and high-speed taxi-test the airplane, the results will probably make you smile! If the test should fail, repeat the process.
Ultimately, with a little patience, the shimmy beast can be tamed!
