
Do speed mods work? I have used various speed mods over the nearly 60 years that I’ve been a pilot and had drawn some subjective conclusions but hadn’t done any formal, objective evaluation. Recently, though, I tested them on my plane and found that the results were definitive, and I’ll cover those results in this article.
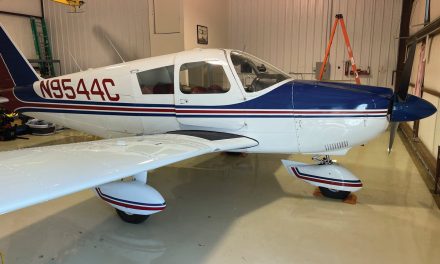
For those of you who don’t know my history, here’s a brief bio. I started flying in 1964 while in Aviation Explorer Post 100 in Evanston, Illinois, just north of Chicago. I’ve owned eight aircraft since then: four twins and four singles. Six of the aircraft have been Pipers: a 1977 Warrior II, a 1977 Seminole, a 1975 Seneca II, a 1981 Seneca III, a 1977 Seneca II, and my current ride, a 1977 turbo Arrow III.
I had installed LoPresti speed mods on the Warrior and Seminole, and Knots2U speed mods on the Senecas. I couldn’t have told you exactly how well they worked because I never took the time to quantify the results from any of these upgrades. It didn’t matter much to me, though, as I just like customizing my aircraft. My planes always felt like they were faster than POH speed, and they all handled noticeably better than unmodified Pipers.
Another piece of my history is that I’m the aviation director for your association, and I hang out much of the day on the Piper forums, helping people with their Piper problems. Questions are never ending about restoration, upgrading, and maintenance. One of the most often recurring topics on the forums is in the category of upgrades. When it comes to speed mods, members wonder what they actually do and what they cost to purchase and install.
After thinking about the effectiveness of speed mods for at least a year, I contacted Knots2U’s president, John Bailey, and made an appointment to visit him. I told him I wanted to quantify how his mods do on my Arrow to see if they live up to his advertising claims. He thought that was a great idea, and a couple of weeks later my speed mods arrived. Since my plane was in annual anyway at the shop right next door to Knots2U, all I had to do was pick up the box and carry it about 100 feet to my shop. Easy peasy. Too bad we all don’t live close to Knots2U or Aircraft Spruce for that matter.
After thinking about this for a year, and procrastinating, I defined the questions I wanted answered:
- How much faster could I actually make my plane go?
- What does it cost to put speed mods on my plane?
- How long does it take?
- What were my options to make my plane go faster?
- Are there any other benefits to this project other than speed?
- Are there any negative effects to this project?
- Knowing what I now know, would I do it again?
How much faster could I actually make my plane go?
In order to know how much faster my plane will be after adding speed mods, we have to know where it was before. In my case, my Arrow already has modifications to it and, while not specifically speed mods, they certainly affect the performance of my plane. I figured the best way to capture the performance improvements was with an Excel spreadsheet. So I opened up Excel and created a new spreadsheet. I pulled out the POH for my 1977 Arrow III and loaded all the pertinent data from the speed-power graph into the spreadsheet for 75% power.
While the graph has many other power settings, I’m not interested in them, as I fly my plane at 75% power in cruise all the time, weather and altitude permitting. Unlike normally aspirated airplanes that fly lower and have to throttle back to achieve maneuvering speed in bumpy conditions, in my plane I don’t have to do that. Maneuvering speed is relatively low in indicated airspeed at 119 kts at gross weight, and in the low- to middle-teens (12,000 to 16,000 feet), the true airspeed of my Arrow is high and the indicated airspeed is low. Specifically, 75% power gets me to roughly 160 kts TAS, while my indicated airspeed is only 120 kts. This allows me to fly at 75% cruise and maneuvering speed most of the time. It’s one of the great benefits of a turbocharged engine.
Loading the “book” speeds as the plane came from the factory gave me pause, however. The aircraft information manual for my Arrow has a speed-power graph, which was compiled in December 1976 with the technology of the day. So the pertinent question is how accurate that chart actually is. I don’t know the answer to that question, unfortunately. So I loaded the 75% power speeds and outside air temp into the spreadsheet and concluded that we’ll just have to see.
With the loading of the factory speed-power chart to the spreadsheet done, it was now time to measure the performance of the airplane as it stood in January 2023, before any of the Knots2U speed mods were installed. I was curious to see how the 2023 performance without speed mods would compare to the factory chart from 1976. Would the plane be faster? Slower? The same?
So here’s what I did. I took the plane up to 16,500 feet MSL in 2,000-foot increments, starting at 2,500 feet MSL. I leveled off and set the power at 75% settings, as documented in the Power Setting Table and waited about five minutes for the kinetic energy to stabilize, with manifold pressure set at 33.8 inches, tach at 2,400 RPM, fuel flow at 14 gph, and EGT approximately 100 degrees rich of peak. It took every second of five minutes for the airspeed to stabilize. I had the air vents closed, heat off, and rudder trimmed with my turn coordinator. The autopilot was on in heading mode with altitude hold on. The same procedure was used at all altitudes tested up to 16,500 feet. I was very patient while the airplane stabilized.
Before we look at the performance of my plane, let’s identify what’s been installed on the plane since it was built. This allowed two graph columns: (1) As built in 1977 and (2) Just before the mods were installed. Here is the information included:
- Useful load: 1,070.19 lbs / Empty weight: 1,829.81 lbs.
- Knots2U lighted pulsing wingtip, installed in 2021.
- Merlyn Black Magic upper deck controller, added to the turbocharger prior to my purchasing the Arrow in 2018.
- Electroair single electronic ignition, added in 2020.
- Whelen belly strobe, a large lamp fixture, as my aircraft had no rotating beacon.
- McCauley three-blade scimitar propeller.
- Vacuum pump and associated instruments and plumbing removed.
We now have a benchmark in place to quantify the performance changes after the installation of the speed mods.
What speed mods did we install from Knots2U?
Here’s a list of Knots2U products:
- Flap, Aileron, Flap-Fuselage, Stabilator Gap Seal Kit #28TGS.
Advertised performance improvement: 4-6 mph, 100 to 150 fpm rate of climb and stall speed reduction of 1 to 3 mph. Control authority is advertised as being much better.
Time to install: 19 hours. - Wing Root Fairing Kit #28WRKIT.
Advertised performance improvement: 1-2 mph, reduced stall speeds, improved low-speed handling, and improved stabilator authority in the flare.
Time to install: 3.5 hours. - Gear Lobe Fairing Kit #28LOB.
Advertised performance improvement: 3-5 mph.
Time to install: 3.5 hours. - Hub caps for main landing gear LSM-200-701-1.
Advertised performance improvement: none.
Purpose: To smooth airflow under wing, protect landing gear, and look nice.
Total time to install these mods was 35 hours. It should be noted that there is one kit from Knots2U that I didn’t install — the flap hinge fairing kit. Perhaps I’ll get that done another day.
With installations complete, how did the test flight go?
Of course, I had the best of intentions on this project. And, of course, it didn’t go as planned. I took my plane to the shop in January for its annual inspection, and I thought that while it was in the shop, we would do the speed mods, too. I didn’t anticipate my Arrow needing much during the annual inspection, so this was intended to be a short project. I had hoped to pick up my Arrow at the end of February.
True to the plan, I got my plane back on Feb. 27 for a test flight. I did a thorough preflight twice. Not only was I concerned about my annual inspection but also the installation of the speed mods. According to the FAA, 12% of all aircraft accidents are maintenance-induced. Since the speed mods affect flight controls, I was very concerned.
Finally, I got in the plane and ran my checklist. For those of you who do “GUMP and GO,” my pre-takeoff checklist is about 100 items. I made sure that my rudder and pitch trim were adjusted correctly, did my run up, took a deep breath, and took off.
My flight test plan was to stay right over the airport in the pattern and test the landing gear first, and then see how the plane handled. I climbed to pattern altitude, 1,000 feet AGL or 2,000 feet MSL, throttled back to about 50% power, and retrimmed.
The landing gear cycled okay. I rolled and pitched the plane enough to see that it performed correctly. I did notice that my pitch trim seemed unusually far forward, and I wrote a note and kept an eye on it. I put the gear and flaps down for a pre-landing test and everything seemed OK. I was hand flying and the plane was trimmed well, although the pitch trim seemed too far forward. When I raised the gear and flaps and powered up to 75%, the plane pitched up about 30 degrees. I started to trim nose down and ran out of trim. I had my hands on the yoke pushing forward and pulled the power back to 50%. The nose dropped to level with the pitch trim fully forward. Since I was in the pattern, I put gear and flaps down and landed uneventfully.
What happened during the flight test?
The rest of this article can be seen only by paid members who are logged in.Have a website login already? Log in and start reading now.
Never created a website login before? Find your Customer Number (it’s on your mailing label) and register here.
JOIN HERE
Still have questions? Contact us here.

