
Columbus Never Had It So Good
The compasses that were delivered in our airplanes are filled with a flammable petroleum-based liquid and we generally call them “whiskey compasses.”
Since Columbus’ time they have changed little. There’s still a magnet floating on liquid with a horizontal compass card to tell direction. It isn’t easy to use and, as we all learned in private pilot ground school, they have lots of inherent drawbacks.
Horizontal Mechanism from a Vertical Viewpoint
We’re not going to give a primer on compass theory or deviation here; we’re just going to acknowledge that it’s there, and whiskey compasses are a pain when you have to align your directional gyro or HSI to them. They bounce and swing when doing banks, pitches, and turns.
While doing research for this article I found a reference to a Joao de Castro, a sailor who, in 1538, seemed to be the first person to report on deviation and the inherent problems with a “whiskey compass.”
And not much happened in compass design between then and about 1958, when Phelps Lane had an idea to redesign the compass to have a vertical display while the mechanism would still be based upon a horizontal movement.
Lane published an article on his idea and in a later article he wrote that miter gears would allow him to design such a device. After publishing these articles, he proceeded to start the design and manufacturing process for the compass. During the design phase he determined that when the horizontal compass energy was directed vertically, the display could be made to work like a directional gyro or HSI and not backwards like a whiskey compass. Much easier to read and much more stable in turbulence and during aircraft maneuvers, he determined.
The Early Prototypes
A prototype unit named the PP-112 was assembled and submitted to the Rice Institute for testing and evaluation. In order to obtain a Technical Standards Order (TSO) it had to meet the criteria as outlined as 14CFR C7c Type1 as a non-stabilized magnetic driven compass that satisfied the FAA requirements as defined.
Ultimately, the unit passed the FAA’s testing and was awarded a TSO. Production started and these units have been in continuous production since. Eventually the compass was renamed the PAI-700 Vertical Card Magnetic Compass and Mr. Lane founded Precision Aviation, Inc. More than 90,000 compasses have been built and delivered since production started!
Installation Instructions
In 1975 I purchased the first of my eight airplanes. In all, I have owned four singles and four twins. I have installed the PAI-700 compass in six of the eight airplanes. Whenever I get a new airplane, the first thing I do is to remove the old whiskey compass and put in a Vertical Card Magnetic Compass from PAI.
Here’s how I did it. It’s very easy and you can do it too in about 30 minutes.
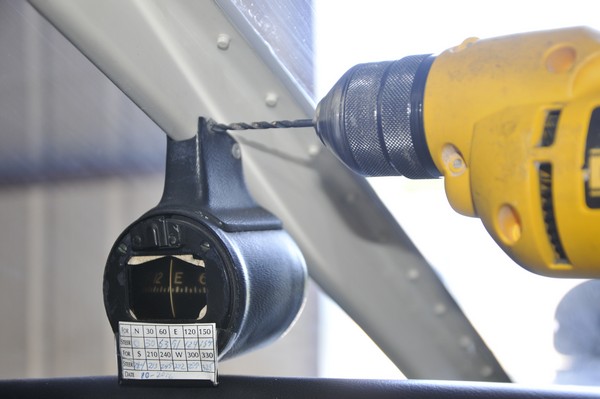
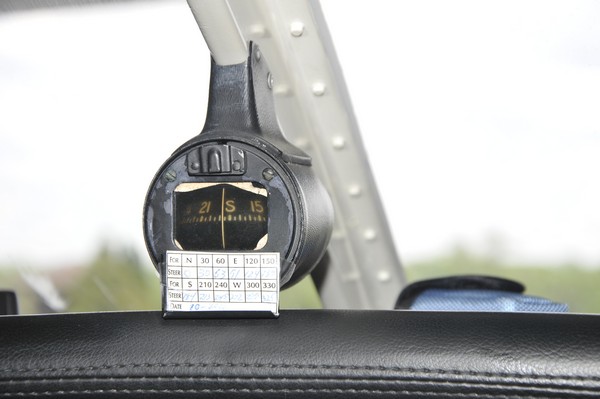
Step 1: Drill Out the Old Compass
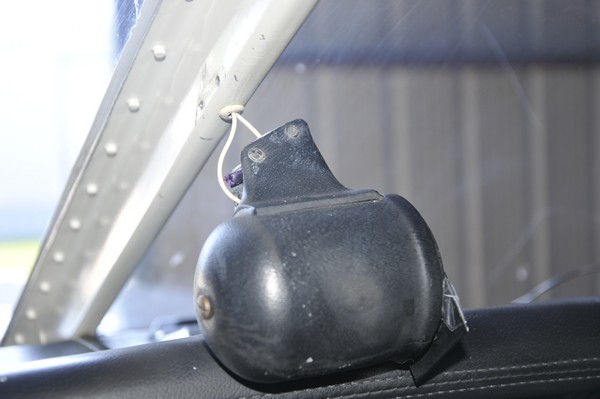
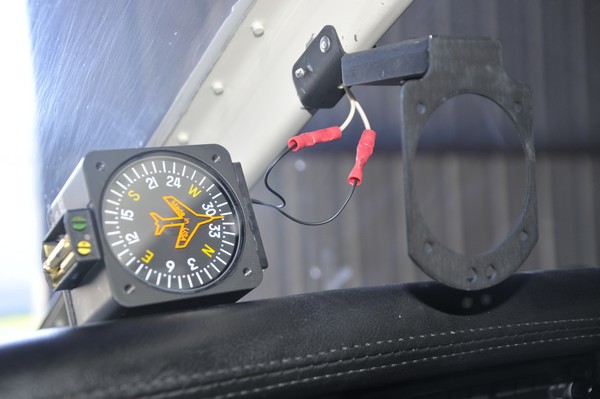
Drill out the old compass rivets as in Picture 1. Use a 1/8” drill bit and just drill the rivet until the head pops off. Don’t drill into the hole, it’s not necessary and you may drill through an antenna coaxial cable and cause a real headache. There are four rivets and this should take about 15 seconds per rivet, tops. When the rivet heads are drilled off, the remaining part of the rivet will fall down the windshield center post and not be a problem. The compass will fall down and hang by the lamp wires, as seen in Picture 2. If it doesn’t, just give it a gentle pull. Then clip the old wires as close to the whiskey compass as you can, leaving as much existing wire as possible.
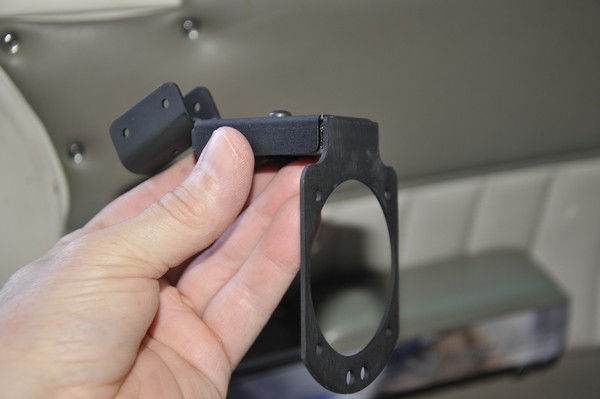
Step 2: Mount Your New Bracket
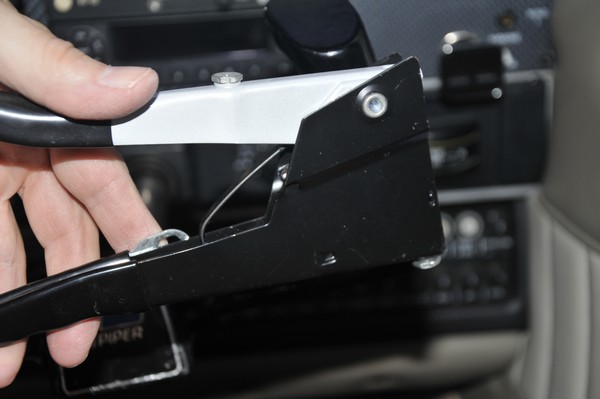
Get the new vertical card mounting bracket that you purchased, see Picture 3, with the new compass. You did that, right? If not, you’ll have to stop and order the correct bracket for your model of airplane. Also, get out your Pop Riveter, see Picture 4. If you don’t have one, you can purchase one at your local hardware store for less than $50.
Next, check to see if the two lamp wires that are hanging from the windshield center bar will fit through a very small hole in the bracket. The wires were too large to fit through my bracket so I took my drill with the 1/8” bit on it and drilled through the hole to enlarge it. The two lamp wires fit through the new, larger hole with room to spare.
Put the new bracket on the center bar with the wires sticking through and check the four holes in the sides of the bracket to make sure that they line up with the holes in the center bar where you already drilled out the old rivets.
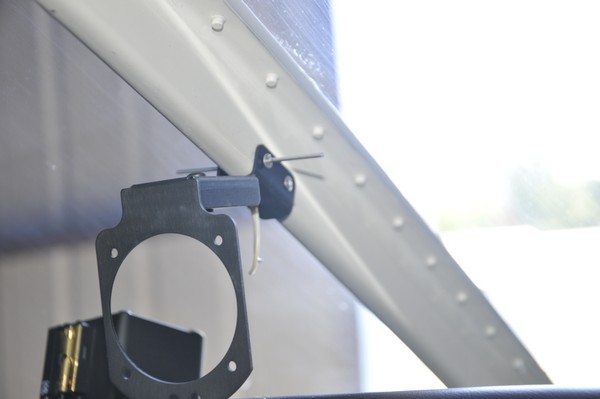
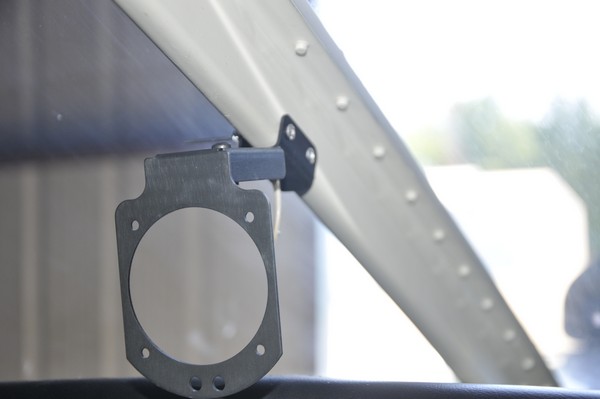
Place ¼” rivets into the four holes as in Pictures 5 and 6. Take your Pop Riveter and fasten those four rivets tightly. If you’ve never used a Pop Riveter before, experiment a few times to get the hang of it. Don’t experiment on the new compass bracket.
Picture 7 shows the bracket firmly attached with the rivets popped correctly and with the two lamp wires hanging down.
Step 3: Attach Your Wires
Attach the wires using appropriate connectors as seen in Picture 7. You can get them from Aircraft Spruce for a few cents each if you don’t have any. Red is the color you probably want to use as these are color-coded to indicate wire gauge. While the wires have polarity (12VDC plus and minus), the lamp doesn’t. It doesn’t matter which wires are connected since the lamp is a basic incandescent bulb.
Step 4: Attach the Compass
The compass comes with four screws. Screw the compass to the bracket using these screws. Tuck the lamp wires above and behind your new compass. They will stay in place without cables ties, but if you have any doubt, use a small black cable tie to hold the wires in place.
Step 5: Swinging the New Compass
Step five, the compass comes with a small, brass screwdriver for swinging the compass. Don’t use a steel or iron compass because it will have a small magnetic field that will make swinging your compass impossible. The brass screwdriver included is non-ferrous and won’t have any adverse effects on your new compass. In the instructions is a paragraph or two on swinging the compass.
Follow the directions and your new compass will be deviation-error free! It took about five minutes for me to do this. Don’t forget to fill out your compass correction card, included, and put it on your panel near your new compass.
You’re done! It took about 30 minutes to install and swing my new compass and best of all, I didn’t have to pay a shop to do it. I made a log book entry in the airframe log and cleaned up my airplane.
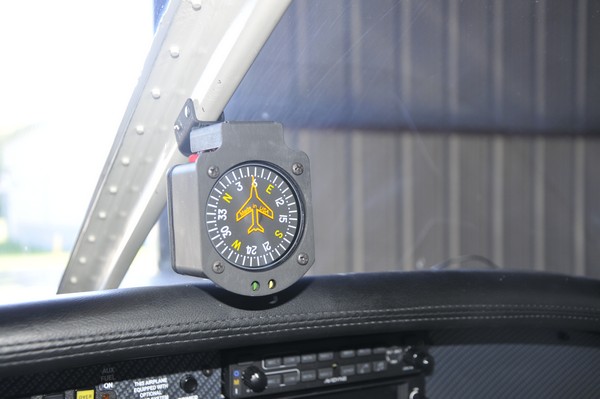
Picture 8 shows the completed project. Finally, it looks new and modern and it works perfectly. And I did it myself! It’s a wonderful instrument and I recommend it highly. I’ve never had one fail or need maintenance after installation. It reads like my DG and the display is the same. Over 90,000 owners of this compass can’t be wrong. I give it an A+.
Columbus never had it so good!

