
The edges around the windows are trimmed and cemented, too.
This is Part 2 of a two-part article on replacing the headliner in your Piper. This article is applicable to all PA-28s, PA-32s, PA-34s, and PA-44s. Read Part 1 or find it in the July 2020 issue of PIPERS magazine.
Now that the headliner and old adhesive have been removed, we will carefully remove all of the insulation from the ceiling one piece at a time. Don’t ruin it or crumple it. You will need it for reinstallation if it’s good or you may use it for measuring new insulation for cutting. The old insulation is not glued to the ceiling except in two locations and in short order you’ll have this phase of the project complete. Since fiberglass is tough on your lungs and eyes, wear appropriate safety equipment when removing and reinstalling it.
Soundproofing installation
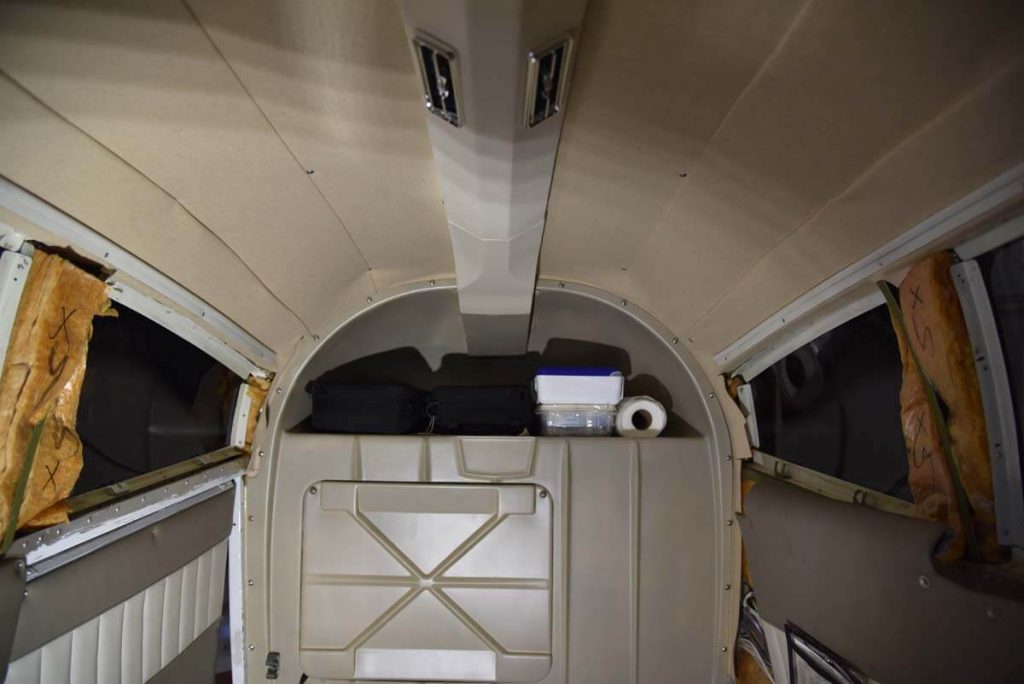
Start by removing one piece of fiberglass ceiling insulation. Put it aside and take out a measuring tape, a pad of paper, and a pencil. Measure the inside of the area from which you just removed the insulation, then wipe out the area with a crumpled paper towel wetted down with alcohol or acetone. Exit the plane to your work bench and cut a piece of foam rubber sound proofing insulation to match your drawing. Make sure that the foam rubber is positioned as it would be in the airplane, silver side down and sticky side up. Go back in the plane and peel off the wax paper on the sticky side. Install it in the area where it’s needed and press all over to make sure that it attaches to the ceiling properly. Reinstall the fiberglass insulation removed earlier. Take a permanent magic marker and place an X on the fiberglass insulation. The X tells you that underneath the fiberglass insulation is rubber soundproofing and that space is finished. Then repeat one piece at a time till you’re done. This took about three hours in my Arrow.
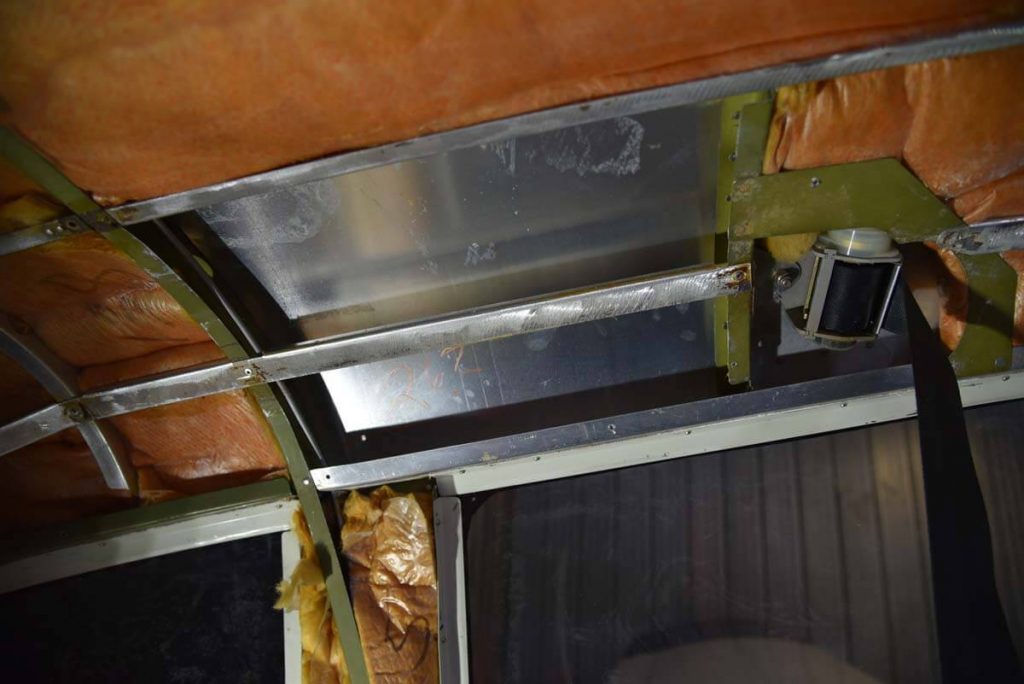
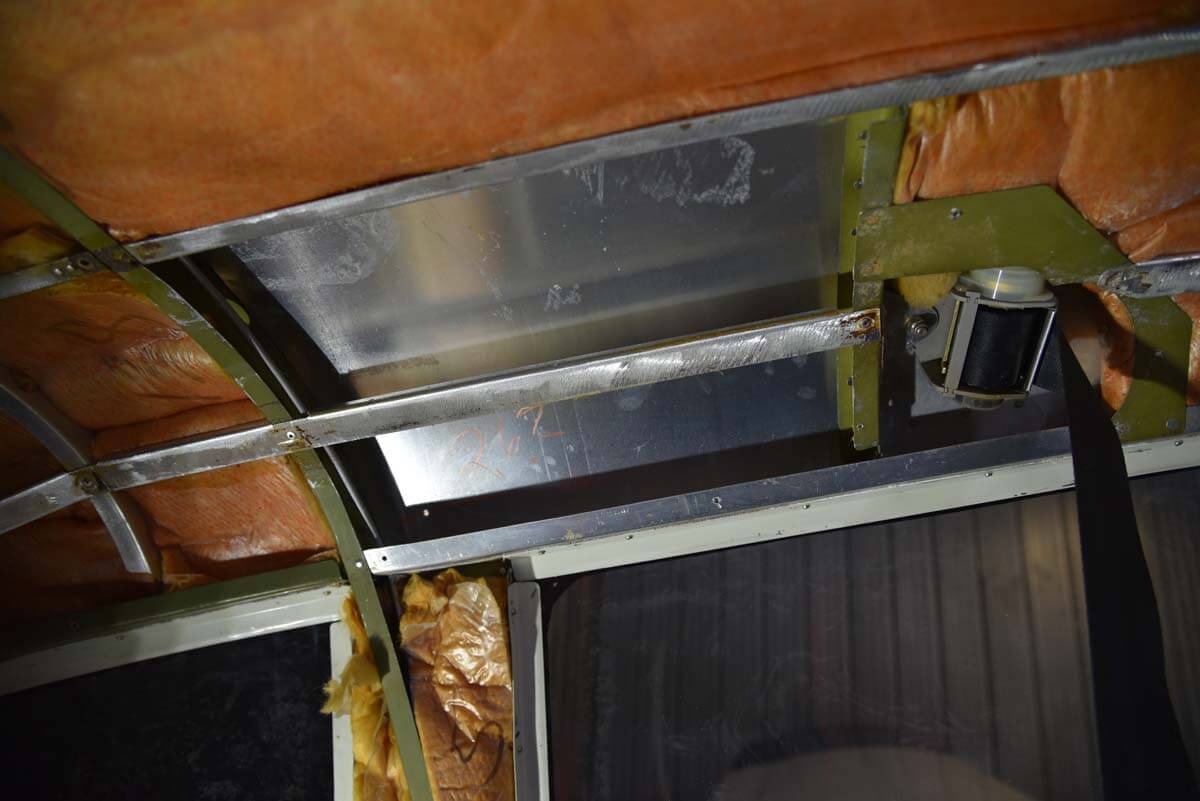
Insulation removed, ceiling checked for corrosion and working rivets and cleaned with alcohol ready for foam rubber insulation from Airtex. 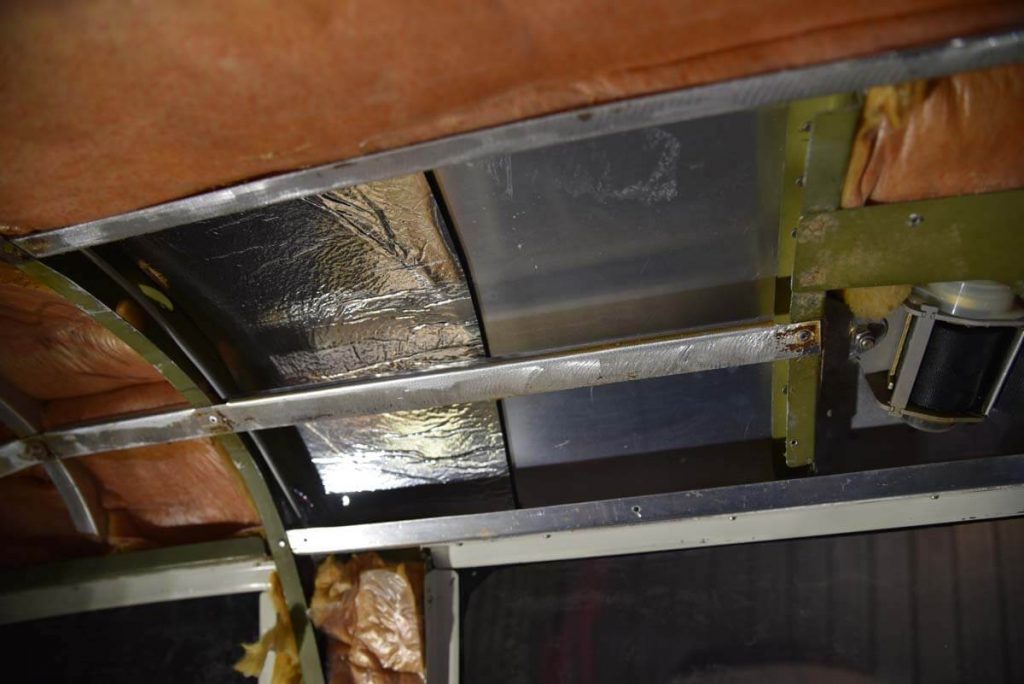
The same opening on the ceiling with the left half insulated with foam rubber.

Baggage bulkhead removal
As Charles Lindbergh said upon landing in Paris, “So here we are” — it’s time for the final preparation step before we can install the new headliner. I know you’re going to cringe when you hear this, but it has to be done. And it’s much easier than any of the other steps we’ve done. Specifically, the baggage area fiberglass bulkhead needs to be removed from your aircraft. The old headliner is tucked in and glued behind the bulkhead all across the sides and top of the bulkhead. So, we’re going to remove it from the airplane. It’s much easier than it looks, and it took about a half-hour to figure it out.
First, remove the door to the empennage. After that, put a work light in the empennage and get a medium-sized flat screwdriver. You’re going to have to stick your head and shoulders in the empennage and look up just behind the hat shelf. You will see the air vent scat tubing sticking into a bracket behind the hat shelf. There is one cable clamp around it and that clamp will have to be loosened and pulled back to the scat tubing. This will release the scat tube from the hat shelf. After 40 years or so you may find that someone has put duct tape on the scat tube. You’ll need to remove that and wiggle the scat so that it loosens up. That’s all you need do through the baggage door.
Next, remove all of the screws along the outer edge front of the bulkhead. Finally, lift up the bulkhead and it should be loose. Pull it toward you while being very careful as it’s fairly fragile. The vent opening cable at the top will need to be fed into the empennage. When the bulkhead is fully in the aircraft, you’ll need to remove the cable from the back of the hat shelf. At that point, you can remove it from the aircraft through the front door. Note: I did not have to remove the front seats to do this and the back seats were already out of the airplane.
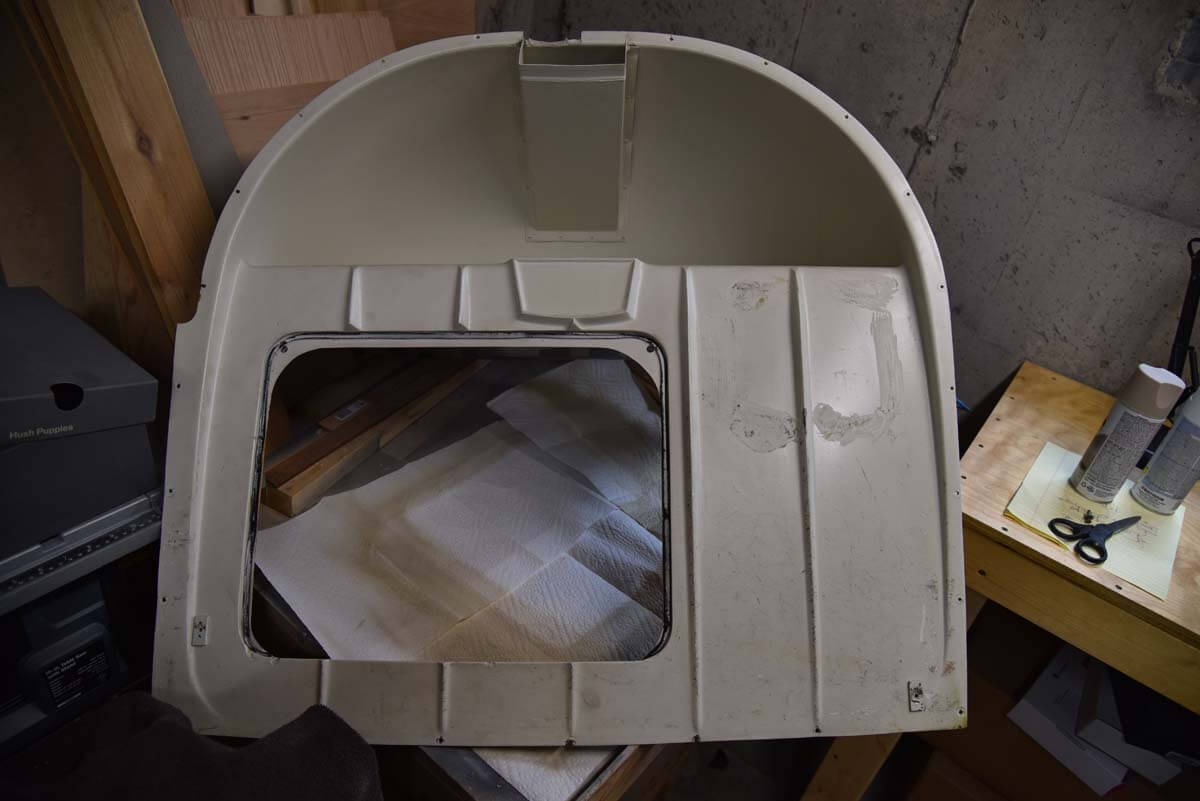
With the bulkhead removed, I removed all of the remaining old headliner from above and around the baggage area bulkhead. I used acetone to clean all of the cement off. I then took the bulkhead home and re-duct taped the insulation on the back and underside of the hat shelf. If yours doesn’t have any insulation, use the same foam rubber insulation that we used on the ceiling and put it on the back and underneath of the bulkhead. This will keep heat out in the summer and heat in during the winter.
Next, I washed the bulkhead with dish soap and a Scotch-Brite pad and got as much dirt off as would come off. There was adhesive on the front of the bulkhead where someone had taped a document at some point.
A bit of adhesive remover from Knots 2U took it right off. Do not use acetone on fiberglass as it will take the finish off. Rubbing alcohol didn’t harm the finish but also didn’t take the adhesive off. I did not try MEK, but I think it might be too aggressive for this use.
With the bulkhead as clean and smooth as I could get it, I put on two coats of primer and four light coats of paint. It now looks almost new and at a casual glance it’s awesome! Now it’s time to bring it back to the airport and reinstall it in the plane.
Installing the fastener
Unbelievable though it may sound, it’s actually time to install the new headliner. Most of this is pretty easy and it’s moving toward the end of the project. This phase requires that the cabin be totally clean and while there are some challenging moments, for the most part it looks better and better with each hour that goes by. So, let’s begin!
Make sure that the inside of your airplane is spotless — no dust or dirt or anything wet. Remove all of the tools and everything you can with the exception of the front seats, which you’ll need to sit in. Make sure you’ve got clean clothes on and that your hands are totally clean. You don’t want to mess up your new headliner!
Lay out a clean blanket on the right wing of your aircraft (or left wing on a PA-32 or 34). Place the headliner on the blanket with the Velcro side up. The headliner has the word “front” penned in magic marker on it. Remove the left Velcro strip off of the headliner without removing the clean adhesive-protecting strip then take it into the airplane. Sitting in the pilot’s seat with the metal strip above your head that you previously removed adhesive from, remove the adhesive-protecting strip from the new Velcro for a couple of feet being careful not to bump that fresh adhesive into anything. Keep a few inches of excess strip extending over the front of the metal strip. Line it up and press it on. Then move to the rear area, remove a couple of additional feet of the adhesive strip protector and press on the metal strip. Do this all the way down to the end. There will be a few inches extending off the end — just leave it there. Then take a clean rag or the palm of your clean hand and press all of the new Velcro onto the metal strip firmly. Make sure you do every inch.

Then leave it alone in the cabin for the next 24 hours or so. There are three strips to go so do them one at a time. Note that you’ll need to cut a gap in the new Velcro around the front seat belt retraction reels. When complete, press each new Velcro strip onto the metal strip firmly. And make sure you do every inch. Keep your airplane warm — 60 degrees Fahrenheit — for the next 24 hours or so. This will allow the new Velcro to set.
Attaching the headliner
Presumably, you’ve left the inside of your plane alone for a day while the new Velcro adhesive has cured a bit and you’re ready to hang the new headliner. I’ve been at this for two weeks and about 30 Scott-hours, so this is a welcome place to be. The remaining work to do is tedious but easy and it starts to look better as each hour goes by. Also, my work bench is getting emptier as I’m putting things back in the airplane.
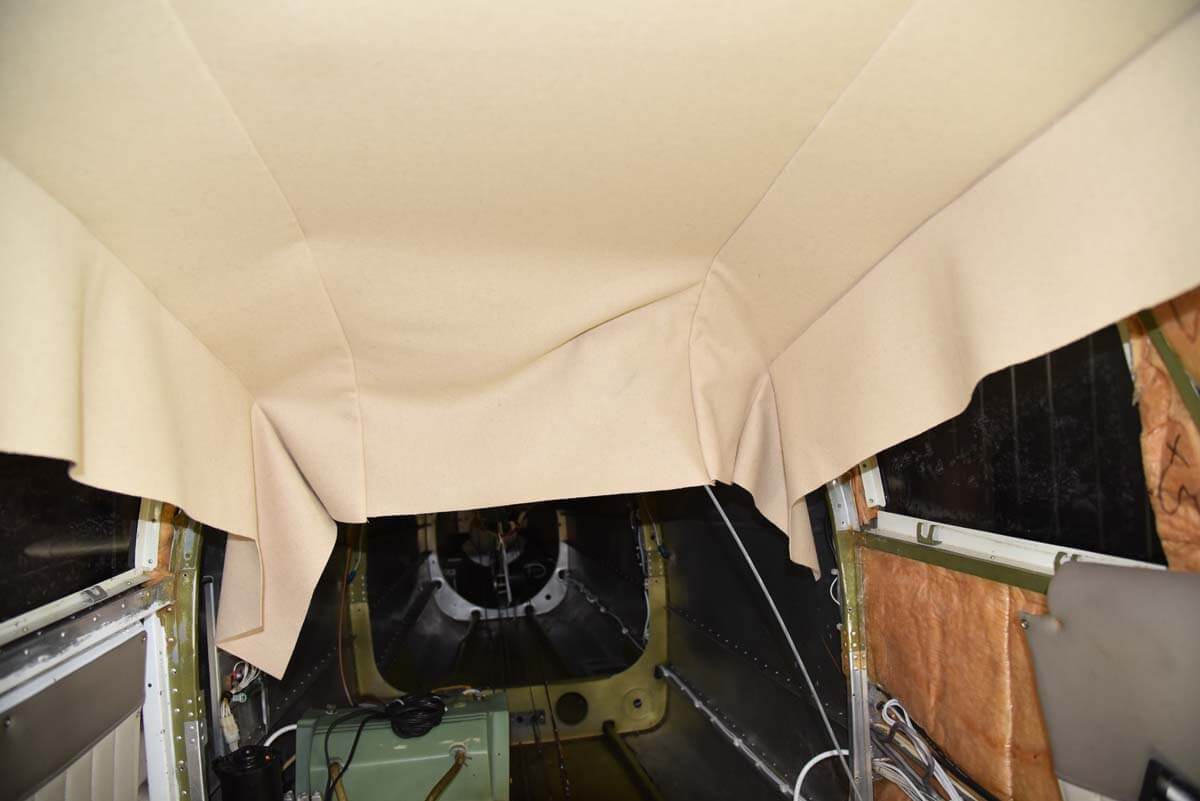
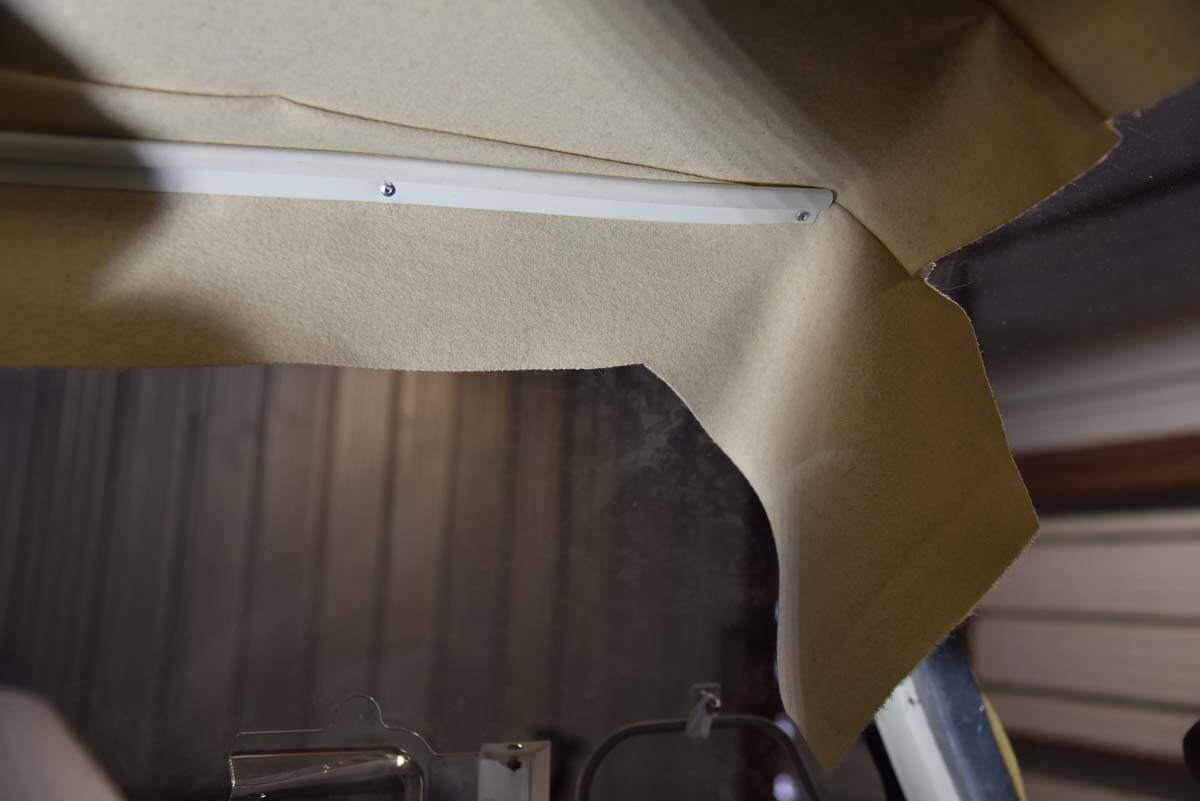
Take the headliner into the plane with you and sit in the co-pilot’s seat. We are going to start the headliner installation in the front right area by the door. This is very important as the entire headliner has extra fabric, but the front right is actually trimmed to match the door. With the Velcro side facing up toward the roof, press the headliner Velcro into the ceiling Velcro having lined up the area around the door. If this looks good, press the two Velcro halves together and move to the back seat and continue matching Velcro halves together until you’ve reached the baggage area. Then move to where the rear right seat would be and press the second from the right Velcro strip into the ceiling making sure that the fabric between the two Velcro strips is taut. Move to the front seat area and press the third (moving right to left) strip into the ceiling all the way to the baggage area. Finally, from the front seat area press the fourth and left-most strip into the ceiling. Take your clean hand or a clean towel or rag and press all of the Velcro into the ceiling. As you look over the new headliner it should look very good. The sides, front, and rear will be hanging down, but the entire headliner is self-supporting at this point. If you’re not happy with it, carefully and slowly pull the offending Velcro apart and re-stick. If you have to do this, give support to the ceiling Velcro as the contact cement holding it to the ceiling strips isn’t that strong. When you’re done, get a drill with a 1/16-inch drill bit. You will use Airtex No. 4 screws and washers to permanently fasten the headliner to the ceiling. When you’re putting screws back, always use new screws and not the old ones. Also, if the screw holes are worn and too large for the screw, use No. 6 screws and that will solve your problem. The photos provide a better idea of how to fasten these screws, but, in a nutshell, every 18 inches or so down each Velcro strip on the ceiling, you’ll drill a hole and put a self-tapping No. 4 screw and washer in. On the outside Velcro strips where the fabric is hanging down you put the screw on the strip under the fabric. It’s easy to see and figure out when you’re at this point. The headliner is now strong and firmly mounted. All that’s left is to trim and cement in all of the edges on the left, right, front, and rear. We’re in the home stretch!
Trimming and cementing
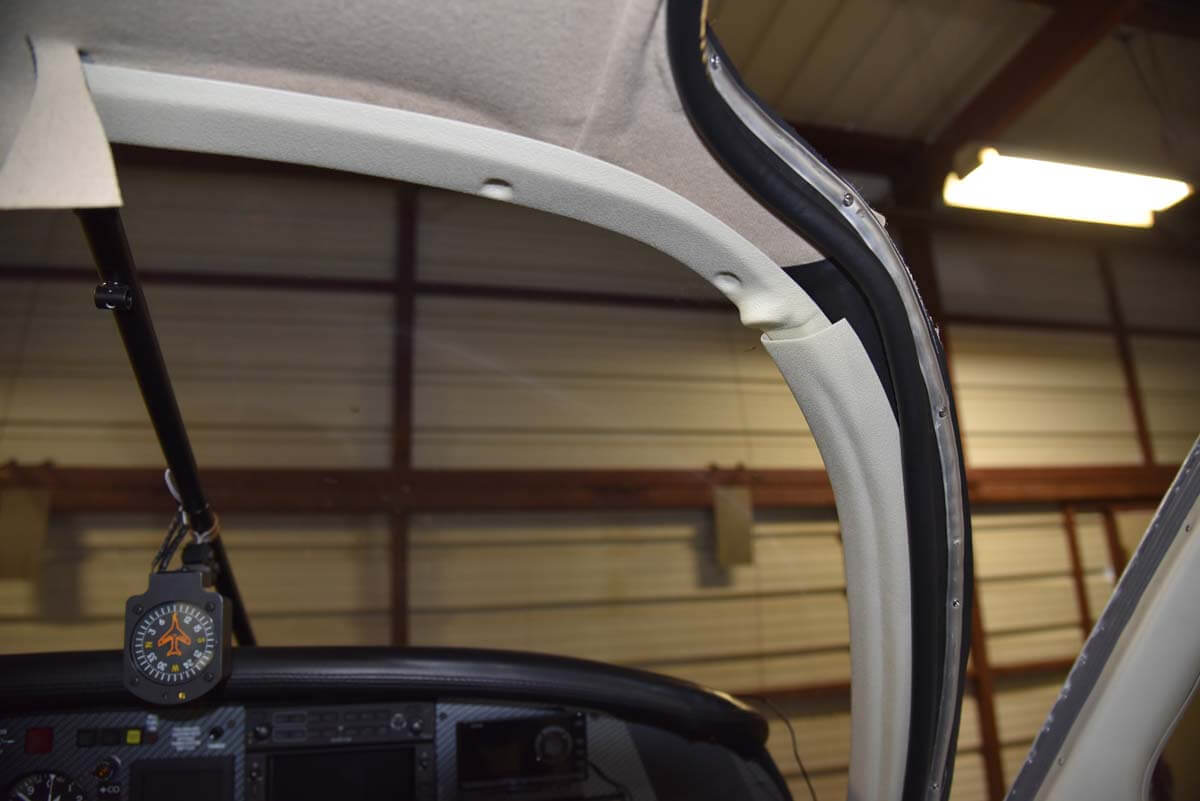
Trimming the headliner isn’t too hard and cementing it in around the windows doesn’t take very long. Don’t get any glue on the windows, though, or on the new headliner. If the instructions on the cement say to spread cement on both pieces (headliner and window frame), disregard this. If you are using a wool headliner, only put the cement on the window frame. If you put it on the headliner it will soak through and leave a very big and unsightly stain.
When trimming the headliner around the perimeter of the ceiling, the difficult part will be around the door. Take your time and go slowly on this. If you took pictures of the door before you disassembled it, then you should reference those photos before you proceed. If you don’t have photos and can’t remember, find a friend with a similar plane to refresh your memory. If you can’t do that then go slowly. The door is very difficult but if you take your time you will figure it out. When you have the headliner glued around the door, then you’ll have to glue in vinyl or similar material around the lower door frames. You can get just a yard of bulk fabric from Airtex. Finally, it’s time to put the windlace back on the door frame and the window and ceiling molding. These too have challenges and finding screw holes through the headliner can be one of those challenges, so go slowly. You can do this!
Finishing touches
At this point I’m done with the headliner, new windlace and the door frame looks good! I’ve put about 40 hours into the project and my poor body is stuck in a pretzel shape from working on the inside of my plane. So, what was the cost? It didn’t cost much, just a few hundred dollars and I have a new headliner with new foam rubber insulation on the ceiling and new windlace all around the door frame. I also repaired and repainted my baggage compartment in the back. It looks great and I’m very glad to be done with it.
So, what’s next? I have new window molding to put in next. So, stay tuned!
Finally, as Hannibal Smith used to say on the A-Team, “I just love it when a plan comes together”! You can do this in about 3 weeks working an hour or two a day. If your body can stand being in a pretzel shape for more than a couple of hours you can knock this project out in a week. And finally, if I can do it, you can too.


