
A few months ago you may have read the article I wrote detailing how I replaced my Arrow’s windows with LP Aero ¼-inch, infrared and ultraviolet resistant, ultra-strong windows. After that was done, I embarked on a project to replace my 43-year-old headliner. With that all done it’s time to install new window molding. Window molding is fairly easy to replace and won’t take more than a day or two.
Removing the old window molding
With the back seats out, everything removed from the baggage area, and a light placed in the cabin, you’ll need to position yourself inside in the pretzel or lotus position, whatever works for you.
Once in the cabin, with a Philips head screwdriver in hand, you’ll need to remove all of the window molding. You’ll need to remove the screws from the top of each wall panel and pull the molding away from the wall. The wall panels do not have to be removed, just pulled away at the top. You’ll see that the window molding also has screws to be removed. Remove them and put them in a dish or jar or something where they won’t get lost. I have a magnetic dish that I use that I got at a hardware store for a couple of bucks. The screws won’t fall out of the dish if you drop it due to the magnet in the base of the dish.
At the top of each window on the bottom of the molding there may be a little round plastic plug. Pry that plug out with a pocketknife, screwdriver, or fingernail. Remove the screw that was under the plug. The top of the molding is pressed into a slot. With all of the screws removed, you can pull the molding down and it should slide right out of the slot. Each piece of molding covers one window and may be overlapped with the molding next to it. The molding may be locked in place until the next piece is removed. Go slow here and it will all work out and make sure that you save every old piece of molding.

Installing the new window molding
The left side of your plane uses three pieces of molding and they all overlap an inch or two. Make sure you start the install on the front left side as it goes under the other two side pieces. Then, follow with the middle piece and then the rear. You’re going to need to match the front left new piece with the old piece by overlaying the old piece on top of the new piece. Try not to scratch the new piece of molding! With one overlayed on the other you’ll see that the new molding is oversized. You won’t be able to use it without significant trimming with your Dremel tool and file.
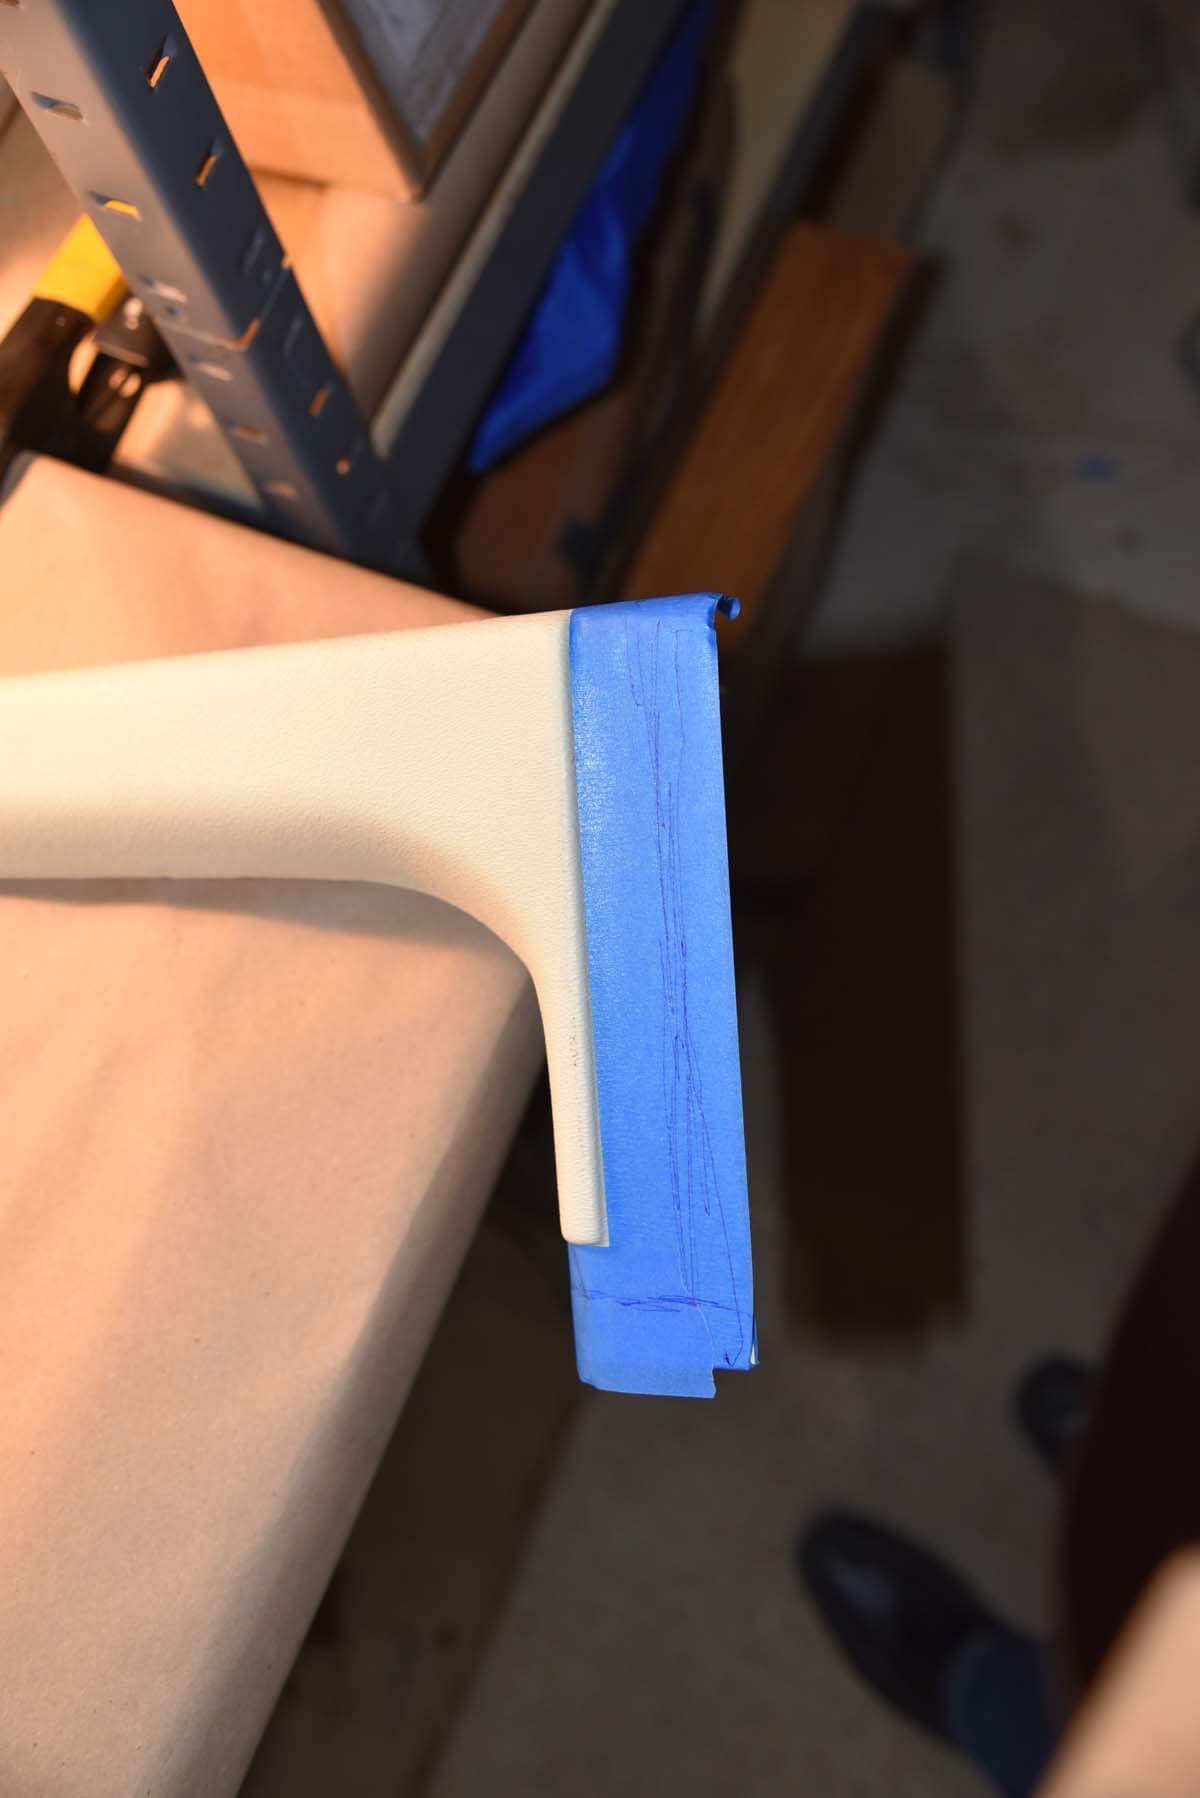
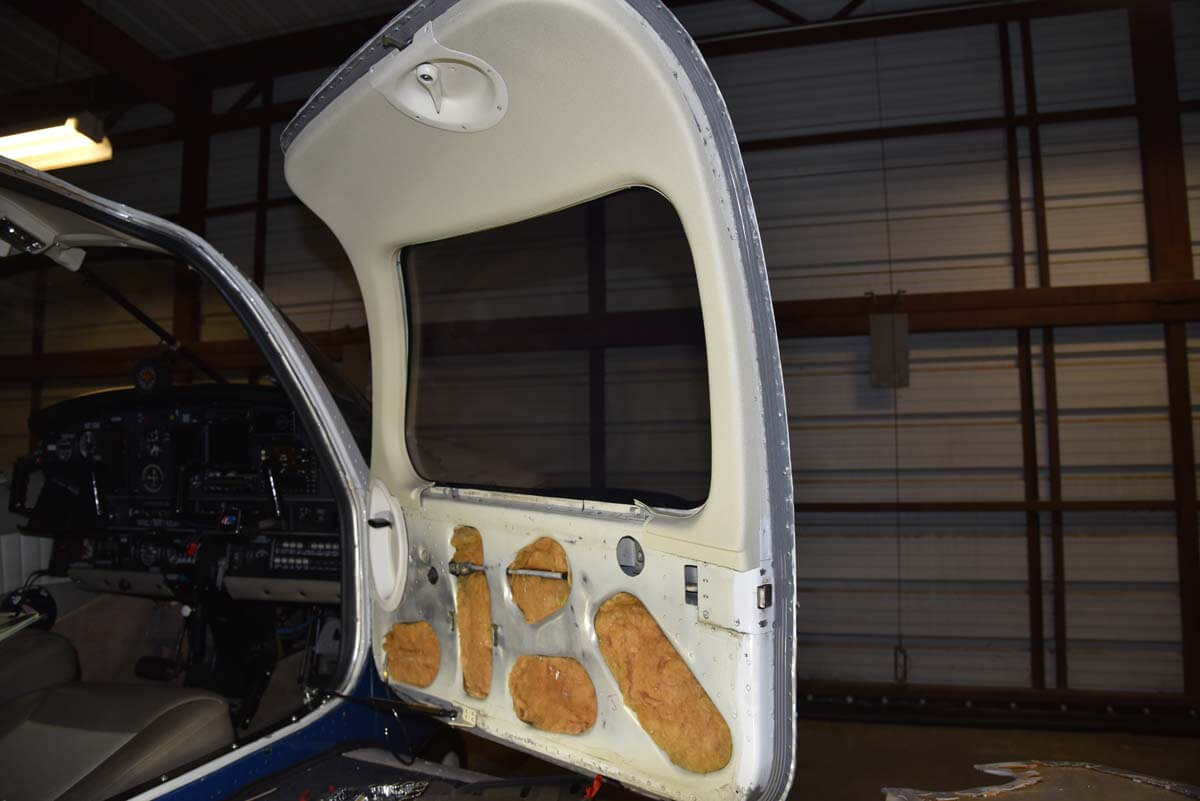
To trim the molding, put down blue painter’s tape or masking tape everywhere that you’ve determined trimming needs to be done on the new piece (Picture 3). Use a pencil to trace the old piece onto the new piece. Take the old piece off the new piece and hold the new piece up to the window and confirm what you’ve measured. Do this a few times to make sure you don’t ruin your first piece of molding. When done, trim the new molding with your Dremel and a cutting wheel. Cut the new piece a little larger than your tracing mark, then use a file or your fingers to remove the excess material from the new molding. Put it up in the window and see how it fits. Use the Dremel to further trim as needed. Go slow! Fit the molding into the window again and trim again if it needs it.
If it fits perfectly, measure window beading and cut to size using the old window beading. Make sure you use the old window beading! Install the new beading onto the new molding carefully, then drill holes in the bottom of the molding for a couple of No. 4 Airtex screws and fasten it in. The screws go below the side panels and you won’t see them later. Next, do the middle piece on the left side.
You’ll notice that the beading goes across two pieces of molding so it’s extra-long. That center piece is challenging to get the beading installed on so take your time. If you get frustrated take a break and think on it a while. Sometimes a flat screwdriver pressed into the beading will help. The same rules apply for the center and rear molding that you used on the front left. Each piece takes a little less time as your experience level increases.
Next, do the right side. Here, due to the door there are only two pieces of molding: middle and rear. Again, go slowly and measure a lot.
Installing windshield molding
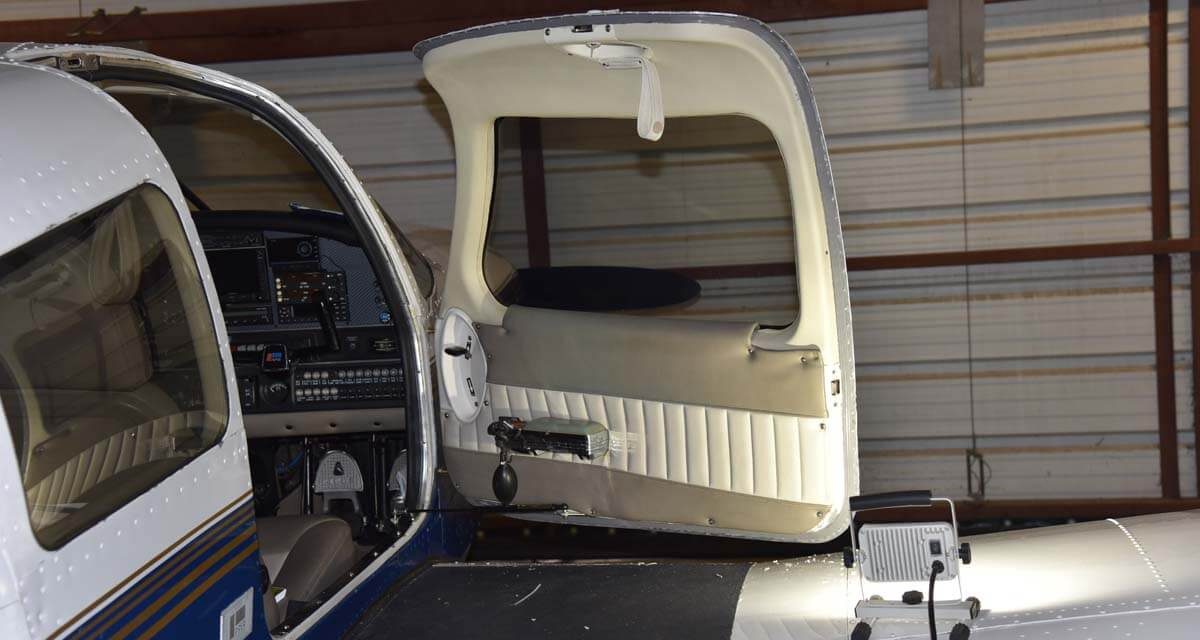
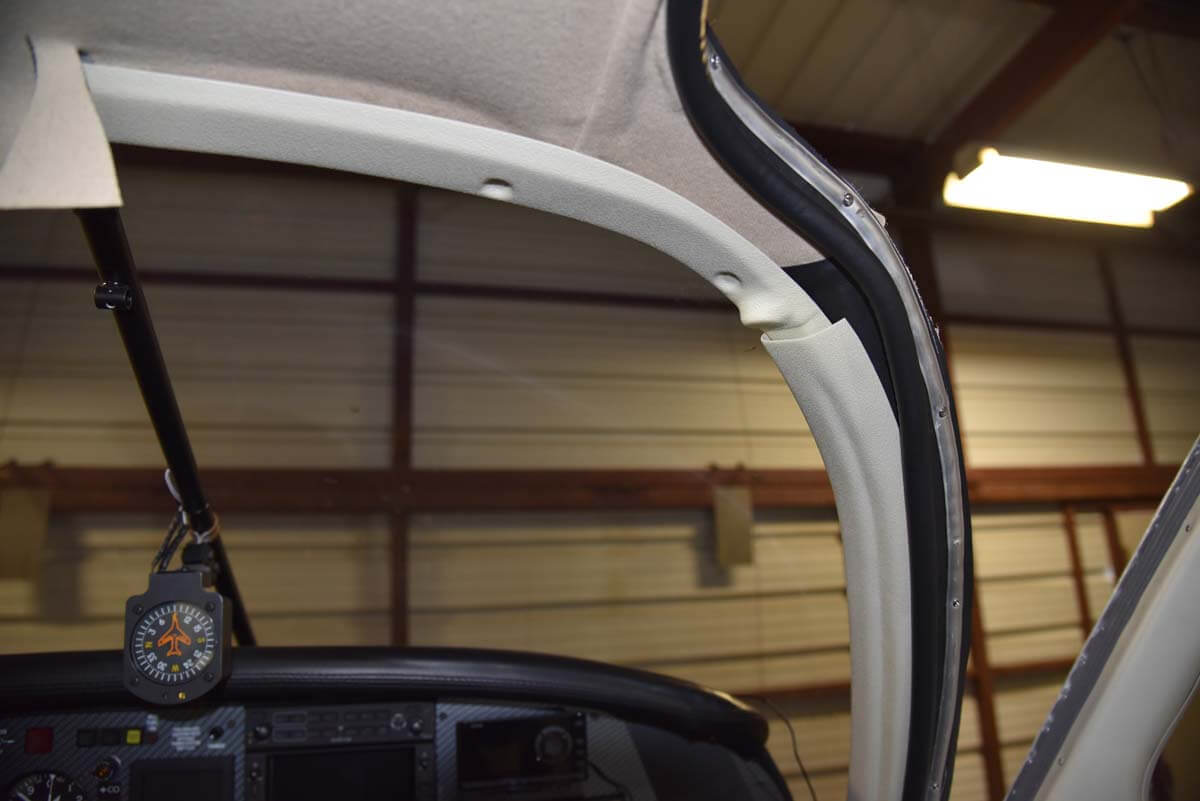
The windshield area is fairly easy. There are two eyebrow pieces (Picture 1) that take two screws each to install. Measure, trim, file, drill, and fasten with No. 4 screws. If you’re putting your visors back in, make sure that the side visor brackets are installed and tight. Some Pipers have the visors installed in the center and not the sides. In mine, they’re installed at the side.
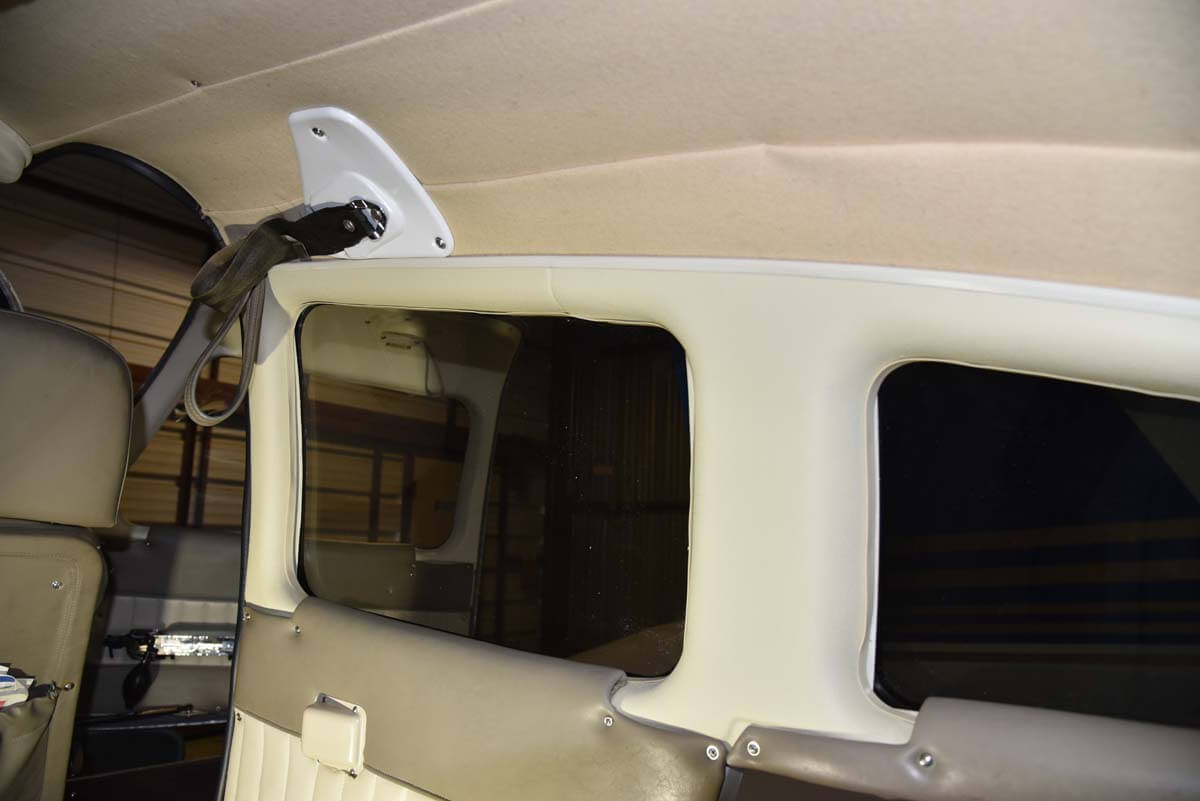
If you have sun visors, you’ll need to drill the appropriate hole in the front molding. Once the eyebrow molding is in, you can install the front left and front right vertical molding that overlaps the new eyebrow molding that you just installed. On the vertical piece you will need one screw near the top of each piece and two screws at the bottom. What remains is one small piece of molding in the center of the windshield between the two eyebrows. This will take some trimming and don’t forget to compare it to the old molding that came out.
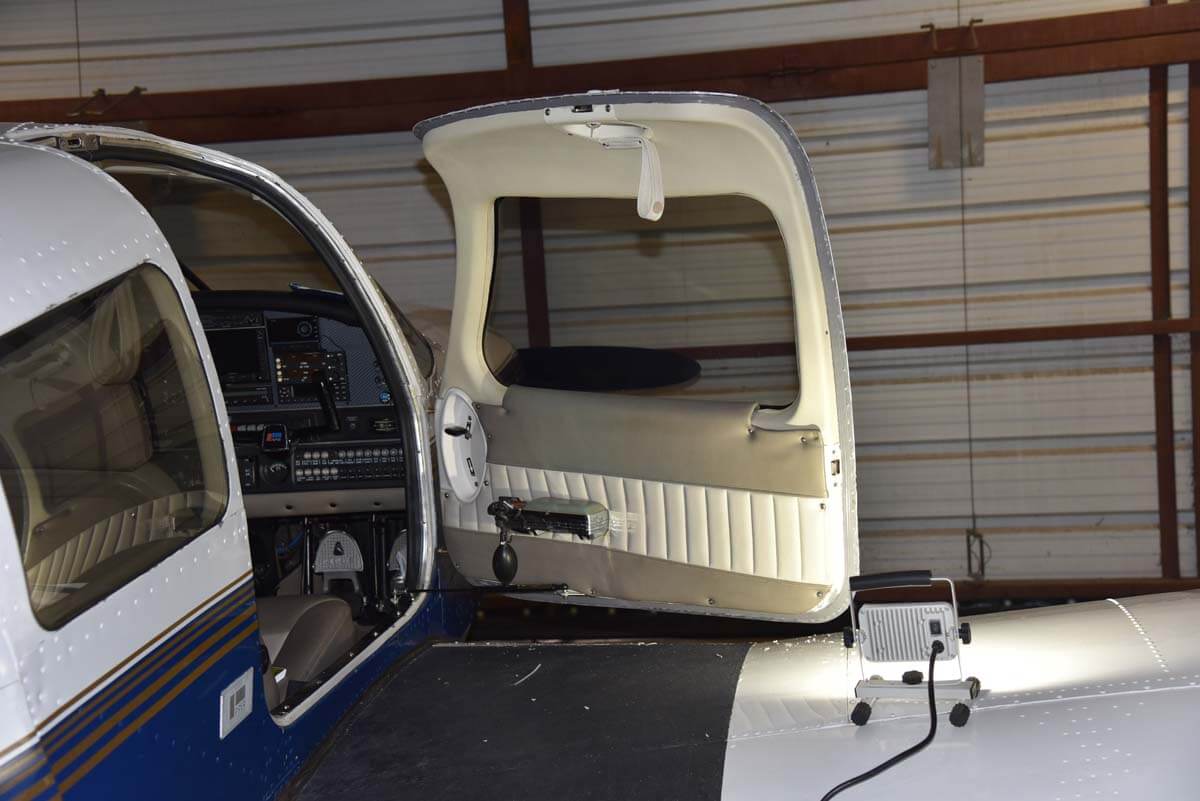
Installing door molding
The door molding is the hardest part. I got it done and it looks great, but it definitely was the hardest part of the project. It took me about four hours over two days. I got frustrated and tired and so I did a little at a time and then would take a break and then do some more.
Open the door and sit in the co-pilot’s seat. With a medium to large Philips head screwdriver, remove the two screws on the arm rest. It should come right off with those two screws out. With the arm rest removed, remove all of the No. 4 screws around the lower door panel. The panel should come right off.
While sitting in the co-pilot’s seat, look at the door window. On the top edge of the window, on the bottom side of the molding might be a little plastic plug. This needs to be removed along with the Philips head screw inside it.
Next, you can get out of the co-pilot’s seat and stand up next to the door. The door lock at the very top of the door needs to come off. There should be four screws on the inside of the door around the edge of the metal lock plate and two additional screws on the upper portion of the inner door where the door latch is. Also, remove the knob from the outside of the upper door. The lock should easily come out of the door on the inside. Below the lock on the inside might be two screws holding a plate to the door molding. This has to come off, too, as these two screws hold the molding to the door.
Around the perimeter of the door molding are screws at 6- to 12-inch intervals. Remove them all while holding the old molding. The molding will start to fall out as the screws are removed if you’re not holding it. You can use masking tape at the top and sides to hold the molding while you’re removing the screws. Also, while looking at the door from the inside, you’ll notice that there are screws to be removed on the lower left corner of the door where the door meets the fuselage. You can remove these with a 90-degree, right-angle screwdriver or you can unfasten the door safety bar at the bottom of the door and swing the door all of the way open. This will allow you to unfasten those last two screws with your normal screwdriver.
With the molding and door panel off, inspect the entire door for door seal and window problems as well as hinge, working rivet, corrosion, and other problems. This is the perfect time to realign your door, reseal or replace your door window, put in a door steward, or install a new door seal.
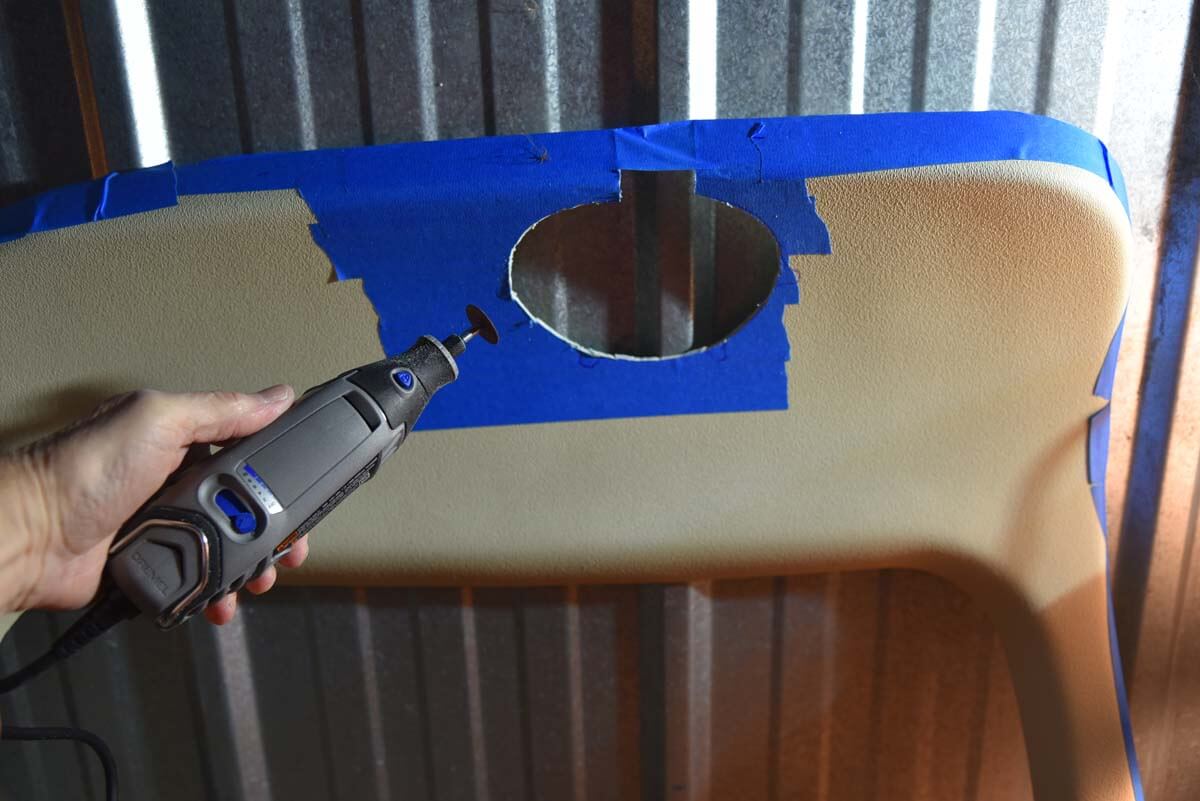
Now it’s time to install the new door molding. Put masking tape on the new molding as in Pictures 4 and 8. Place the old door molding over the new molding and trace onto the tape with a pencil. Measure twice, as the saying goes, and then cut with a Dremel (Picture 7). This is much easier than it looks. Go slow. Each time you trim and file off the excess, put it on the door and see how it fits. Trim off small amounts at a time and retest on the door. When it looks good, put the door lock in the hole at the top of the molding and mark where the six door lock holes need to be. Drill those with a larger hole than you need. The larger hole will allow you to wiggle the door lock a bit to get the screws to line up perfectly. Reinstall the door lock completely and the new molding will stay up nicely. Then line up the bottoms of the window molding and screw into the door frame with two No. 4 screws on each side. You don’t have to use the old holes in the door, you can drill new ones with a 3/32-inch drill bit. They will go right in. You’ll need to reinstall No. 4 screws around the perimeter of the door just like you removed from the old molding. You won’t need to use the old screws or screw holes so you can drill new holes and use new screws.
Finally, you can reinstall the door safety bar at the bottom of the door if you previously removed it and you can put the door panel and arm rest back on. The small plate that we removed with two screws in it that says “Latch Door Before Flight” needs to be precisely measured before drilling two holes and reattaching to the new molding. This is not a structural item and doesn’t need to be reattached if you’re uncertain that you want to drill holes at this point. You can make a label with your home label maker, if you have one, or you can put a dab of contact cement or double-sided tape on the label and stick it back where it came from.
And now you’re done! Your friends are going to say that your plane looks like it came out of the showroom! It’s absolutely amazing what new molding does to your plane’s interior. You will love it, as will your spouse and friends. And if you’re doing the entire interior yourself, as I am, then project by project you’re getting a new airplane. It’s highly rewarding, mostly fun, and not too expensive as compared to buying a newer plane.


