
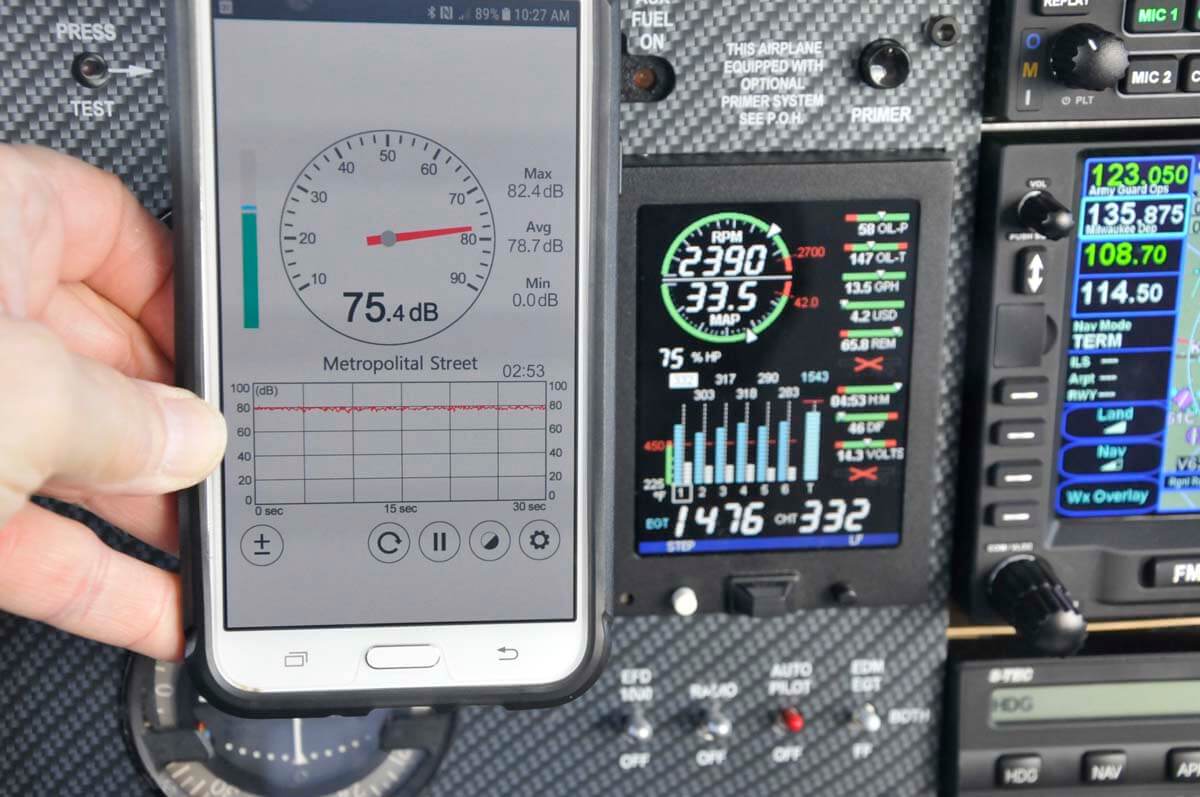
A lot of wind has blown over the wings since my plane was built in 1977. The panel has been updated multiple times, the interior has been replaced, the Arrow has been painted, engine replaced and countless other things have been done in those 42 years. If the door has been opened once per flight hour then it has been opened 4,000 times in its lifetime and anytime you move something 4,000 times, it’s going to wear out. In the case of my Arrow, the door doesn’t close flush anymore. The front of the door doesn’t fit flush either and when the door is open, it can wiggle up and down. The upper door hinge is rusty and quite a bit of rust has come off it. The rust represents actual metal that’s no longer on the hinge and the cause of the wiggle. When the door is closed it’s drafty and noisy, too. In fact, at 75% power at 6,500 feet my cabin registers 80 dB on the sound level app on my cellphone. If you’re interested in seeing how noisy your plane is, there are many free apps for your phone in your app store; just search “sound level meter” and you can pick one out and install it.
Removing the door
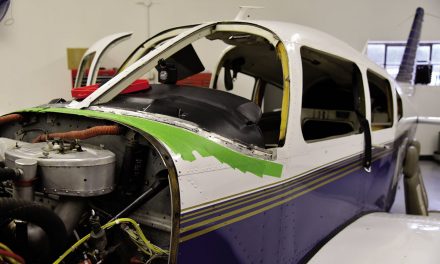
The first step, logically, is to remove the door and move it to your work bench. To do this, you’ll need to remove the cotter pins from the clevis pins in the two hinges and don’t forget to disconnect the door safety arm first. The clevis pins may need tapping with a hammer and screwdriver to get them out. Make sure you’re supporting the door when you do this. It doesn’t really matter if you use paper drinking cups or fancy magnetic bowls, like the ones I used, but all of your removed parts need to be saved until the project is over. You cannot throw out even the smallest broken screw or cotter pin — I can’t emphasize this enough — you may need one of those old parts further along in the project when you can’t find a new matching part. You also might run into a roadblock requiring you to put the entire project back the way it was for lack of a proper replacement part. It’s not unusual to encounter a 6-week lead time when ordering some obscure, overpriced part, leaving you with the choice of reassembling and flying or being AOG (aircraft on ground — meaning stuck) for 6 weeks.
Just for the record, I admit to having waited 6 weeks AOG and when the new part came in, it was the wrong one. I had to wait another 6 weeks all because I threw out the part I removed and couldn’t reassemble my plane and continue using it while I waited; don’t make this mistake! In fact, make sure you read the restoration checklist that I’ve created (see December 2018 issue of PIPERS); it will keep you from making many mistakes!
The plastic near the inside door handle is worn out and the black paint has chipped off. It’s embarrassing so I ordered a new one. I removed the armrest, wall panel, and the plastic and found a very small amount of surface corrosion that needs to be treated. Considering that the Arrow is 42 years old, there’s almost no corrosion which is a very good sign! I subsequently cleaned it up with a Scotch-Brite pad and it’s good to go.
Replacing the door hardware
It’s worth noting that having a nice door does you no good if it doesn’t hang on the fuselage correctly. To be more specific, if the hinges and clevis (hinge) pins are corroded and worn out, the door won’t fit right in the door frame. A gap of 0.0001-inch at the hinges can be 1/8 inch at the door handle and make for a noisy, leaky door that’s just plain annoying. My wife, who generally sits in the right seat, just doesn’t like it even if she is wearing noise-canceling headphones. In her words, “The headphones don’t keep my right shoulder from getting cold. And my butt gets cold, too!” So, the mission of my project is to keep my wife happy. When she’s happy, she looks forward to going flying. And that keeps me happy!
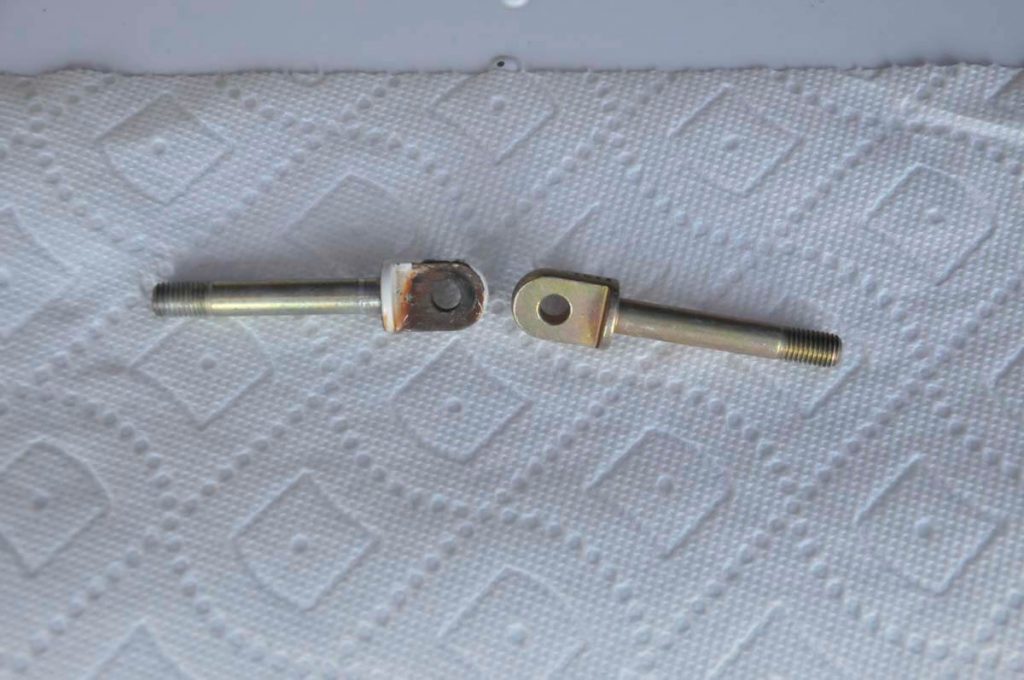
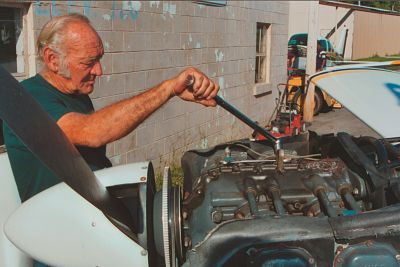
The old hinge bolt (left) compared to a new one. 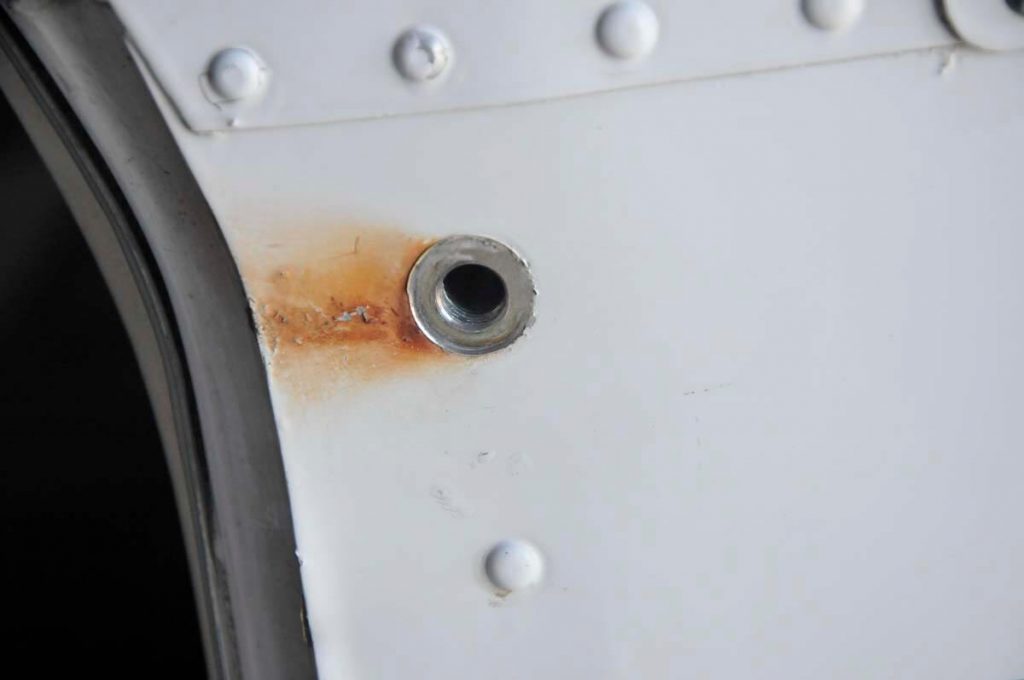
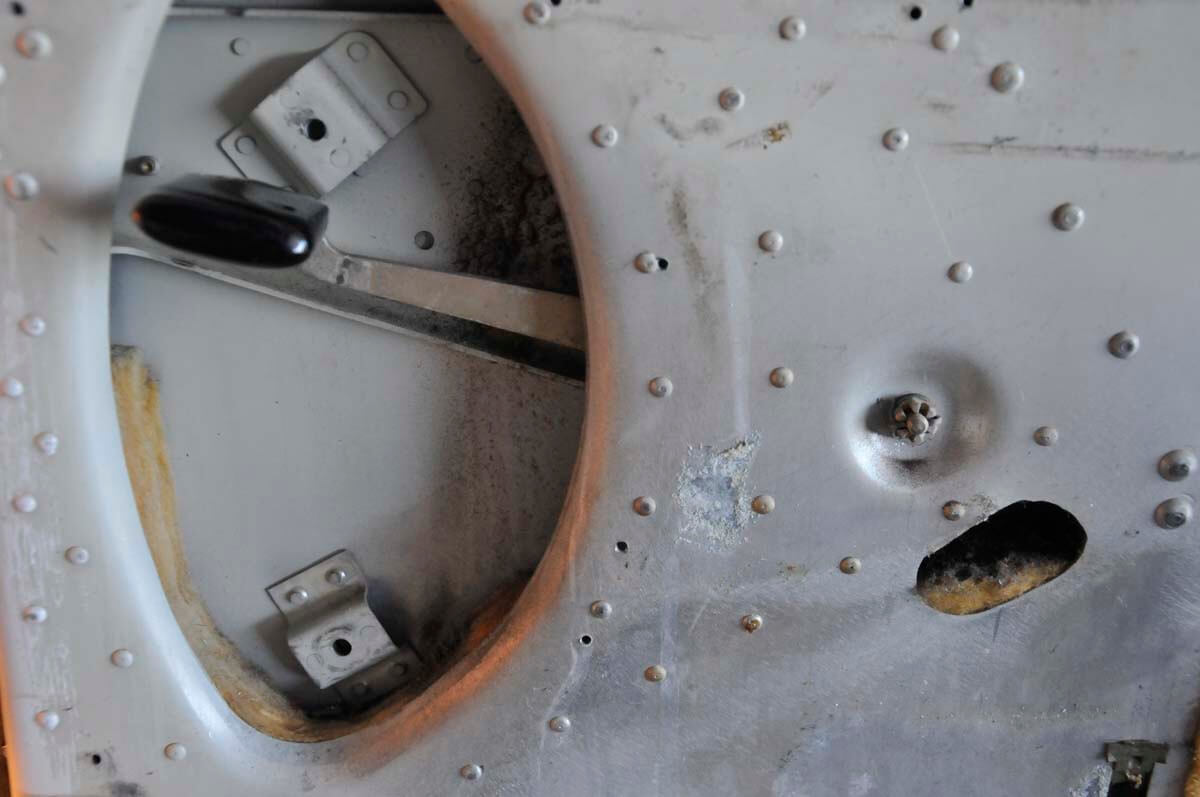
After removing the old, rusty hinge bolt.

The lower and upper hinge bolts are worn out and corroded. What we’re going to do is replace them with shiny new bolts and clevis and cotter pins that come in a kit from Knots 2U and other sources. They are very inexpensive at less than $40 for everything you need.
First, undo the screws and pull the side panel in to expose two hinge bolt nuts. Remove these by using a ½-inch socket or box wrench. Hold them tight while you turn the outside hinge bolt counter clockwise with an adjustable wrench. Unscrew and remove them and do not throw them out. The nuts will be reused, the bolts will not.
Removing the old door seal
We’re going to realign the door so that it’s as close to being “like new from the factory” as we can get it. We’ve now installed new hinge bolts and clevis pins but before we can reinstall the door and align it, we have to remove the old door seal. There is no way to align the door with the old seal in, unfortunately. So even if your door seal is new, if you want to align the door it has to come out.
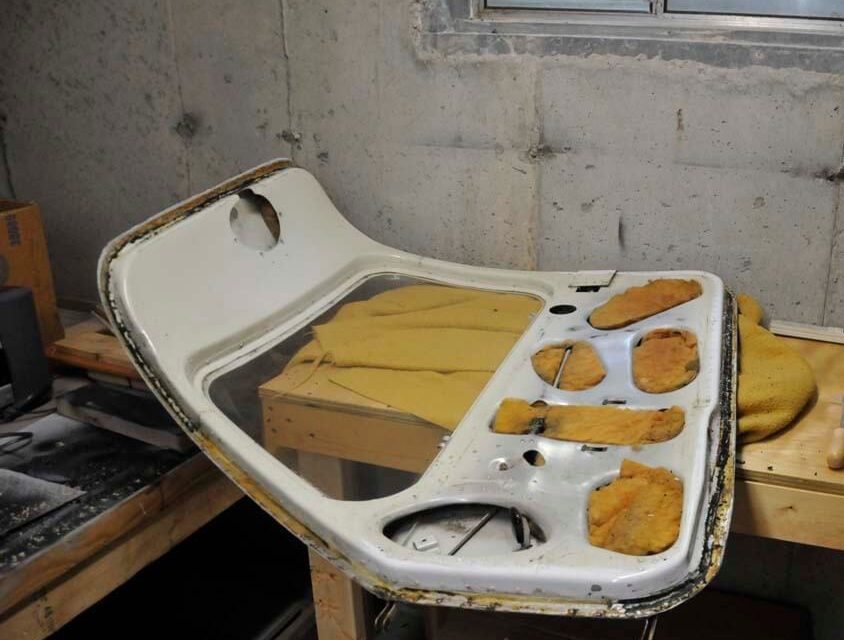
The first step is to get the door onto a table so you can turn it as you remove the old seal. Put a blanket or bath towel under the door so you don’t scratch it or harm the window. Once you’ve done that, get a pair of pliers and grasp part of the door seal and give it a gentle pull. If the door seal has been on for decades, the old glue will let go. You may be able to remove the old seal just by pulling on it without the pliers. If the seal is newer the glue may be holding on and a gentle pull won’t work. In that case, you’ll need a heat gun from a hardware or big box store.
In my experience removing door seals, the lower heat setting is all that you need to use. Wave it back and forth over a foot of door seal at a time and after 30 seconds or so a gentle pull with the pliers should lift it right off. Don’t try pulling with your fingers unless you enjoy intense pain. Also, don’t worry about glue or door seal rubber being left on the door as we’ll deal with that shortly. It will take you no more than 10 or 15 minutes to get the door seal off.

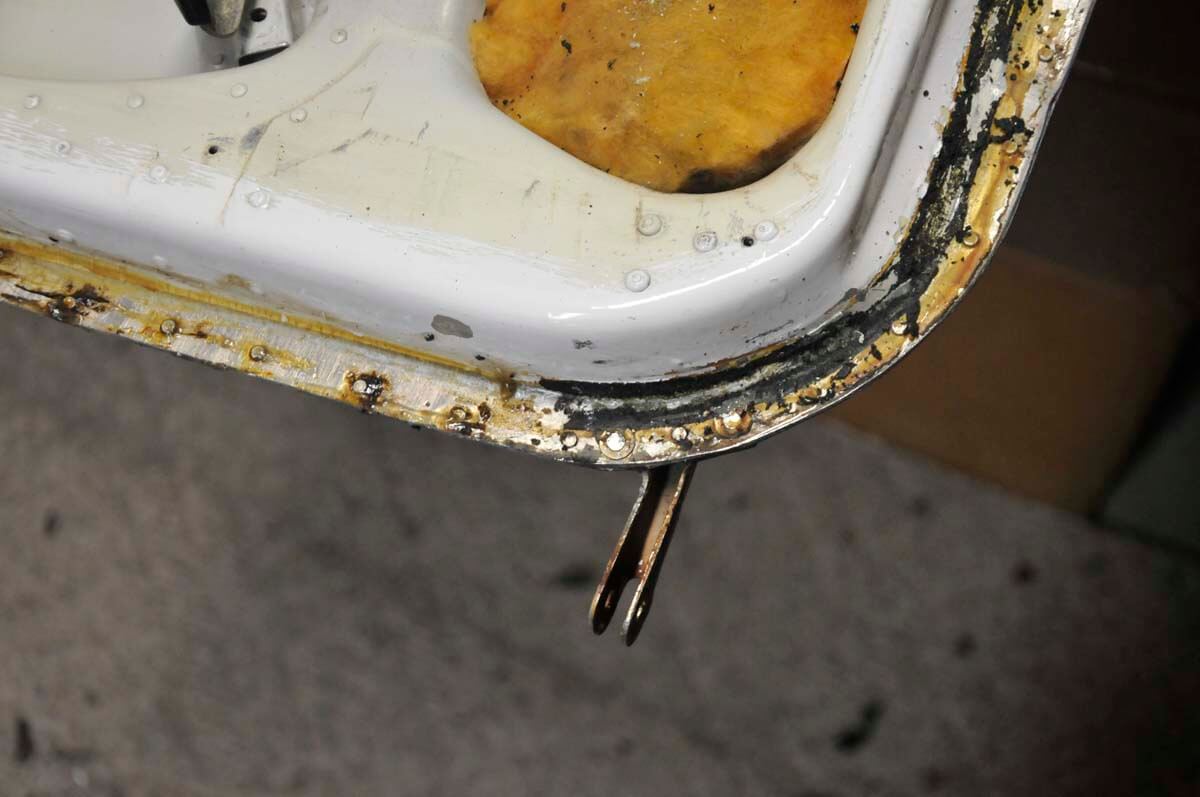
The door with the seal removed, but before cleaning. 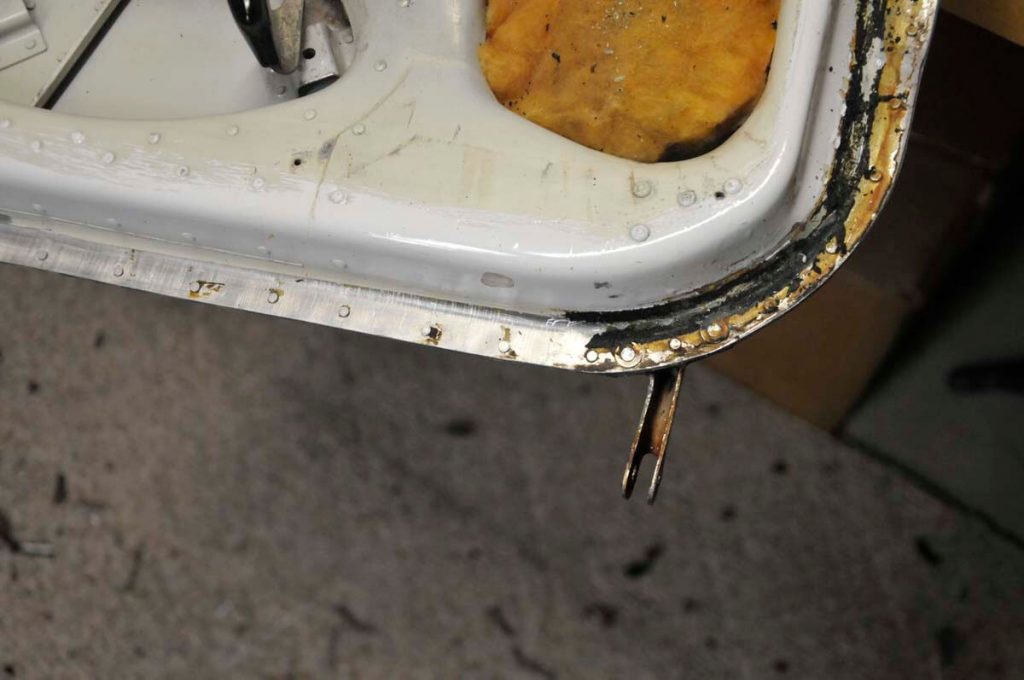
After cleaning with glue remover.
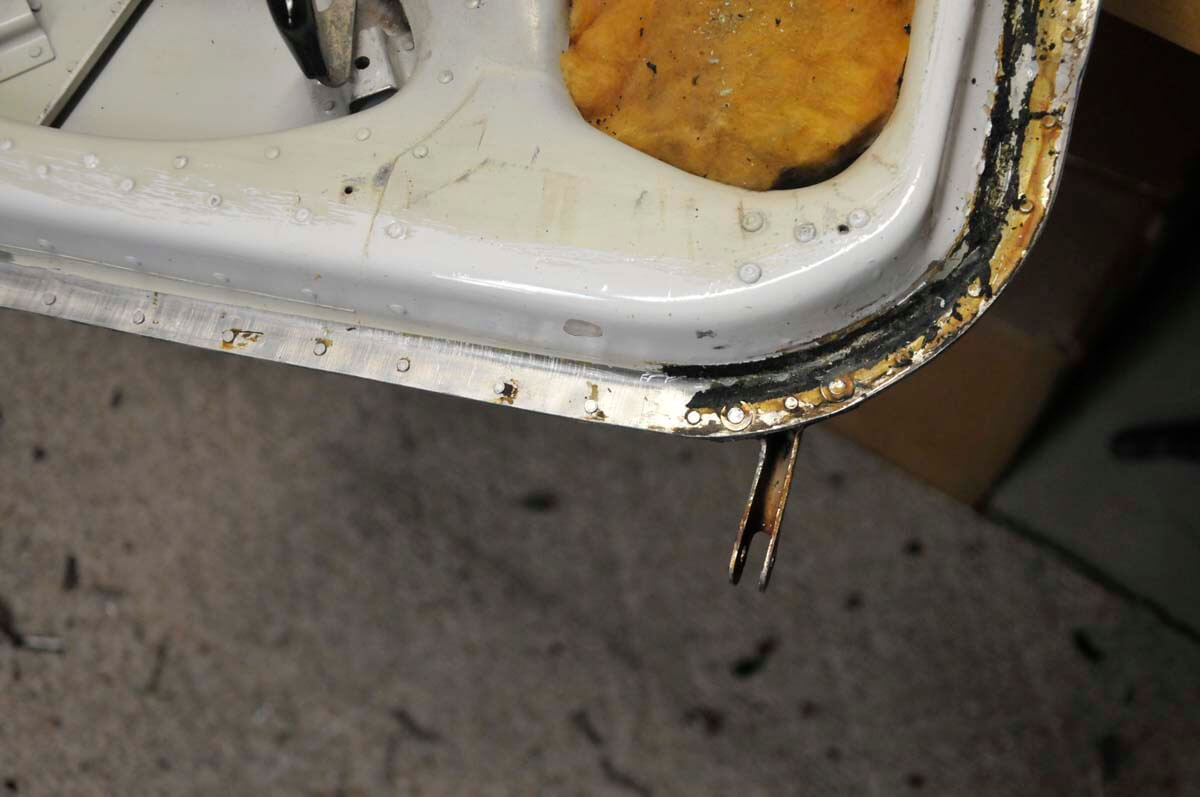
Door seal removal is subject to the 80/20 rule, by the way: 80 percent of the work takes 20 percent of the effort. The 80 percent being the removal that we just did. The 20 percent of the work is to remove the glue and get the door down to bare, shiny metal.
I used a chemical door seal remover. It’s $29.82 for a pint from Knots 2U. It includes an internal brush and one pint is about twice as much as you need for one door. If you’re doing a Cherokee Six, Lance, Saratoga, or Seneca with multiple doors, one pint should be enough.
It’s very easy to use but make sure you’re wearing gloves and are in a well-ventilated space. Directions for use are on the back of the can, but basically you unscrew the lid and the brush is attached to the inside of the lid. You stir the remover and then spread it liberally all over the glued area. Then you wait at least 10 minutes, 20 is better, then take a wad of paper towel or a rag and rub the chemical on the door seal glue. The glue will flake right off, leaving the surface looking clean. You may have to do it twice but the whole project will only take about 2 hours. I watched “The Blues Brothers” while doing it! With the door seal removed and cleaned up, it’s time to hang the door and get it aligned.
Aligning the door
The door alignment procedure is remarkably easy once you have the seals removed and the door put back on. The package of hinge bolts contains washers. You may or may not need them. In the case of my Arrow, the top hinge bolt needed no washers and the bottom needed three. So, what determines whether you need washers? Very simple; with the door rehung, clevis pins in with no cotter pins installed, and the door closed, the front edge of the door should be flush and smooth with the fuselage. If the front edge of the door is recessed, then you need to add as many washers as it takes to get the door flush. This process will require taking the door off and removing the new bolts a few times till you get it right. I did this myself and it was challenging; it’s definitely much easier to have a friend there to help. Getting the washers right will take no more than 5 to 10 minutes. Once the washers are on and the door is flush at the front edge, you can tighten the hinge bolts with a ½-inch socket or box wrench. Don’t over tighten! Now check the rear of the door with the door locked. The rear of the door should be flush and smooth with the fuselage just like the front end. If the door sticks out a bit, adjust the striker plate on the fuselage edge. Loosen the two screws and put the plate in or pull it out as necessary and retighten the screws. If your door is flush front and back, then you’ve done a great job, just like they do from the factory. Note that the door should have a gap of 1/16 inch to 1/8 inch around the entire door.
If the gap at the bottom is too small, you will need to add supplied washers to the hinge bolts where the clevis pins go through. The number of washers at the top hinge bolt will be identical to the number of washers at the bottom bolt to distribute the weight equally between the two hinges. This may take a couple of tries.
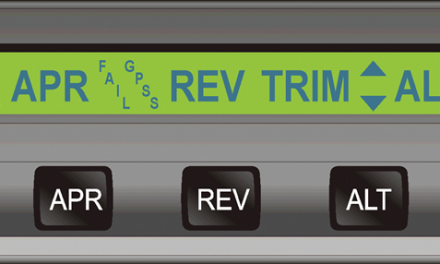
Now let’s check the top for alignment. With the door handle closed and the door flush with the fuselage, close the upper lock and check the gap. If it’s more than 1/16 inch, you will need to adjust the upper latch. To do so is easy: Remove the two screws on the cover plate and turn the hook and replace the plate and screws. You may need to do this a couple of times to get it right.
If it’s not perfect, don’t worry about it. It will be better than it’s been in decades. Don’t forget that the door is made of aluminum and may have bent a little over the years so if at all possible, leave it be. If it needs rebending there are procedures for that but try not to go there if you can help it. At this point, remove the door, put it on a table with a towel or blanket for protection and install the new door seal. When you remove the clevis pins, remember where the washers went so you can reinstall them later in the same position.
Installing the door seal
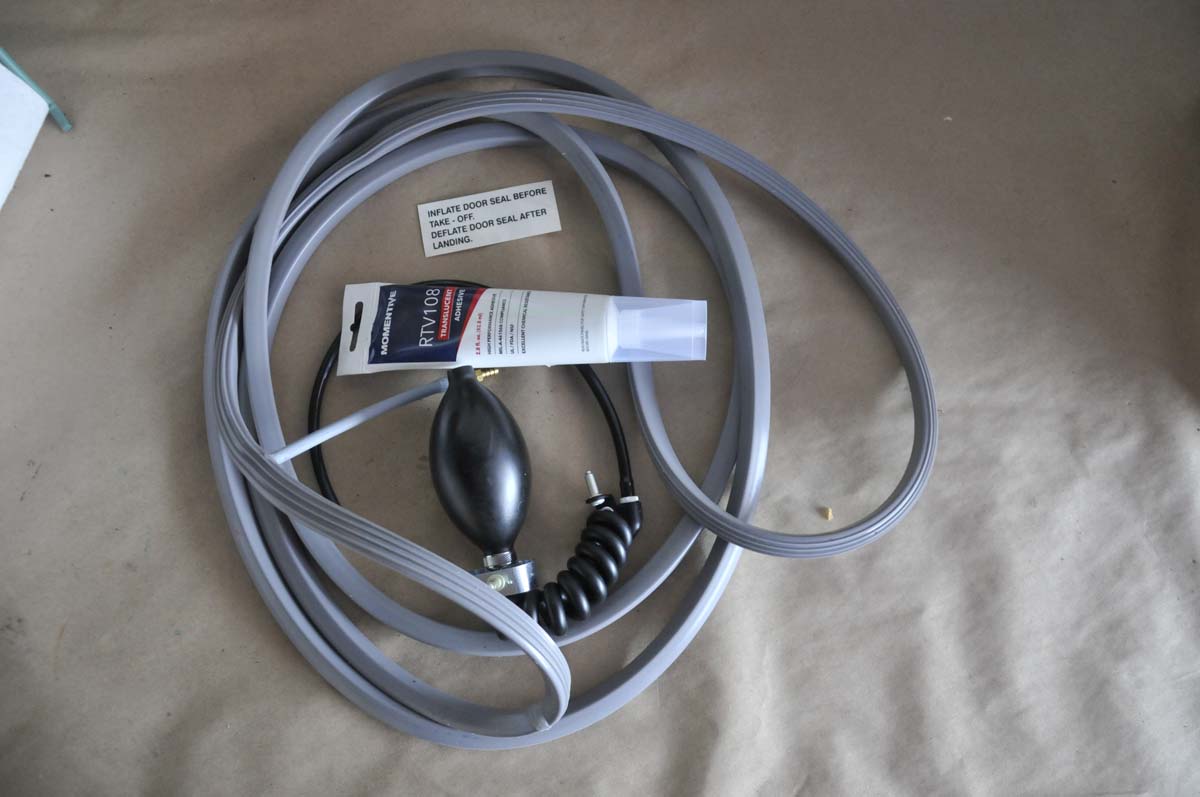
My awesome mechanic, Greg Joslyn, helped me with the door seal. Since the door seal that I purchased was an inflatable door seal from Bob Field’s Aerocessories, it was a bit more complex than a standard door seal.
Since each door seal is unique in its installation requirements and glue needed, I’m not going to get into that too deeply. Talk to your A&P and let them know what you’re thinking before you purchase one. They may have useful insight on a specific door seal for your plane. In any case, you will want them to review your handiwork while you are in the process or at least when you’re done. Having a second set of eyes is a good thing.
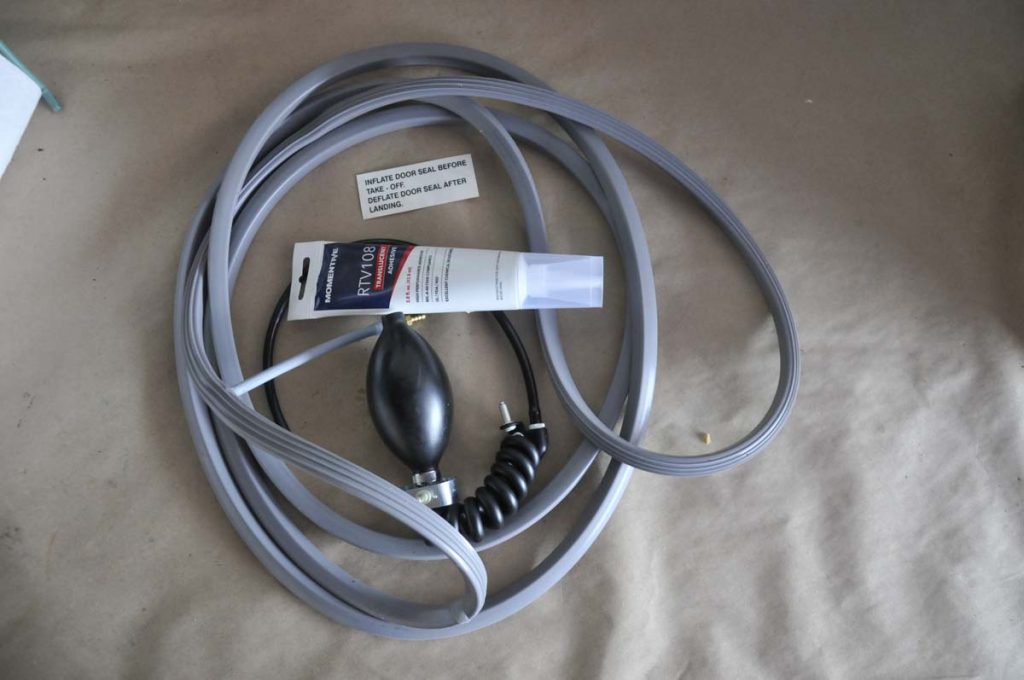
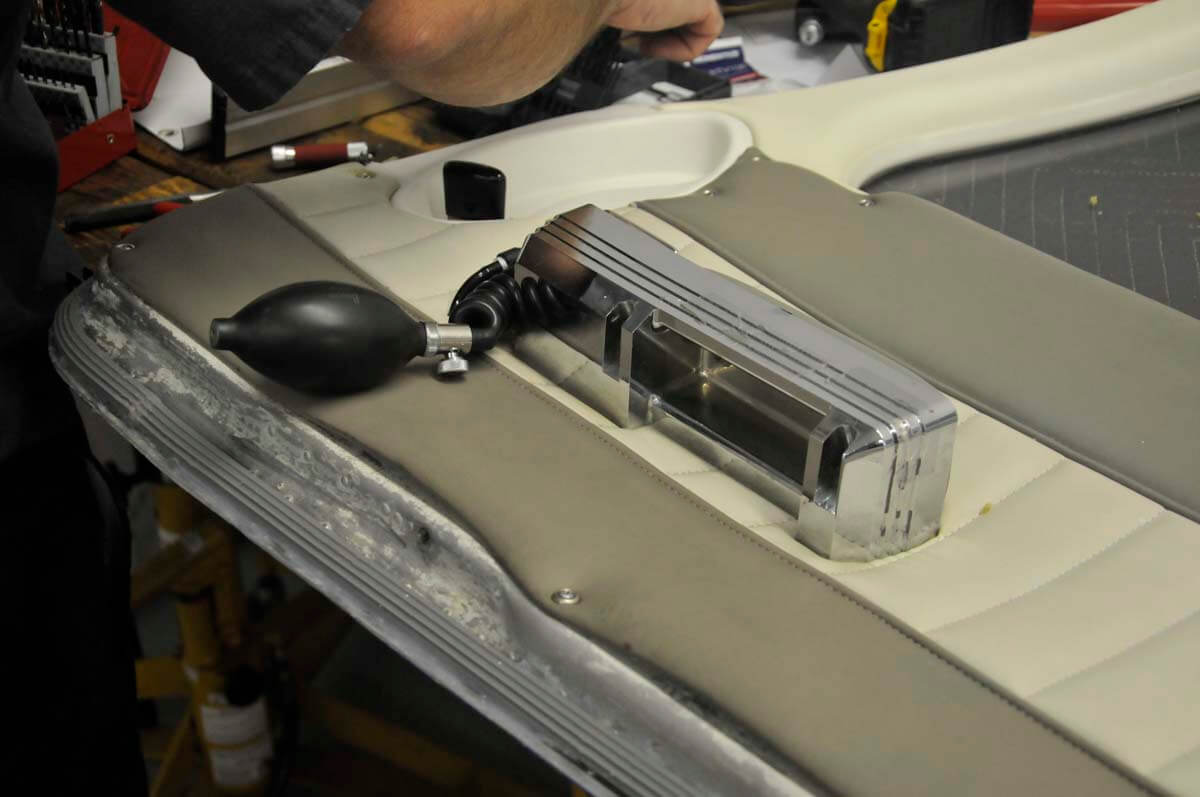
New inflatable door seal from Bob Field’s Aerocessories. 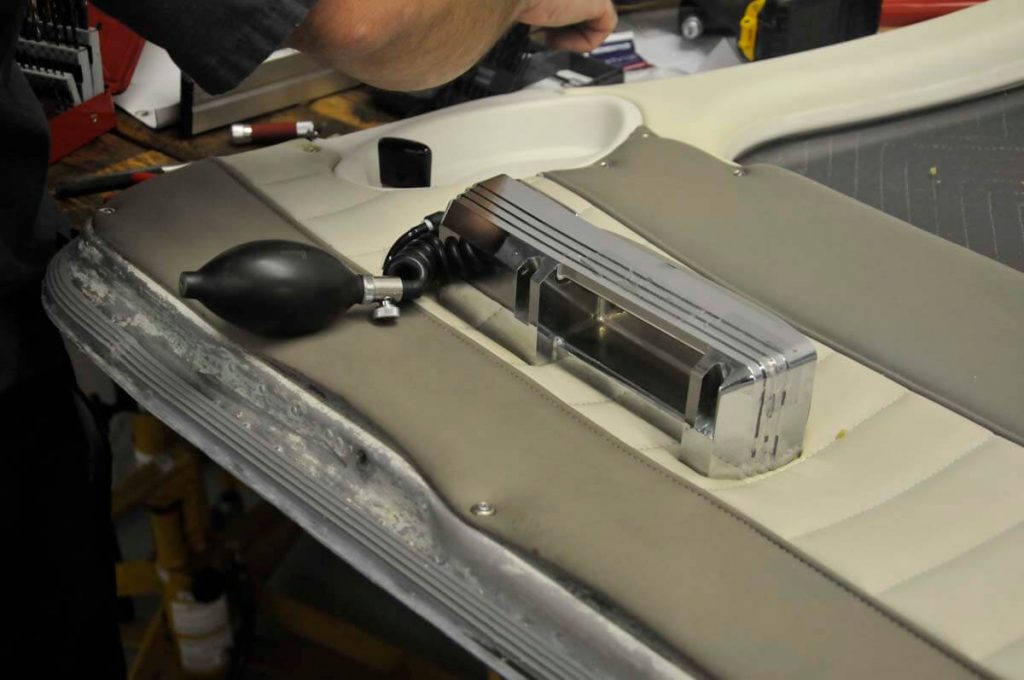
Installing the new door seal.
When you’re done with the door seal install, rehang the door and put those washers in where they belong. That part about getting the washers in the right place is critical, but don’t put the cotter pins or door brace in yet. First, close and lock the door. It may be very stiff, but don’t be too concerned. Only be concerned if it is very difficult. Do expect it to be somewhat difficult to close as the rubber in the new seals is hard and may take a week or two to adjust to your door environment. My door was easier to close after the first week.
If the door closes okay and is still flush on all sides with the 1/16- to 1/8-inch gap all the way around, then you can put the cotter pins back in along with the door brace at the bottom. It’s time to fly!
First flight
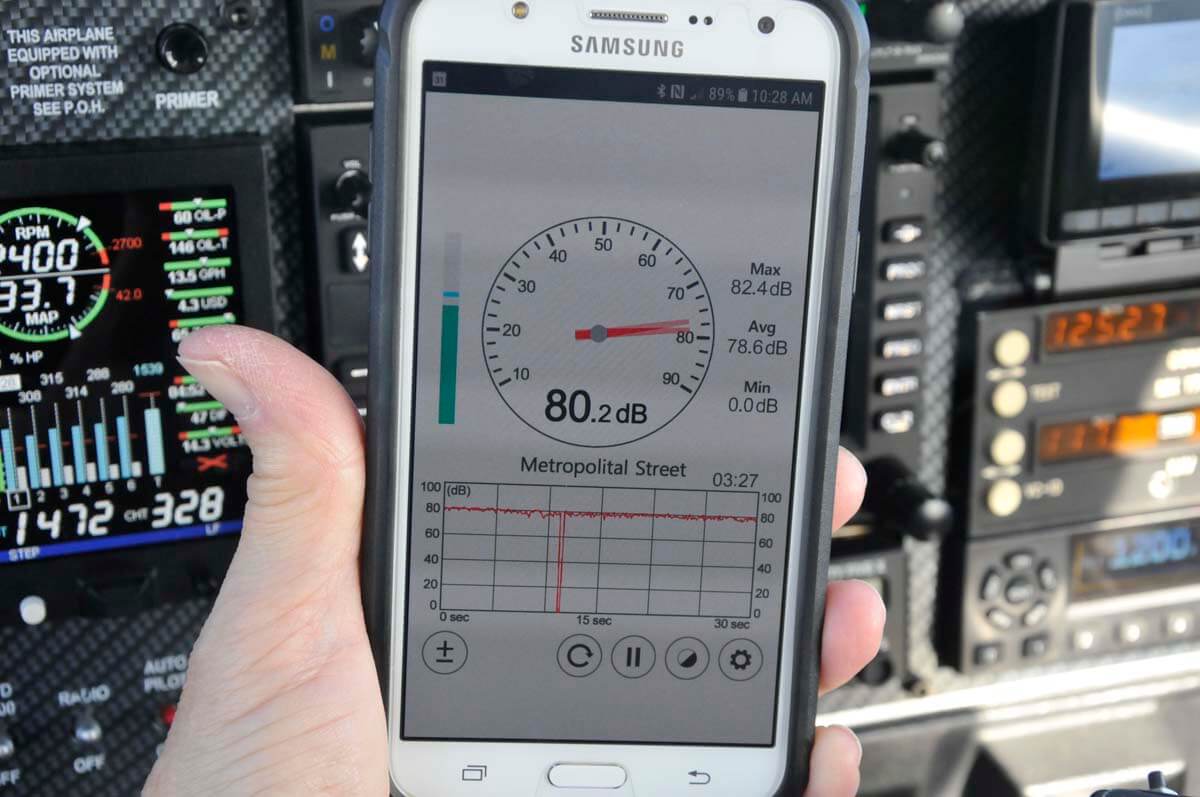
At 6,500 feet at 75% power before I did my door reinstall, I metered the sound level at 80 db. After the project was done I took it flying, again at 6,500 feet and 75% power. Now it’s about 75 db. A noticeable difference, but the best part is that there is no draft anywhere around the door and the cabin was warmer. I know my wife will appreciate that! In the past she has always stuffed a jacket or blanket between her and the door. I’m going to get a lot of husband points for this project!

Cockpit noise level before installing the new seal: 80db. 
Cockpit noise level after installing the new door seal: 75 db.
