
By Tim Stockhaus
Have you recently upgraded your Piper? Send us your story!
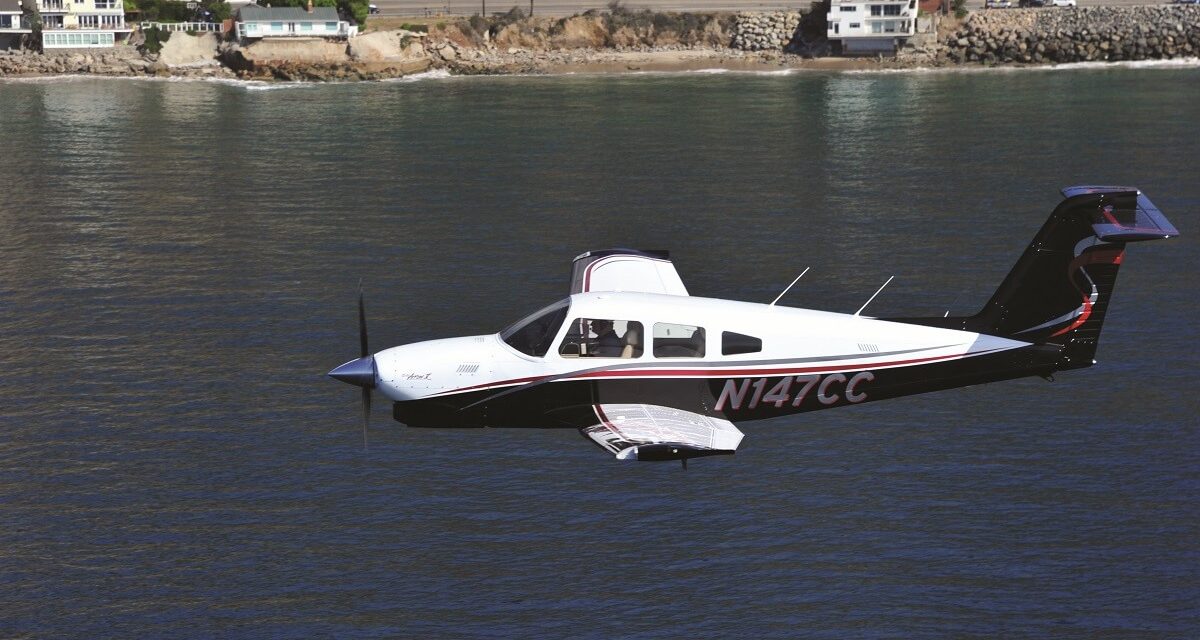
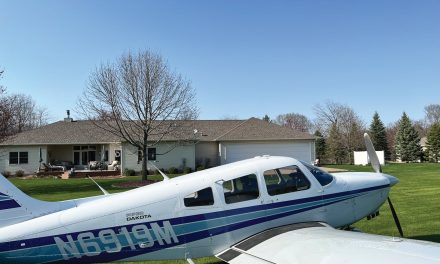
This project started with a choice I had to make — do I buy a new Piper Arrow (non-Turbo) for more than $600,000 or possibly a new Cirrus for about $900,000? About 20 years ago I owned a Piper Turbo Arrow IV that allowed me to safely fly into virtually any airport on the West Coast including high-altitude ones like beautiful Lake Tahoe. Since Piper doesn’t make a Turbo Arrow anymore, I figured there was a third choice: buy a good used Turbo Arrow IV and make it as close to what I call a new Turbo Arrow V as possible, including new avionics, interior, paint, and overhauled engine. I knew it would be pricy but also knew it could be done for about half the price of a new one that’s not even turbocharged. The goal was to find one that was close to TBO with older instruments since they would be ripped out anyway. After looking for a few months, I found one in Austin, Texas, bought it, and flew it home.
The first step of the project was the panel. There are some pretty cool new gadgets out there today from Garmin and others that take advantage of the latest technology including ADS-B In and Out. Since I’m a gadget guy who happens to be a pilot, I knew my budget would be blown right out of the gate. I did spend more than originally planned, but it was worth every penny. It started with a custom aluminum powder-coated instrument panel that houses a 10.6-inch Garmin G500 TXi and a GTN 750. The avionics include a Flight Stream 510 that interfaces to Garmin Pilot on my iPad as well as my iPhone with both Wi-Fi and Bluetooth. I decided not to order the additional panel-mounted Garmin 7-inch TXi screen since the iPad and iPhone give me two extra screens that I can use to view almost anything.
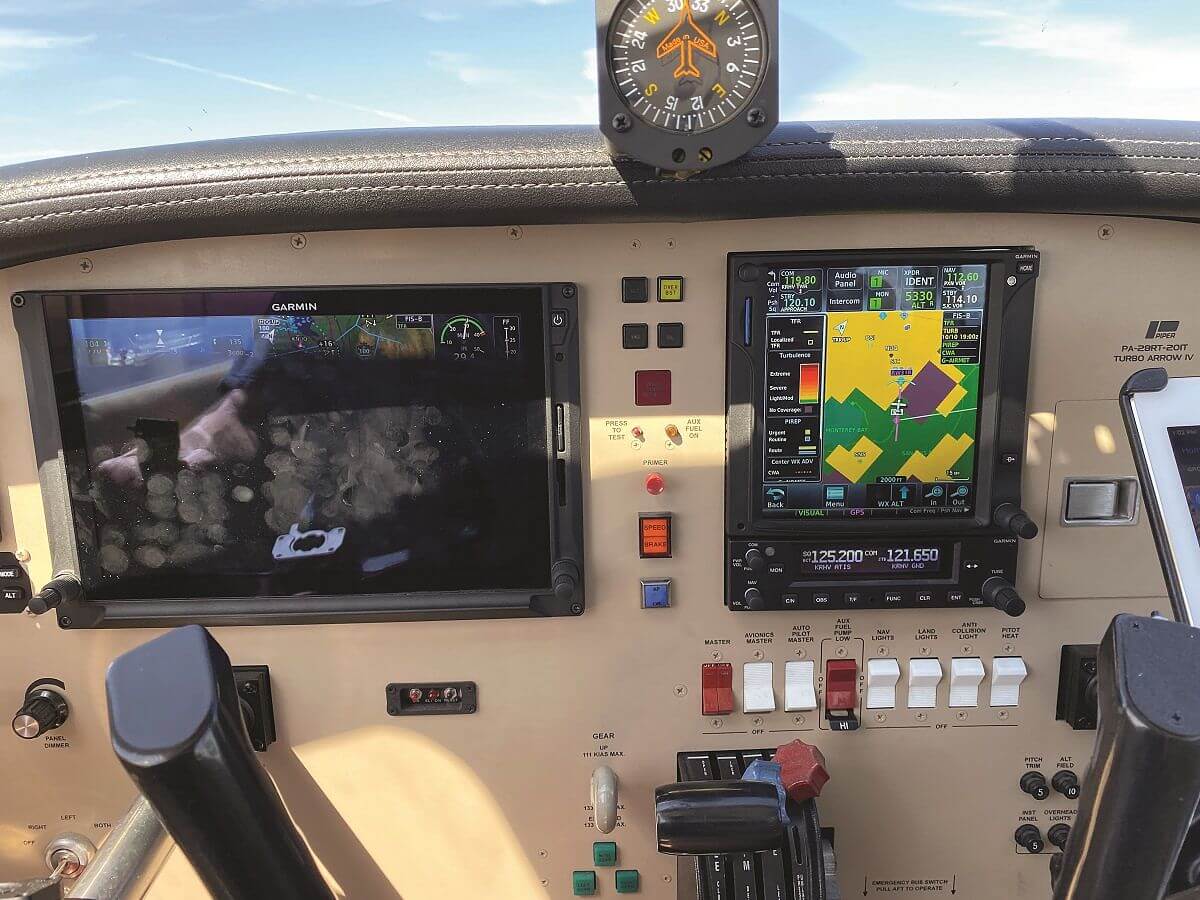
I am still experimenting with the different configurations for all the screens every time I fly, which gives me a lot of options and flexibility. The latest FAA FIS-B update for the GTN 750 and the G500 TXi allows me to view very useful weather data including METARs, cloud tops, turbulence, and icing as well as all the radar views needed for a safe flight. Before every flight, I use Garmin Pilot to create the flight plan, brief the weather, and file it. When I get in the plane, it uploads the flight plan to the panel and I’m ready to go. The Safe Taxi map simplifies the navigation of the taxiways at unfamiliar airports and highlights hot spots. The EIS engine monitoring system has built-in thresholds that get your attention by flashing red on the screen and keeps a real time record of all the engine parameters for every flight, which my mechanic and I can review on my laptop in the electronic flight log on my flyGarmin.com account if needed.
This article originally appeared in the February 2020 issue of PIPERS.
In hindsight, the EIS engine monitoring system was one of the best choices I made as Garmin did a great job integrating it into the entire system. The panel supported all devices behind it, which gave it as much, if not more, capability as any new light general aviation airplane out there. It did take some mental adjustments to re-train myself transitioning to the glass cockpit from the steam gauges, but it was easier than I expected. The result is a very efficient, clean, and simple-looking panel that gives me full access to any and all information in the cockpit to make every flight the safest and most fun possible.
The next step was the engine. I did my research and had to decide if I wanted to go with an overhaul or factory new. Then I called Victor Aviation and made an appointment to visit its facility in Palo Alto, California, since it’s about 20 minutes from my home. I think I could write a full article exclusively on all the 21 unique processes they go through with the XR Black Edition VII overhaul.
The overhauled engines go through a cryogenic liquid nitrogen stress relief process that super cools the metal to minus 300 degrees, which strengthens the components. Then everything is matched, volumetric efficiency balanced, and flow tested. I was very surprised to see my new factory cylinders before and after their inertia supercharging air flow optimization, which is another step in Victor Aviation’s process. The roughness and inconsistencies of fit and finish of the factory new cylinders versus the Victor refined cylinders was absolutely incredible. The result is a noticeably smoother running engine with little to no vibration thanks to the precise balancing of the components. From a performance standpoint, I have experienced a noticeable increase in power and TAS. Everything is finished off with the XR Matte Black electrostatic powder coat, which adds an extra level of protection not to mention it looks really cool. A big factor in my decision to spend the money was that according to the 2019 Aircraft Bluebook, the value added for the Victor engine is $83,235, which is about twice as much as factory new.
Another very significant addition was a Merlyn wastegate, which combined with the intercooler and GAMI injectors gives me great performance up to and beyond 20,000 feet resulting in cooler cylinder head temps. Anyone flying an aircraft with a fixed waste gate like Continental TSIO-360 series engines should add these to their aircraft.
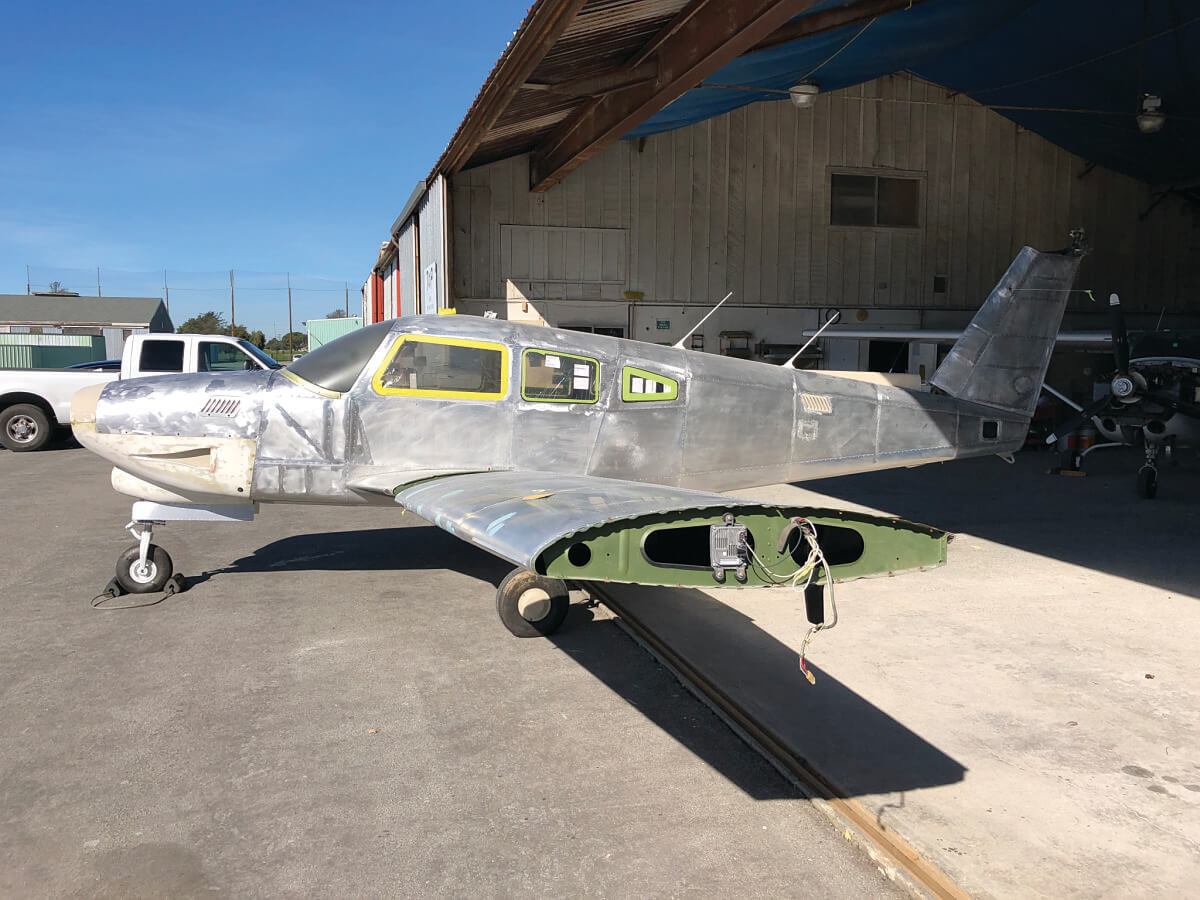
The next step was the paint, which technically happened at the same time as the engine. This turned out to be excellent timing as the paint shop was able to paint the firewall while the engine was out. This required both shops to be at the same field of course. I was also able to send the engine mount out to get it completely rebuilt, painted, and returned. The engine installation included all new hoses, a new turbocharger, wiring, baffles, and control cables. The exhaust system was sent out for a complete overhaul as well. The prop was so close to overhaul that I decided to get that done at the same time. Both the paint and the engine installation were done in Salinas, California, by T&P Aero Refinishers and Airplane Company, respectively. I could not recommend them more highly. I have been disappointed by other aviation shops before, but their attention to detail and delivery on time as promised exceeded my expectations. Having them on the same field to work together throughout the process was amazing and necessary to get the job done right.
During the paint process, I had the supporting wing walk structure below the wing skin repaired as it was cracked. I also replaced the fuel senders with new digital ones by CiES. Juan at T&P Aero Refinishers repaired the fiberglass cowling adjusting the fit and finish to the airframe. He also aligned the nose gear doors and the intercooler vents to the cowling. The entire paint process resulted in an amazing shiny plane that gets compliments wherever I go and that’s the reason Juan is booked out for months.
New LP Aero windows were installed including a single piece windshield, which gives me noticeably better visibility over the original factory two-piece wind screens.
The plane I purchased had factory built-in oxygen with ports over every seat. There is one more aftermarket add-on that a previous owner installed that I use on almost every flight — speed brakes. I can’t tell fellow Turbo Arrow owners how effective they are when ATC dumps you into an airport that requires a steep descent.
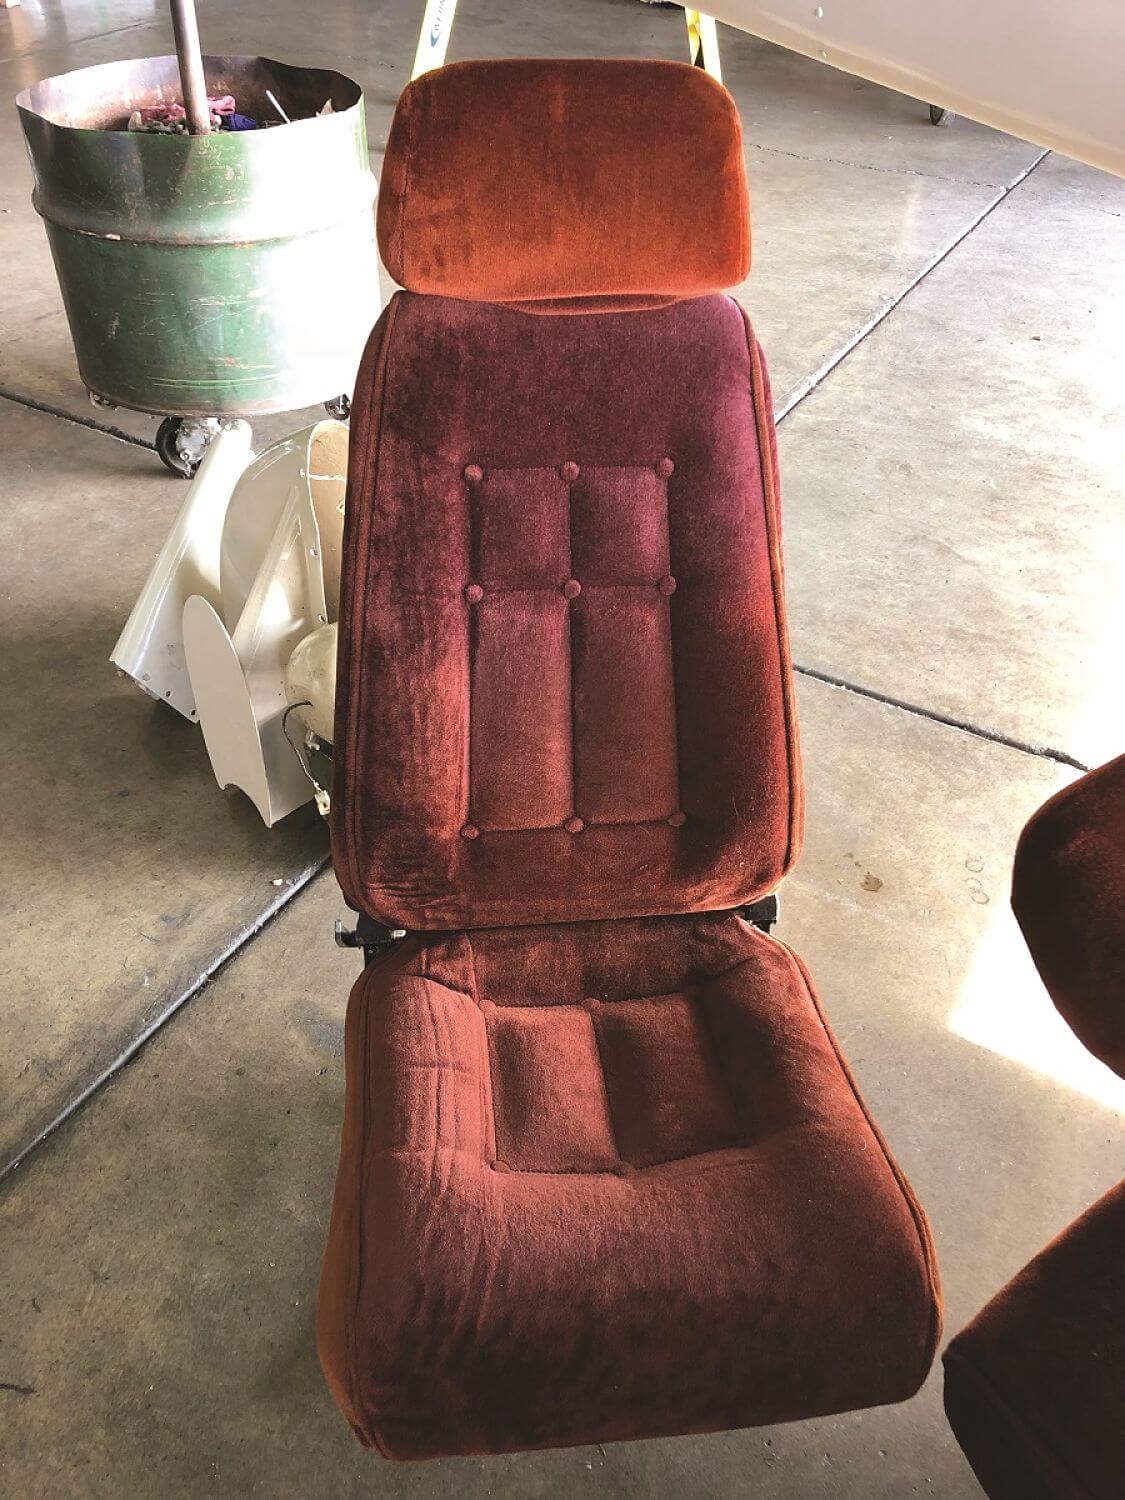
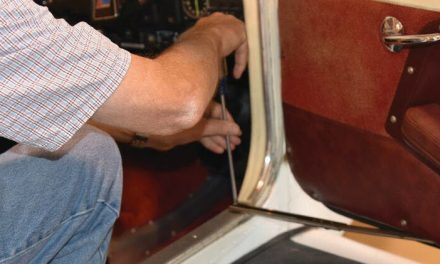
The last step was the interior. It had the original maroon velour interior from 1980, which I think Piper thought was cool back then. I started out thinking I could do some of the interior myself since I had spent so much on the engine and panel. I purchased all the plastic pieces myself and painted them with SEM Super White. I then sent all the seats, carpet, and side panels to be completely redone with fine Corinthian leather by Ron at Aviation Creations in Scottsdale, Arizona. He shipped them back to me when they were done for me to install. In the meantime, when the windows were out during paint, I had a local interior installer, Jeff Belardi of Belardi Interiors come over from Watsonville to re-cover the glare shield and dash. After speaking with him, he convinced me that the installation of the interior is a bigger job than I thought it would be, so I hired him to install all of it including all-new FAA-approved fireproof insulation. Boy am I glad I did that as they did a fantastic job. He even had new thresholds custom made for the front door and the baggage door. I think everything looks better than new.
Now that the project is done, at least as done as any airplane ever is, all I have to do is fly it. This project resulted in a fast, high-performance, high-altitude, newly painted airplane with a perfectly balanced smooth-running engine and an interior that smells and looks new for less than half the price of a new plane. Would I do this again? You bet.
This article originally appeared in the February 2020 issue of PIPERS.

