
This Owner-Assisted Work Will Help Keep Your Belly and Cowlings Clean
By Mike Jones
Piper Editorial Board
Does the belly of your airplane have that greasy black oily look? Ever open the cowling to find much the same inside? When learning to fly on rental aircraft, did you perhaps think this was typical of airplanes in general?
Caring for my own airplane and looking at many others in maintenance, I discovered early on this mess was anything but normal. Well, old radial engines might be an exception! Many well-cared-for aircraft are squeaky clean, both under the belly and under the cowl.
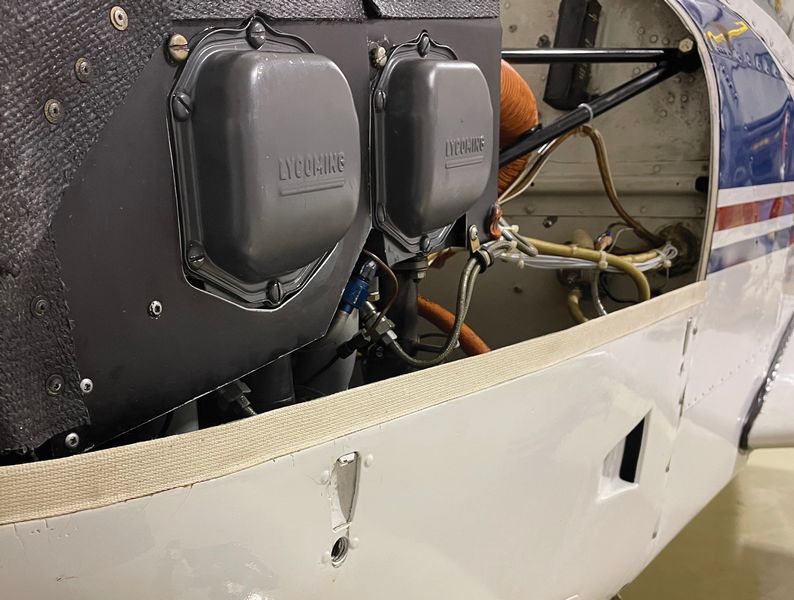
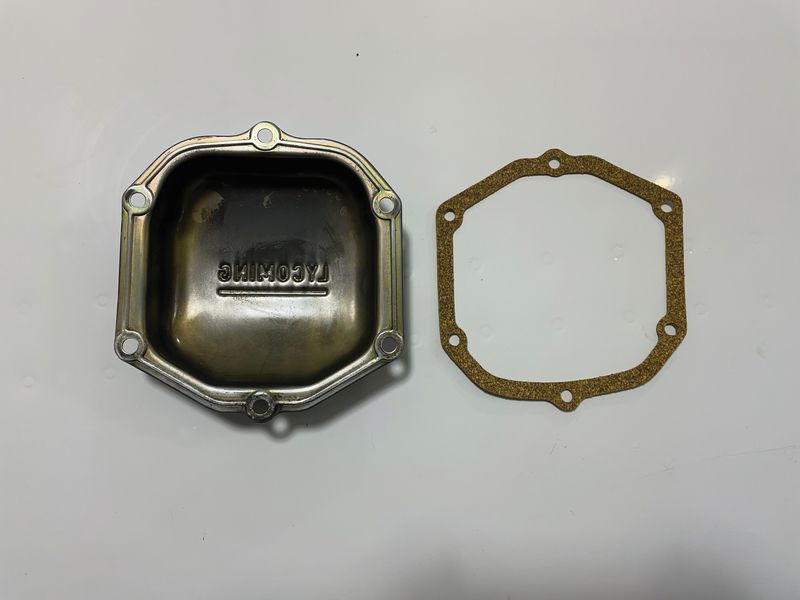
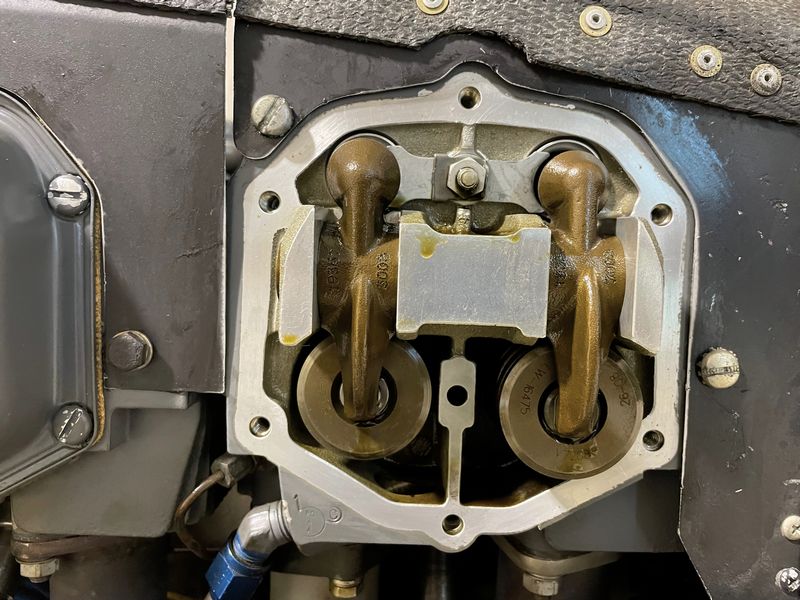
One source of the oily mess are those pesky valve covers; sometimes referred to as “rocker box” covers. They provide access to the rocker assembly at the top of each cylinder. The rocker arms open and close the exhaust and intake valves in time with the camshaft of the engine.
The rocker assembly is bathed in oil, and the oil then returns to the main sump through an oil return line. The cover, held in place by screws around its perimeter, is sealed with a gasket to keep oil from leaking out, dripping, and being blown everywhere by prop wash and ram air cooling.
The next time you have the cowling off, run a finger around the lower edge of each valve cover and see if you have any leakage. What you do not want to see are drops of oil suspended below the lowest point on the cover! What to do if you see oil? As we discuss a solution, I will be using my own Cherokee 180 with its Lycoming O-360-A4A as an example. Procedures are similar for other models, but the details will be specific to your engine.
This article is being offered free for a limited time to email newsletter subscribers. To read more articles like this that are available to members only, join the Piper Owner Society today.
Getting Started to Fix Leaky Piper Valve Covers
If you have oil leaking from around your valve covers, a first step would be to check the screws to see if they are loose. While these screws do have integral lock washers, over time, from continued heating and cooling of the engine, they can become loose. How tight should they be? That is a very important question, but for now, resist the temptation to quickly tighten these screws with your “calibrated wrist” and handy yet worn-out screwdriver, especially if you have silicone valve cover gaskets. Let me explain.
Unlike traditional cork gaskets, which are fairly thin, some silicone gaskets are rather thick. You can warp the valve cover if tightened down without the benefit of a properly set torque wrench. Once covers are warped, it is very difficult to get a good seal all the way around the cover, and they will leak. Newer silicone gaskets of improved material are said to be better in this regard, if set with proper torque. In addition, the screw slots in the Lycoming rocker box cover are very shallow, and the screw is soft aluminum. If the screwdriver blade does not fit the screw exactly, there is a good possibility it will slip and permanently ruin the slot. It may then be impossible to achieve proper torque because the screwdriver blade will slip out of the screw before proper tension. The correct solution at that point is to replace the screw and use the proper tool!
Degreasing a plane’s belly. What do you use? Join the conversation here.
Changing Leaky Gaskets
So let’s see exactly what it takes to change those leaky gaskets. Of course, this falls outside of an owner’s allowed preventive maintenance, but if you have a good working relationship with your A&P, it is possible to do this work under their supervision, if you wish. If you prefer to leave the work to the shop, you will at least understand the time and process involved, which for me, usually helps justify the final bill.
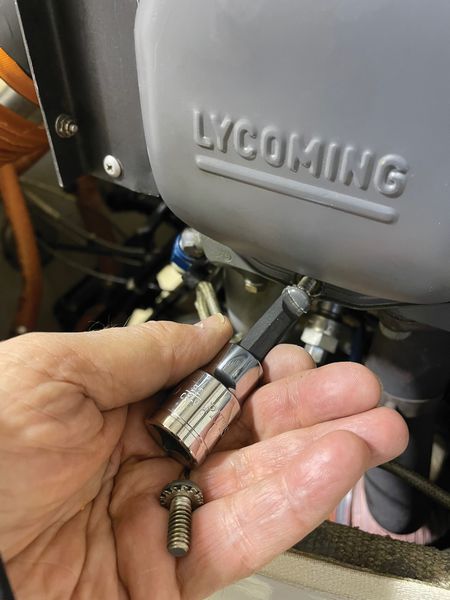
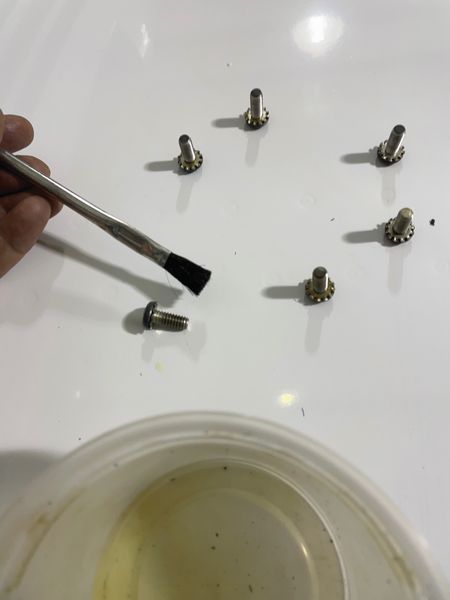
Before removing anything, have the proper tools and replacement gaskets for your engine at hand. Proper tools mean a torque wrench covering about a 30 to 60 inch-pound range and a socket driver bit that exactly fits the soft aluminum pan head screws common on Lycoming engines.
Not finding one off the shelf? You can prepare one of your own by starting with a generic socket driver bit of the correct width. Carefully grind the thickness of the blade for a good tight fit in the screw slot. It is very important to keep both blade surfaces parallel to each other and not wedge-shaped. If wedge-shaped or not fitting to the bottom of the screw slot, torque will force the blade out of the slot and you will ruin the screw.
Starting with a Harbor Freight set of half-inch driver bits, I had to make two before I had the correct profile, with the help of a Dremel tool, abrasive disk, and safety glasses.
Removing the Cover
It’s time to remove the screws from the valve cover. It is unlikely the cover will just fall off, but just in case, be prepared to catch it. More likely, you will need to gently separate the cover from the cylinder by tapping with a plastic or wooden wedge to avoid damaging the cover or the cylinder mating surface.
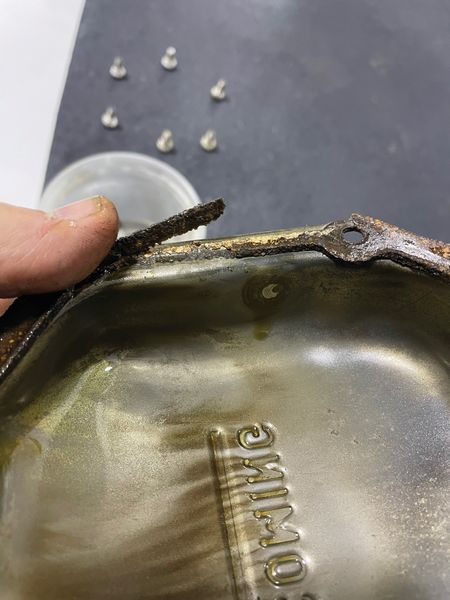
You may find that some gasket material sticks to the cylinder and some to the cover. In any case, each surface must be thoroughly cleaned of old gasket material. Here is where silicone gaskets have an advantage, as they will usually come off in one piece.
Removing the Gaskets
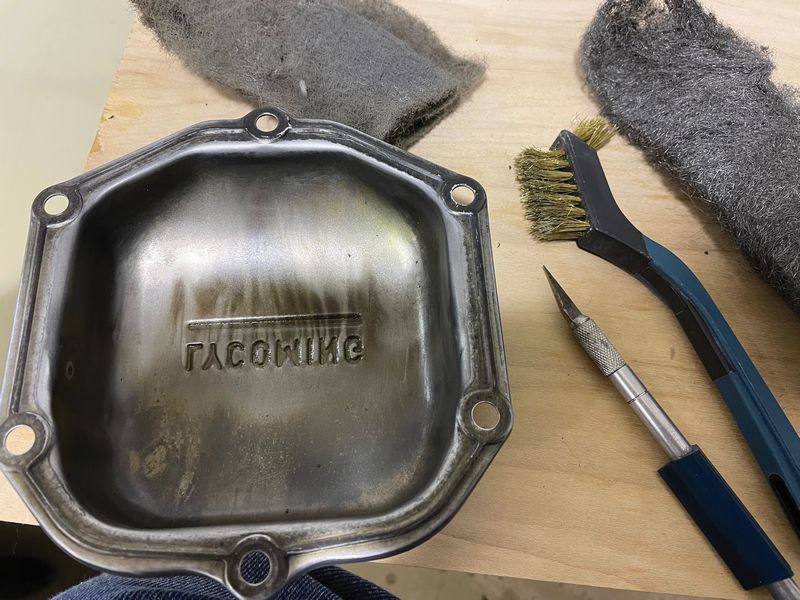
Use a solvent such as lacquer thinner or methyl ethyl ketone (MEK) to remove all traces of old gasket material. If you have been using cork gaskets, they are probably well baked on, and it may be necessary to use a combination of:
- A soft brass bristle brush
- Some steel wool on the cover (the cover is steel)
- A very fine Scotch pad
- In difficult cases, a razor blade held gently very flat to the surface to remove stubborn areas.
Be gentle with your cleaning and try not to gouge the cover or cylinder-mating surface, though light surface scratching may be unavoidable. This is the time-consuming part of the process, so proceed carefully. While you are cleaning, don’t forget the screws. Clean the threads with some solvent, as well.
Degreasing a plane’s belly. What do you use? Join the conversation here.
Installing a New Gasket
In most cases, you have a choice between a cork gasket or a silicone gasket. My own personal preference is cork. The choice is yours. If you have a Lycoming engine, as in my example, part numbers and proper torque values for both gasket types are specified in Lycoming Service Letter No. L272A, available online. When all surfaces are clean and dry, it is time to put on the new gasket.
How is your spatial perception? At first glance, it may appear that the shape of the gasket is symmetrical, but it’s not. Be sure to turn the gasket to match the shape of the cover! Place the gasket on the cylinder, center the cover over the gasket, and start all of the screws by hand. Then, using the torque wrench and proper driver bit, gradually snug the screws in a crisscross pattern to evenly seat the cover.
How tight should they be? Let’s answer that important question now. According to Lycoming Service Letter No. L272A, the proper torque for a cork gasket is “50 in.-lb. (5.6 Nm)” and for the newer silicone gaskets “35 in.-lb. (4.0 Nm).” This document also calls out the proper gasket part numbers. If you do not have a Lycoming engine, consult the proper service literature for your specific engine. Set the final torque and work your way around the cover until each screw is at the proper tension.
An A&P sign-off for return to service in your logbook will complete a job well done! After several heating and cooling cycles, you may wish to go around the screws again to check for proper tension.
Enjoy your leak-free rocker box covers and a cleaner airplane!
Mike Jones is an instrument-rated commercial pilot for both fixed-wing and helicopter, a remote pilot, and current CFI. He has enjoyed flying his 1966 Cherokee 180 between its 36 annual inspections. He also ran a webinar for Piper Owner Society members — watch “A Taste of Homebuilding Through an Autopilot Install” at piperowner.org/webinars.

This article is being offered free for a limited time to email newsletter subscribers. To read more articles like this that are available to members only, join the Piper Owner Society today.


