

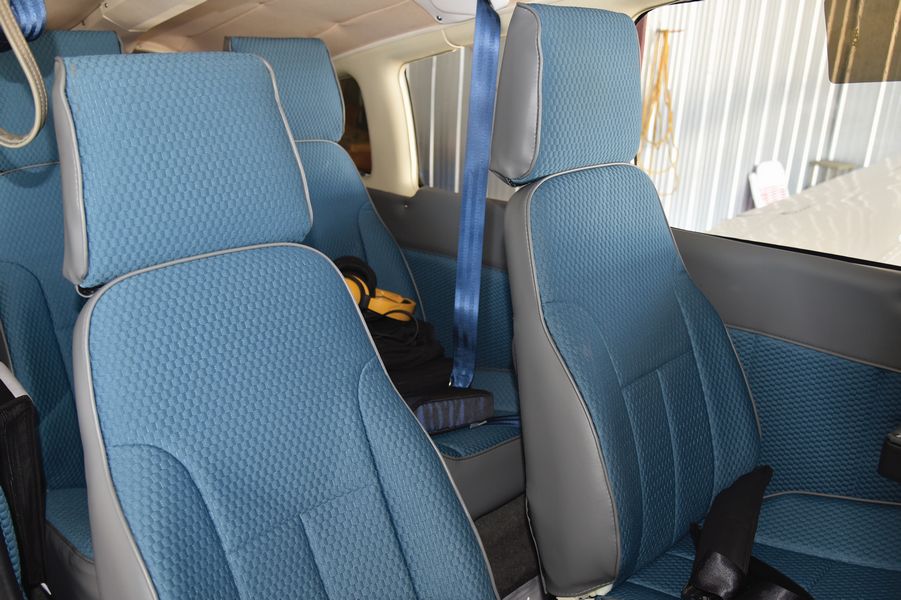
Here’s how to replace your Piper seat covers, which was one step in my Arrow’s long restoration. Like all products from Airtex, they were of very high quality, if not perfect. At this point in the project, I was running out of enthusiasm, but with a little support from my wife Carrie, I carried on.
While this is my fifth Airtex kit, I hadn’t done one since 2005 on my Seneca. And just so you know, I saw my old Seneca recently, and the Airtex interior is still in it — I would rate it at an 8! The carpeting is in need of replacement, but the Piper seat covers and wall panels look new. And I noticed that Airtex either changed the design of the seats over the decades or my new Arrow seats are different than the Seneca’s.
Even though this is my fifth Airtex interior kit, it still took me 12 hours to do the first seat and about six hours each for the next three seats. As always, utilize my Piper Restoration Rules of Thumb and take pictures constantly, especially early in the process, so you can refer to them later.
Step 1: Remove the Old Piper Seat Covers
We’ll skip the step, in this tutorial, about removing your seats and skip ahead to what to do after your seats are in your workshop.
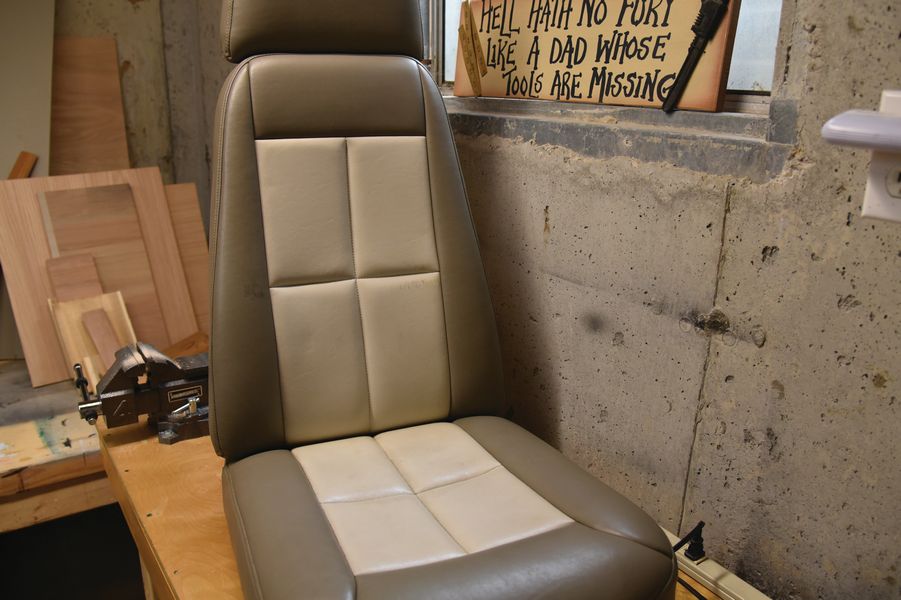
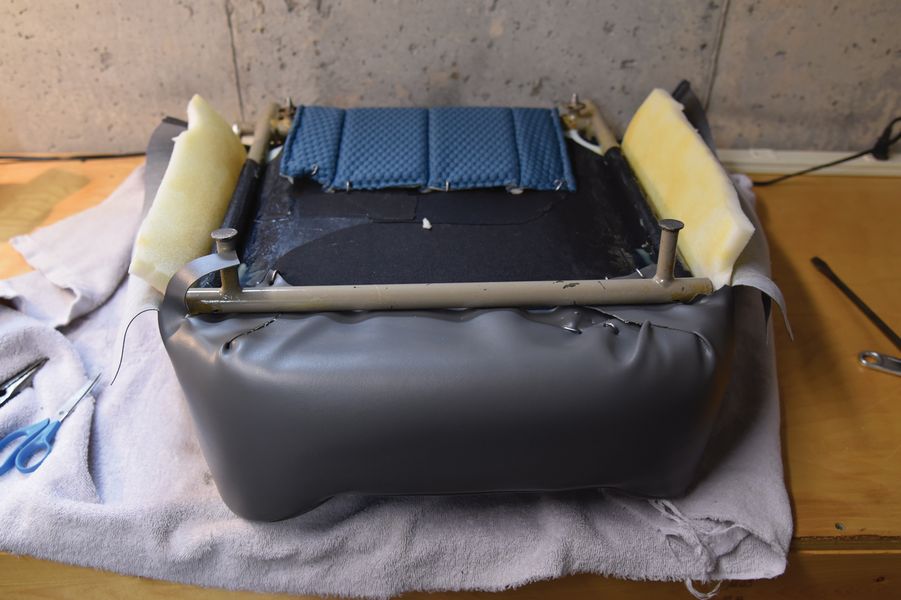
First, with the seat on my workbench (Picture A) where I could stand (gratefully), I removed the two hinge bolts that hold the seat back to the seat bottom (Picture B). This project is much easier to do with them separated. Unfortunately, I didn’t learn this until the second seat, but now you know.
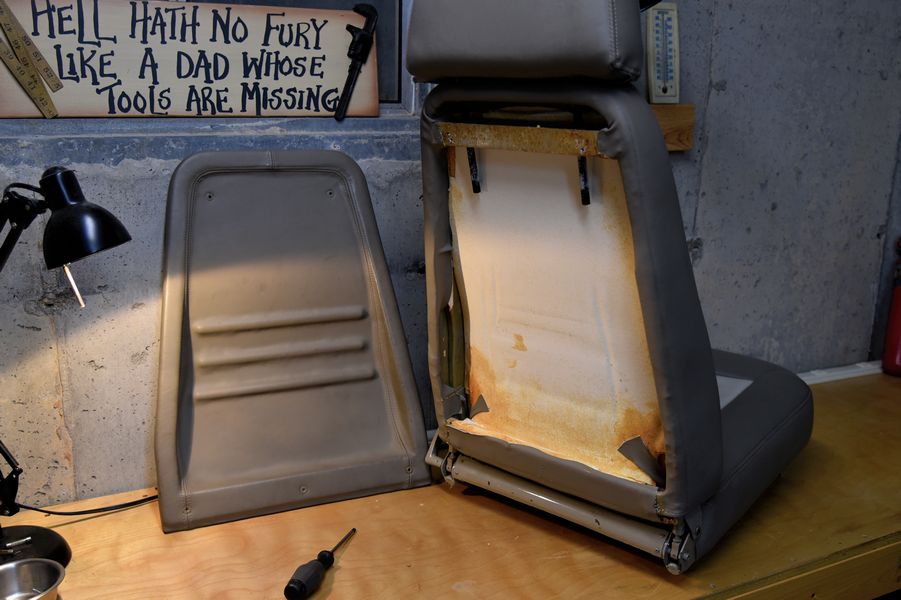
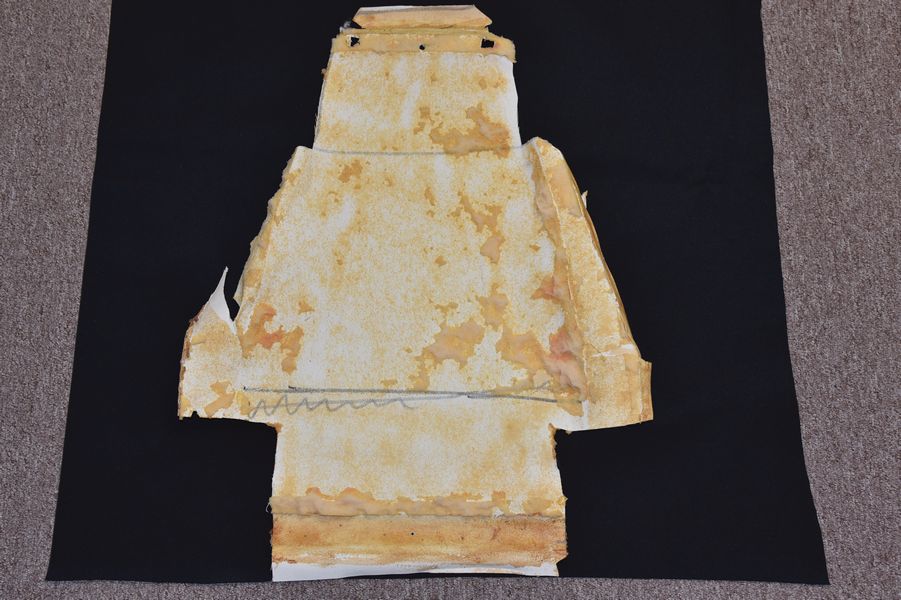
With the seat back on the workbench and the seat bottom on the floor, I removed the back cover of the seat back. As I recall, there are six screws and the back cover pops off — easy as pie. This is the only part of the seat project that’s easy as pie, however.
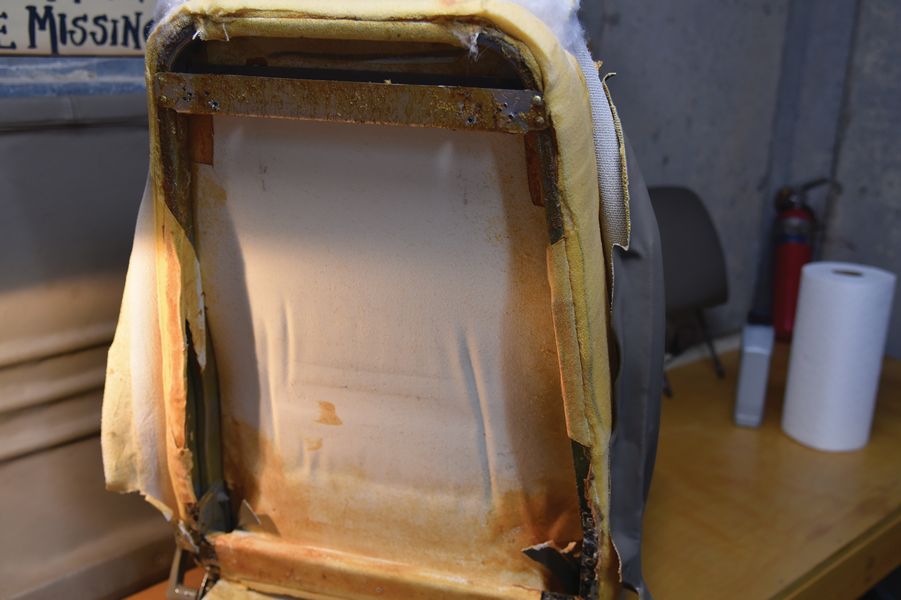
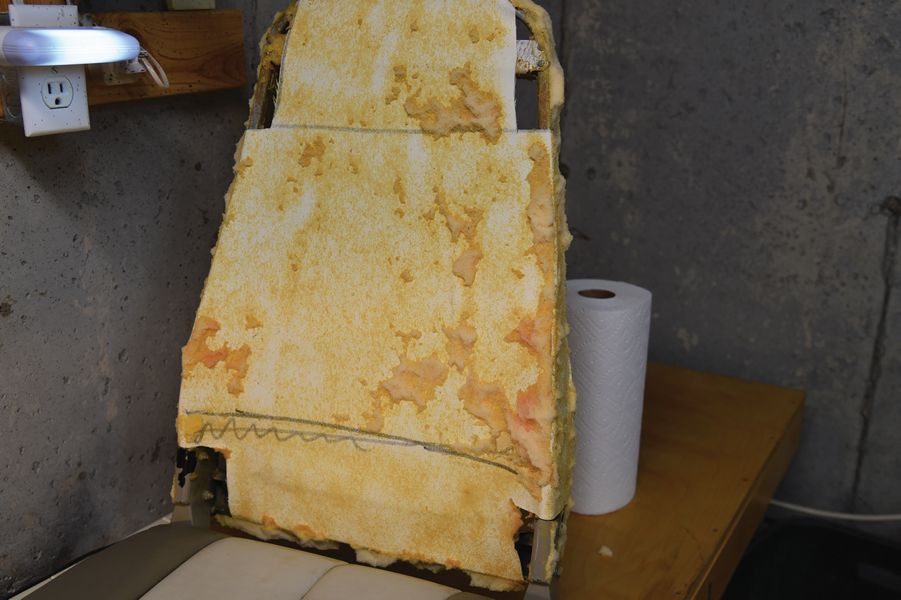
Next, there are two assemblies on both the seat back and the seat bottom (Picture C). First, carefully remove and discard all of the old foam rubber, leaving the fabric webbing on the seat frame (Picture D). This is very important. You won’t need the foam, but you will want to use the fabric webbing for all your seats as a guide later.
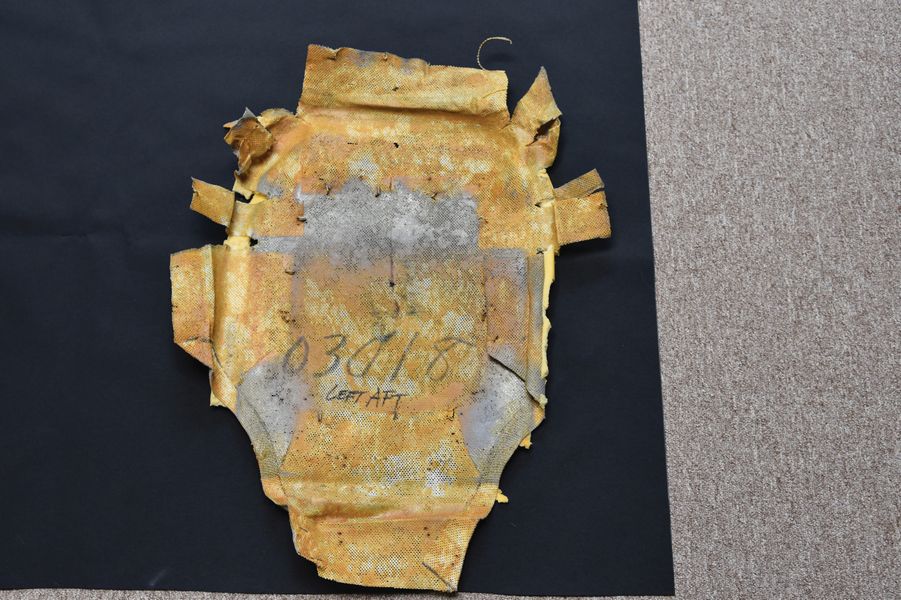
You will be able to use pliers to peel off the webbing. You now have the webbing pattern for all four seat backs, as they’re all the same (Picture E). When you disassemble the other three seats, you can remove the foam and webbing at the same time, saving significant time.
Now, on to the seat bottom. With the seat bottom turned upside down and a pliers or two handy, you will need to remove all the fabric hooks holding the seat bottom fabric to the webbing. This is challenging — I injured a finger while doing this, so be careful. With all the hooks out, carefully remove the seat bottom and foam from the webbing. You can discard this, as you won’t need it anymore. Then carefully peel off the seat bottom webbing and save this. As above, this webbing is now your pattern for all four chairs (Picture F). When you remove the foam on the other seat bottoms, you can remove the webbing at the same time.
Step 2: Strip & Fix the Seat Frames
Next go outside, or into a hangar or garage with good ventilation, and clean the adhesive contact cement off the frame with acetone and paper towels. I used two rolls of paper towels per seat. You will need to do a very good job of cement removal, although it doesn’t have to be perfect. This is labor-intensive, smelly, and hard on your hands, so wear safety gloves.
After the seat tops and bottoms are clean, you will need to inspect each seat carefully for damage and needed repairs. My back seats were perfect, top and bottom. My front seat bottoms were also perfect, but both front seat backs were cracked. I’m lucky that my EAA Chapter 838 has a fully stocked shop, so I went there and cut scrap aluminum doublers, drilled for rivets, and put doublers on my seat backs. If you don’t have that capability, have your A&P do it. If there’s a crack, this is the time to take care of it. If you wait until later, you’ll have to completely disassemble the seat back and reupholster it again. And next time the fabric color might not match!
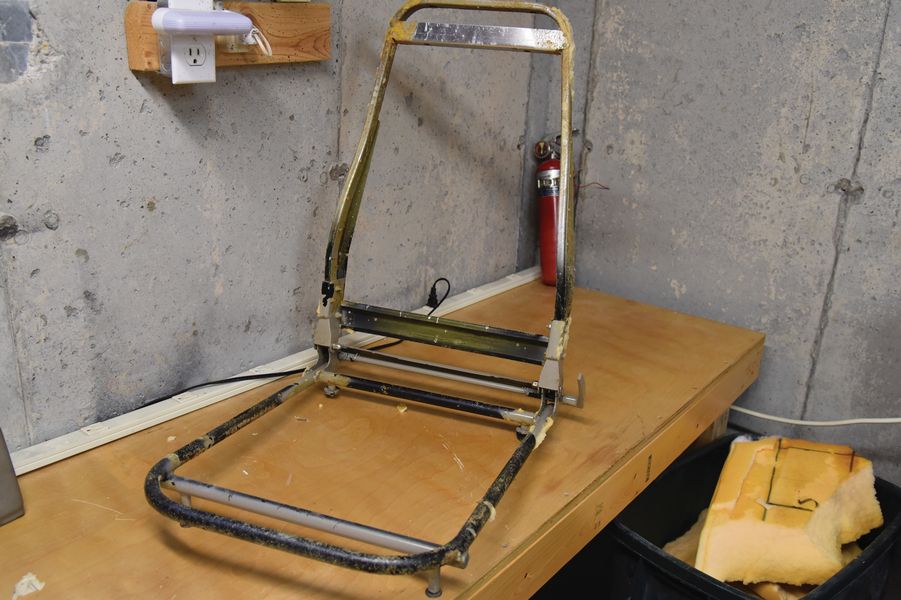
Step 3: Install the Seat Webbing
You now have a seat frame (Picture G), and it’s time to begin reassembling your seats using your new parts. First you’ll need to install the new seat webbing. This is easy now that you have the top and bottom patterns (because you saved them from above, right?).
Grab the bottom pattern and the new webbing. It’s black fabric and very thick. Put it on the floor with the pattern on top of it. Spread the pattern out on top of the new fabric. Cut a new pattern about 10% bigger than the old fabric. Go over to the seat bottom and put the old fabric on the seat. See how that works? Now you can glue the new fabric in place, trimming it with scissors to fit.
The contact cement is smelly and toxic, so you should do this outdoors or in a ventilated area. You put the cement on the fabric and the metal bars of the seat bottom, and you let them dry for 10 to 15 minutes. At that time, you affix the fabric to the frame. You only get one chance at this — that’s why they call it contact cement! Do the front of the seat first. Wait an hour or so and then do the back of the seat.
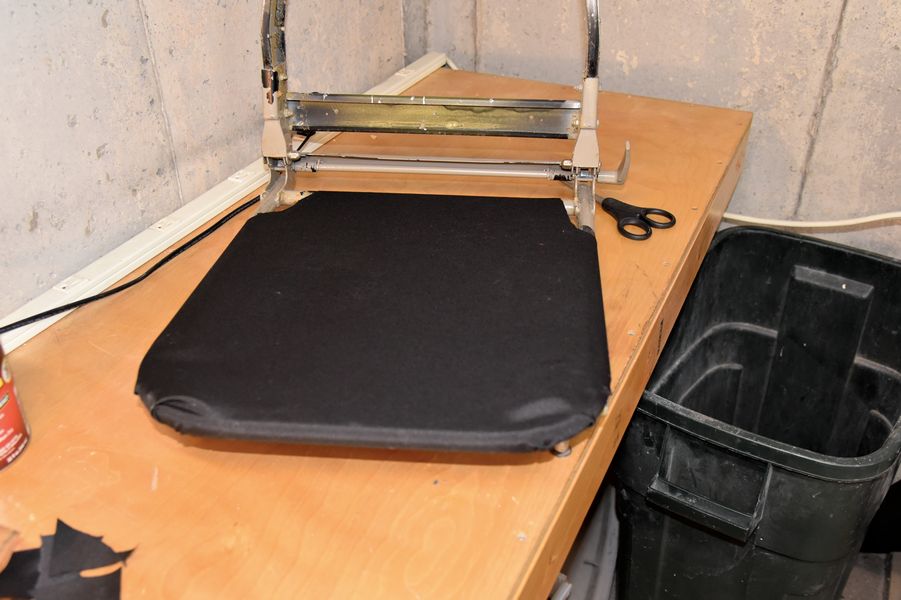
The fabric webbing should be taut across the seat bottom (Picture H). Then do the sides, trimming with the scissors as necessary. When the seat bottom webbing has been completed, leave it overnight to fully dry.
The seat back webbing is installed the same way. It’s time-consuming but not difficult.
Step 4: Install the Foam
Now let’s put the foam on the seats. Your supplier will have instructions for this, and likely they’ll have online help for Piper seat covers and headrests, as Airtex did for me. When you purchase these items, an instruction sheet will come in the box explaining how to access the online help. In my case, Dodd Stretch, the owner of Airtex, was always there and gladly spent time on the phone with me.
Get a seat bottom foam and cover — they’re already assembled — and lay it on your workbench upside down (that is, the top side of the seat bottom is facing down). Lay the seat bottom in the foam. See how it fits? While you’re moving it around a bit, make a mental note about how it fits. When you apply contact cement to the webbing and the inside foam, you will need to let it sit for about 15 minutes. When it’s tacky, you will put the seat bottom into the foam. It will glue on contact (hence, contact cement), and this will require that you do it correctly the first time. You won’t be able to move it around once the surfaces touch each other. Practice doing this without the cement until you get it right.
When you’re ready, apply the contact cement to both surfaces, wait 15 minutes, and set the seat bottom in the foam. Reach under and press the webbing against the foam to make sure it is sticking everywhere. If you need to apply pressure to the two glued surfaces, put a couple of scrap boards on top of the webbing and put some weight on it. I used a pair of 15-pound dumbbells on top of the boards to maintain pressure. I took the weights off after about six hours and left it overnight. This worked perfectly.
Next, you’ll notice that there is enough foam that is folded down around the base of the seat foam to fold up. So fold it up. You’ll need to cut this foam in appropriate areas around the metal seat frame so that it fits around the seat frame and can be glued on the webbing. This is the bottom of the seat (although it is upside down right now). Each piece of cut foam will need to be cut, trimmed, and glued. When it’s glued, I put a scrap board and a dumbbell on it, again for six hours. I did a couple of sections at a time until it was all done.
Step 5: Fasten the Fabric
Start on the back seats here, because you’ll get better as you go along.
Seat Bottom
Note that the fabric is still folded down around and underneath the seat top (underneath the seat). After six hours or so, the weights and boards can be removed from the foam and the fabric and vinyl (if that’s what you selected) can be folded up around the side of the seats (Picture I).
Starting on the seat bottom, it will require a fair amount of hand strength to get this taut around the foam so that there are no folds or creases. Again, you will need to cut and trim the fabric in a fashion similar to when you cut and trimmed the foam, as it will be attached to the webbing on the bottom of the seat. However, you will not use contact cement when you do this.
Instead, the seats come with a bag of steel hooks and a device that looks like pliers. The hook sits in the pliers, and you pull the fabric over the webbing with enough force to make sure that there are no folds or creases in the side of the seat. Push the pliers with the hook in it into and through the fabric, into the webbing, and squeeze hard, hard enough that your hand hurts. You will have to go all the way around the seat bottom cutting, trimming, and hooking your way around.
Here are a few tips as it relates to this part of the project:
- Look at the old seat bottom that you removed to see what it looked like.
- You took lots of pictures before you took the seat apart, right? Look at those, too.
- Look at the online help info from your supplier.
When you’re done, the seat bottom will look magnificent! The first one may not be perfect; don’t sweat it. It’s in the back, and no one can see the sides or underneath anyway. When you do the second seat bottom, it will be much better.
Seat Back
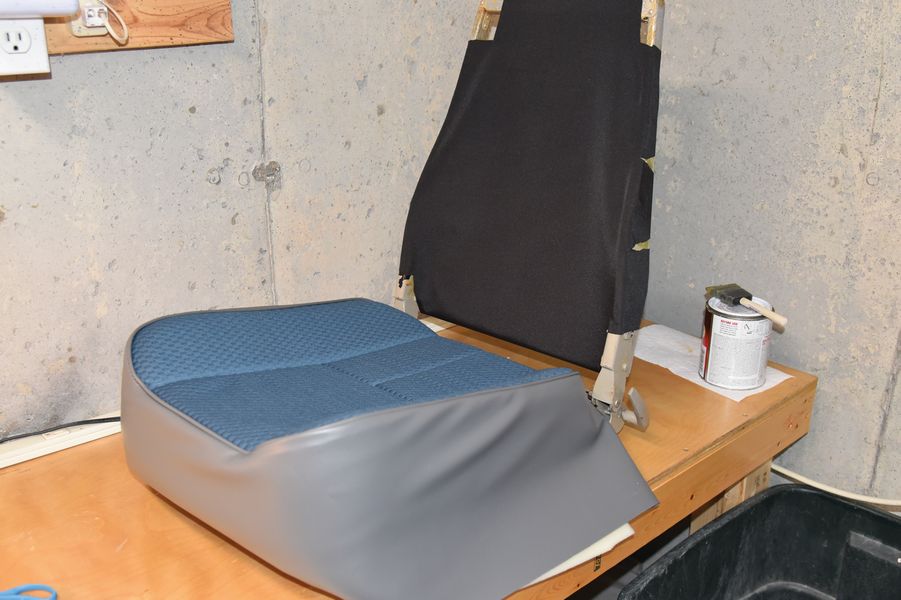
On to the seat back. If the seat bottom gave you fits, you’re in good company. The seat back will give you fits, too. The webbing is done (Picture J) and if any repairs were needed, they’re done, too, in your previous step.
So put the foam seat back assembly on your work bench and set the seat back into it (Picture K). Just like the seat bottom, you’re going to need to practice putting the back in properly because you’re only going to have one chance to do it correctly. And you’re going to need to put scrap boards or something under the seat back, because the center will sag. It needs to be flat or it won’t stick to the webbing properly.
Once you’re ready, apply contact cement liberally to both the webbing and the foam. Wait 15 minutes and put the seat back in. Press down and make sure that the webbing is actually touching the foam. You can put a couple of pieces of scrap lumber on the webbing with a couple of weights and come back in six hours. Remove the lumber, pick the seat back up, and check it out.
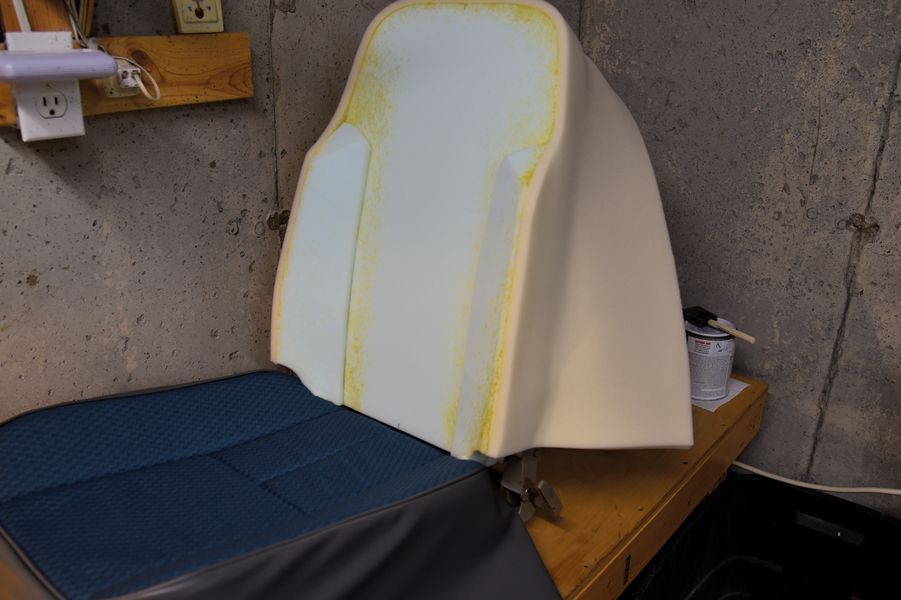
Looks great! The new foam is amazing, and you’re going to love these seats! Roll up the foam from the sides of the seat back. This foam is going to need to be cut, trimmed, and glued to the webbing, just like the seat bottom you already did.
One section of the foam at a time, apply contact cement to the foam and webbing, wait 15 minutes, fold over the foam, and press onto the webbing. Put a piece of scrap lumber on it with a weight and leave it. You can do another side or the entire seat back if you have enough scrap lumber and weights. Again, check the old seat back and your photos for guidance on this. At this point you will need to locate and cut the headrest holes so that you can insert the headrests later. I used a razor knife to cut the holes, two on top and two underneath.
After waiting a day for everything to cure, the seat back cover can be slid over the seat back (Picture L). This is very difficult if you do it incorrectly and only moderately difficult if you do it correctly. First slide the seat cover over the seat back as far as it will go, which is probably less than a foot. Then fold up the bottom of the seat cover while it is on the seat back. While squeezing the foam, you should be able to slide the cover down far enough that the top of the cover hits the top of the seat. This will take strong hands, effort, and patience. When this is done, you can unroll the bottom portion of the seat cover. Now we need to do some gluing.
If you look at the front of the seat cover, it’s stretched taut across the front of the cover and foam. Get yourself a paint-stirring stick and cut off a 4-inch section. Insert the stick into the front of the seat back, creating a tent in the cover. You will need a different kind of contact cement for this. At your hardware store, pick up a can of spray high-strength contact cement. Spray the contact cement liberally behind the seat cover on both the cover and the foam. Do this all over and wait about 15 minutes.
Remove the stick. Put scrap lumber on the seat top and put weights on it. I put two 15-pound dumbbells and two 10-pound dumbbells on the seat back and left it for 12 hours. I came back, removed the weights, and the seat back was perfectly attached to the foam. It was time to finish the seat!
The bottom of the seat cover has Velcro, and it will be a very tight fit requiring lots of strength. You need to squeeze the foam — not easy — and apply the Velcro. When done, the seat back can be bolted to the seat bottom.
Headrests
Next work on the headrests, and there is online documentation for this, too (Picture M shows the finished product). The headrests are easy but require hand strength and a razor knife. You will need to remove the cover and foam from the old headrest. Take a picture, because the interior brackets may have a bend in them. If they do, the bend needs to be in the same position on the new head rest.
After you remove the foam from the old headrest, remove the bracket from the foam. Clean the bracket outside with acetone and make sure the posts are clean, too, or they won’t fit properly in the seat back. Insert the new foam all the way into the new headrest cover. This is a huge effort. Be patient. When it was all the way in, mine was sticking out of the bottom by 2 inches. I had to cut this away with a razor knife. Be careful not to cut the headrest cover! When you do the other headrests, you can cut the excess away before (rather than after) you put the foam into the headrest, now that you know how much to cut.
When the foam is all the way in, you can separate the foam and insert the bracket, being careful to put the bracket in correctly. The bottom of the headrest closes with Velcro. The top of the seat back will need to be cut for the headrest posts. I was able to press on the top of the seat back with my index fingers and feel the hole for the headrest post. I cut there and then used the headrest post to find the other hole. I cut out both with my razor knife, and the headrest went right in.
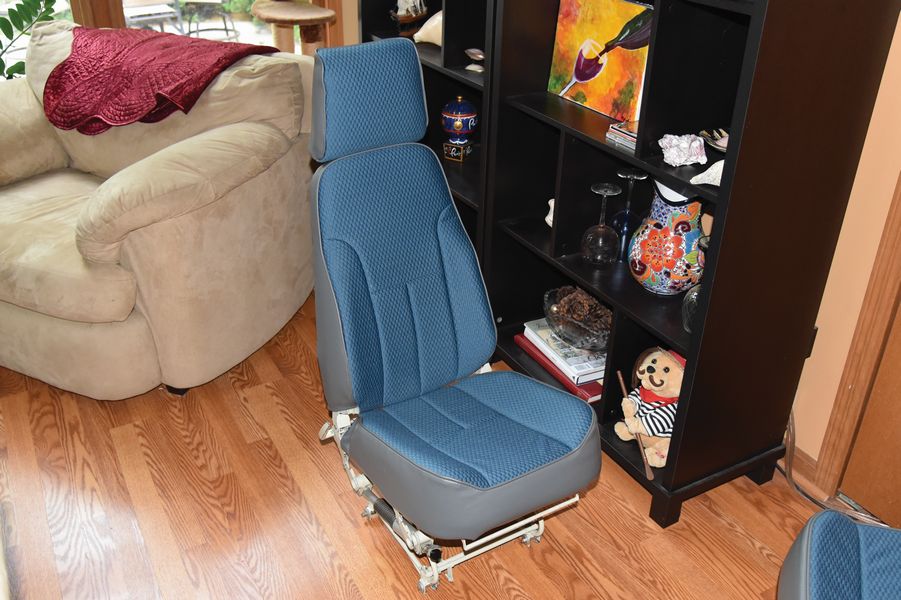
All done! Twelve hours on the first seat, six on each remaining seat.

