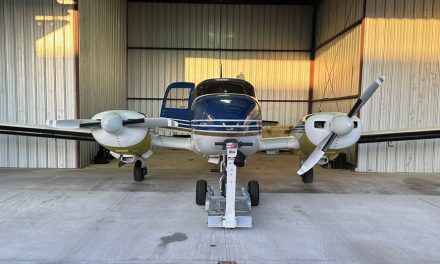
In this installment we’re going to learn how to save money when you get your Piper repainted. Greg Piehl, who lives in St. Petersburg, Florida, with his wife Debbie, spent three years restoring and upgrading their 1959 Piper Comanche 250. After 34 years grounded, the first flight of N6494P took place at Zephyrhills Airport, three days before leaving on a trip to Oshkosh, Wisconsin, in July and August 2021. This is Part 2 of seven parts.
Comanche Restoration Series Part 2: Strip and Paint
Even if you’re not qualified to paint your plane yourself, you can still do most of the work. That is because of a simple fact that anybody who has painted their house or restained their deck knows: “Strip and prep are the most time-consuming part of the paint job,” Piehl said. “If you want to save some time and money, you can do some strip and prep, and even priming, yourself, in advance of a paint shop. (Most plane owners) don’t have the skills, knowledge, or equipment to do the paint job.”
This installment is being provided for a limited time to non-members. Subscribe today to read the entire series, which chronicles:
How to Disassemble and Transport a Legacy Piper
How and Why to Strip Your Plane Yourself Before it Gets Repainted
Restoring the Interior of a Legacy Piper: How You Can Save Money
Comanche Panel Upgrades
Comanche Engine and Mounts: What Happens During an Upgrade
Comanche Reassembly: What a Legacy Piper Looks Like When It’s Taken Apart
1959 Comanche Fully Restored
How to Save Money When You Get Your Piper Repainted
By Rocky Landsverk with Greg Piehl
Last issue, we chronicled the arduous task of getting this previously grounded plane from Massachusetts to Florida. This month, we’re going to discuss the stripping and painting of the entire fuselage, wings, and control surfaces.
Piehl did this at his personal shop. “I have a machine shop and I had enough space available in the shop to do one major component at a time,” he said.
Of course, most plane owners would not be able to do all the work themselves, whether they had a personal shop at their disposal or not. The biggest question as we discuss this area of the restoration is: can or should the average pilot try this themselves?
Piehl is an engineer and has a history of doing such things. He’s not exactly typical. “I’ve been doing this kind of thing since I was 17 or 18 years old,” he said. “Doing custom motorcycle painting, airbrushing, stuff like that. In high school, I had a girlfriend who had a ’67 Mustang. I bought an air gun and sprayed her car. After a bit of sanding and buffing, it actually looked pretty nice. (I wish I had that car today!) So I’ve been doing this for almost 50 years; never as a profession, but I know how to paint.”
Here’s why that doesn’t really matter and why this article is meant for most pilots who are restoring a plane. Even if you’re not qualified to paint your plane yourself, you can still do most of the work. That is because of a simple fact that anybody who has painted their house or restained their deck knows: “Strip and prep are the most time-consuming part of the paint job,” Piehl said. “If you want to save some time and money, you can do some strip and prep, and even priming, yourself, in advance of a paint shop. (Most plane owners) don’t have the skills, knowledge, or equipment to do the paint job.”
Piehl used four colors and added some time and effort to his restoration by executing something we’ll discuss in the photo captions. He didn’t label or sticker anything; he painted everything by getting a stencil created — a reversed cutout vinyl template. Because this was a complete restoration, this plane was going to be disassembled, which (as it relates to prep and paint) is fortunate. “I believe the best time to paint a plane is when it’s disassembled. Don’t disassemble it just to paint it, but you’ll get the best job possible if it is disassembled. That way you can look for damage, corrosion, anything like that,” Piehl said. “I have painted my other planes when they were assembled. But if you’re going to do that, you want to take off everything you can — you want to take off the flight controls, the wing root seals, and you need to mask off the windscreens and windows perfectly — or replace them, as I did.”
That doesn’t mean you should disassemble your plane for the purpose of painting it, but if you’re going to get it disassembled for some other reason (like an exhaustive search for corrosion), strongly consider repainting it then.
There are going to be four colors on this plane: Base white, burgundy, gray, and black.
Quotes in the photo captions from Piehl.
Click on a photo for a popup slideshow “How to Save Money When You Get Your Piper Repainted.”
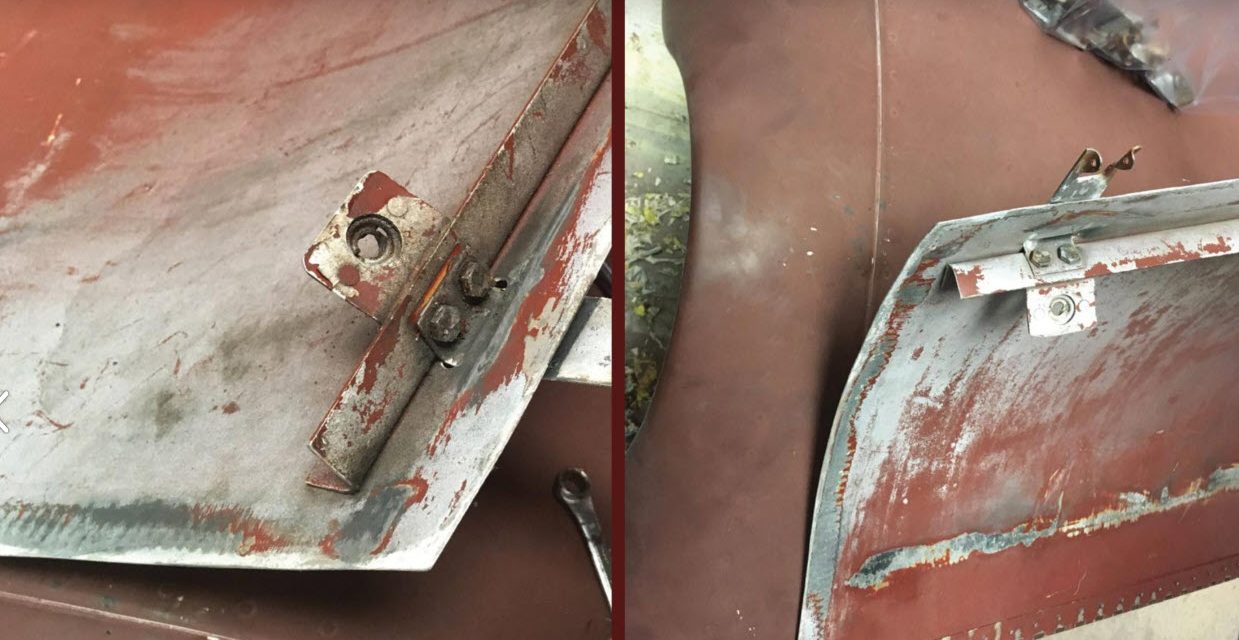
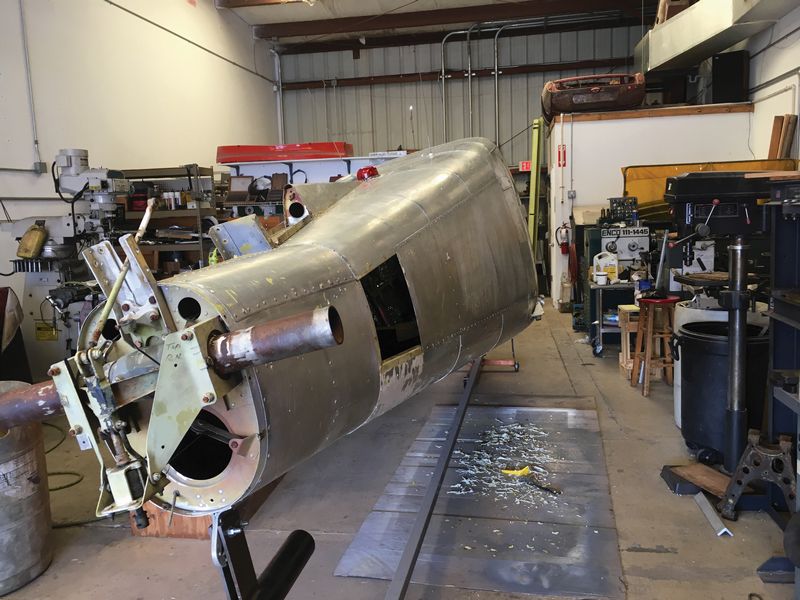
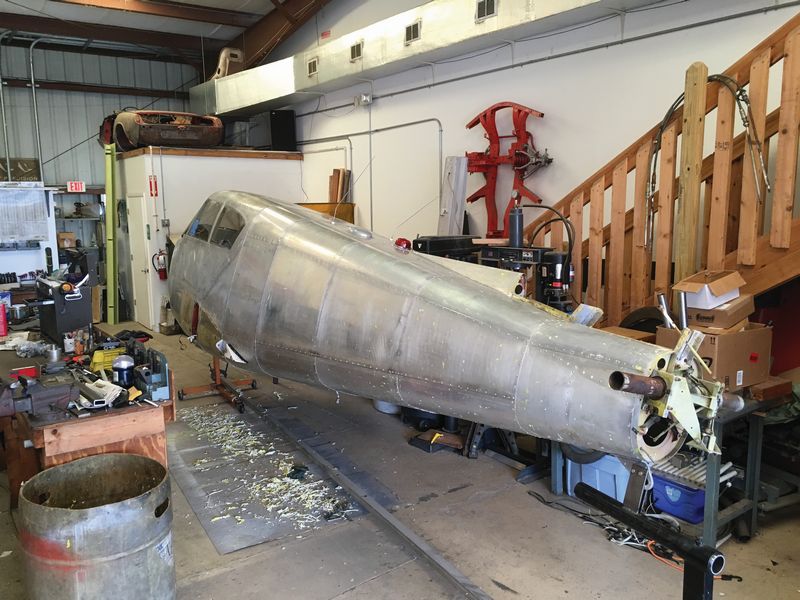
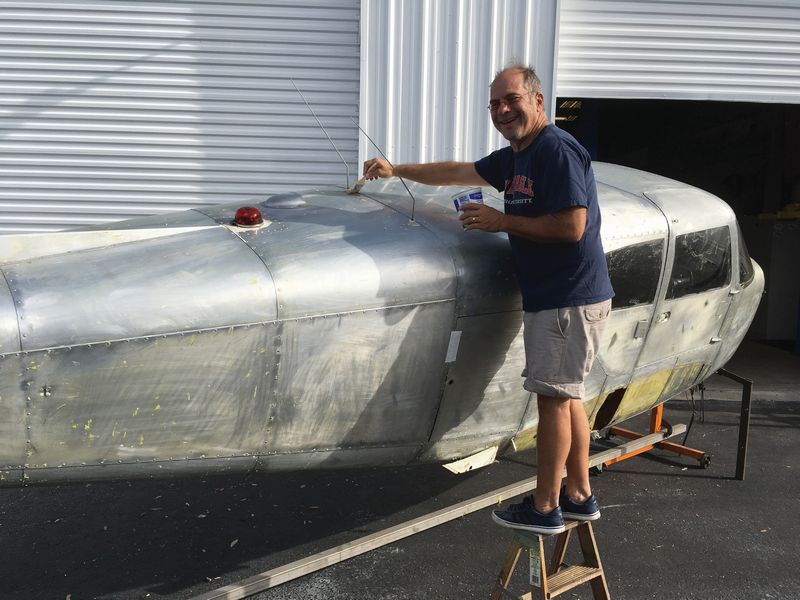
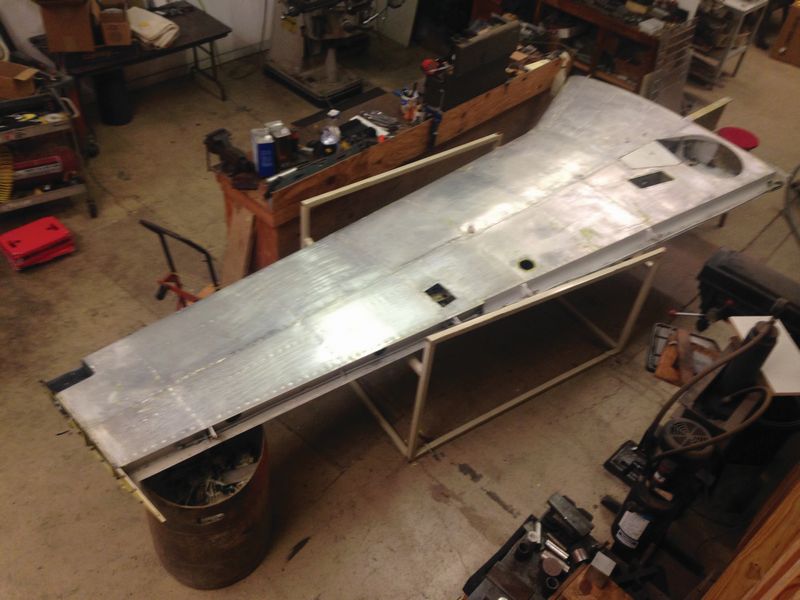
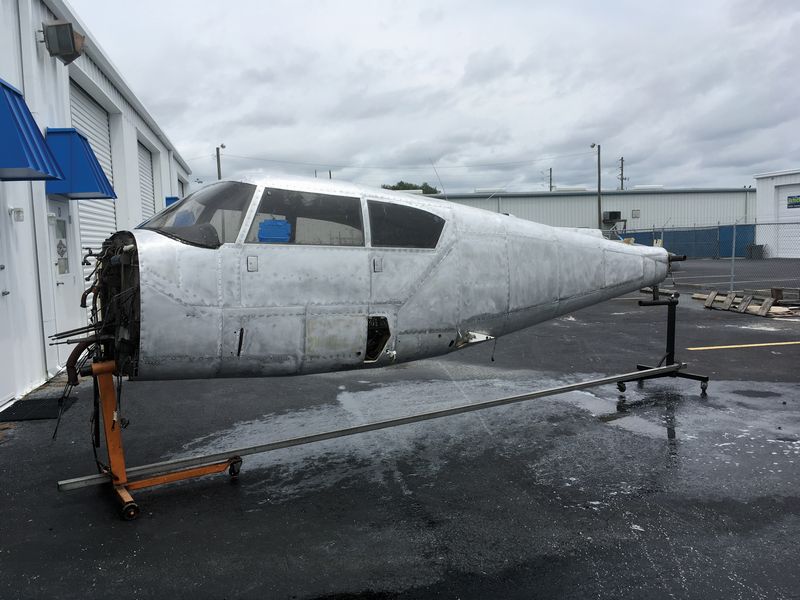
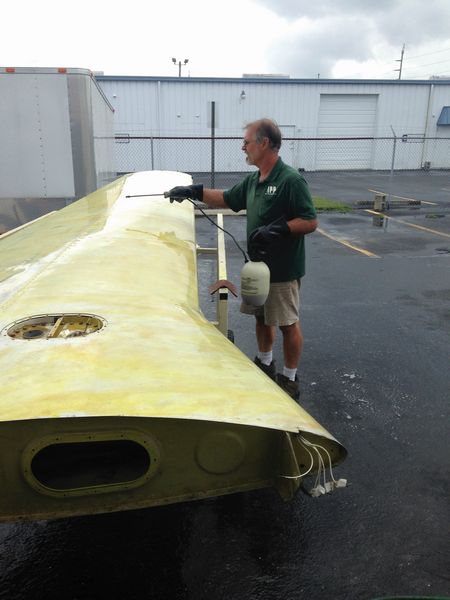
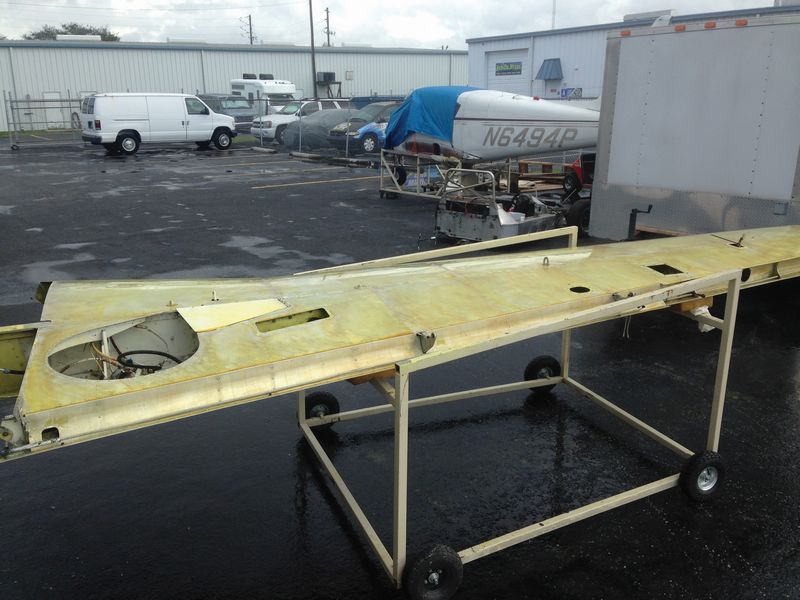
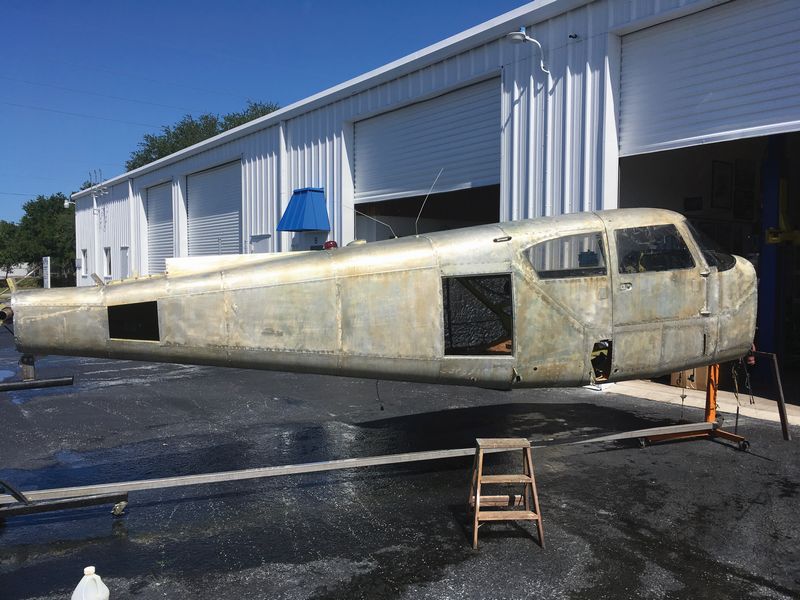
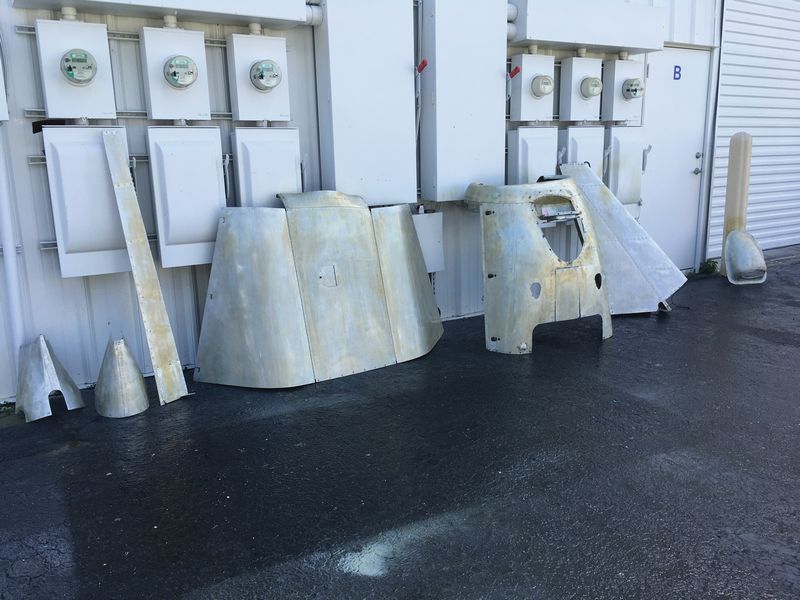
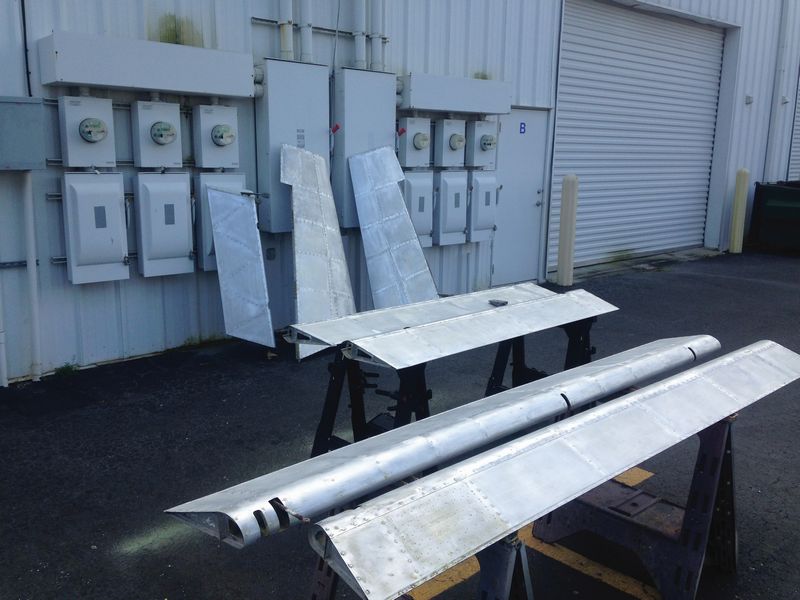
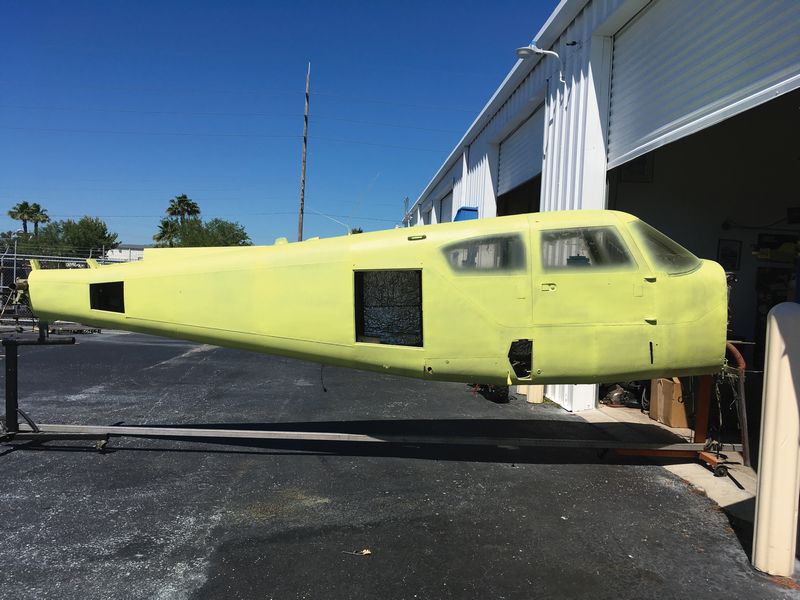
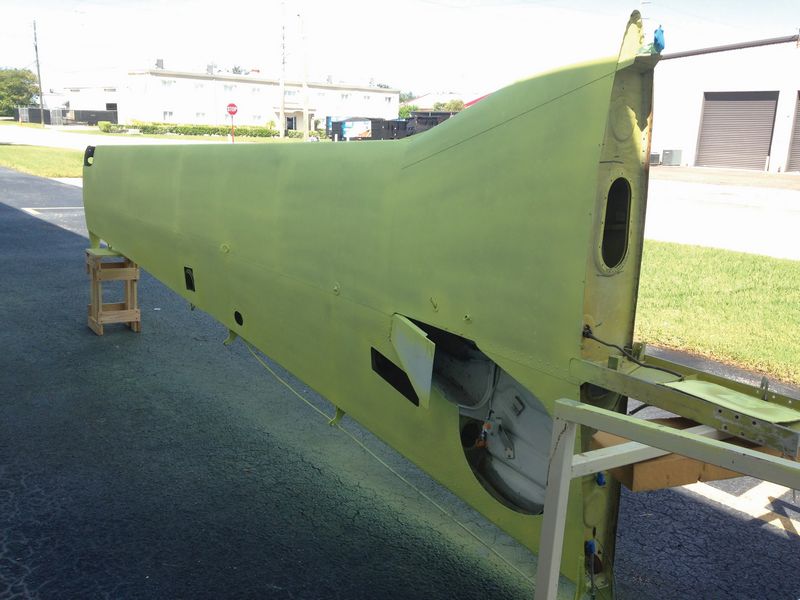
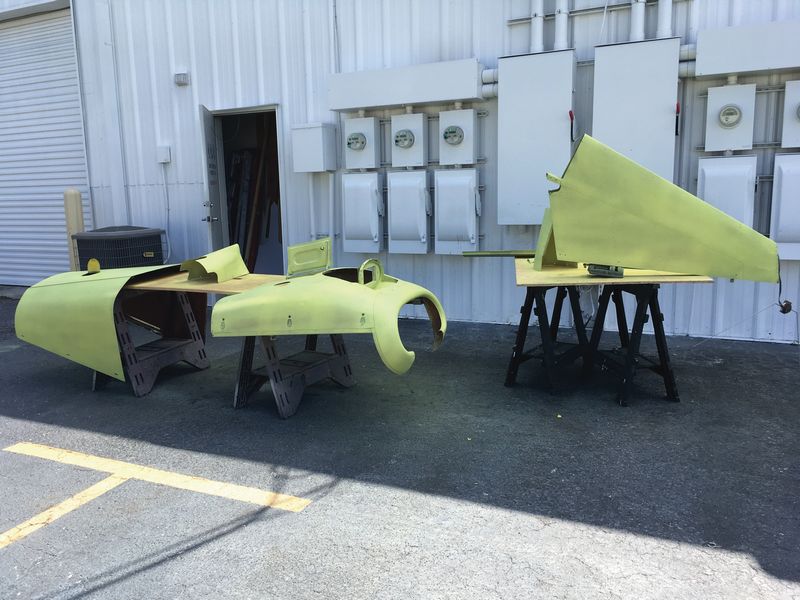
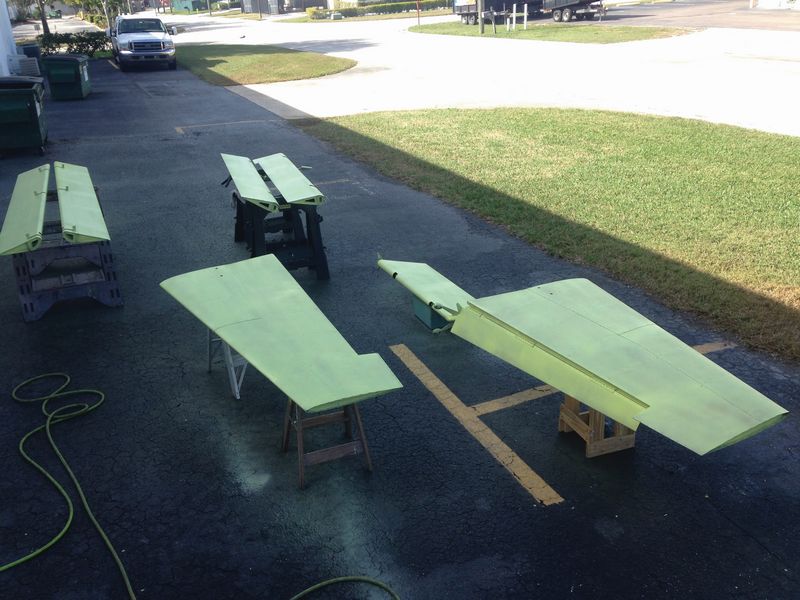
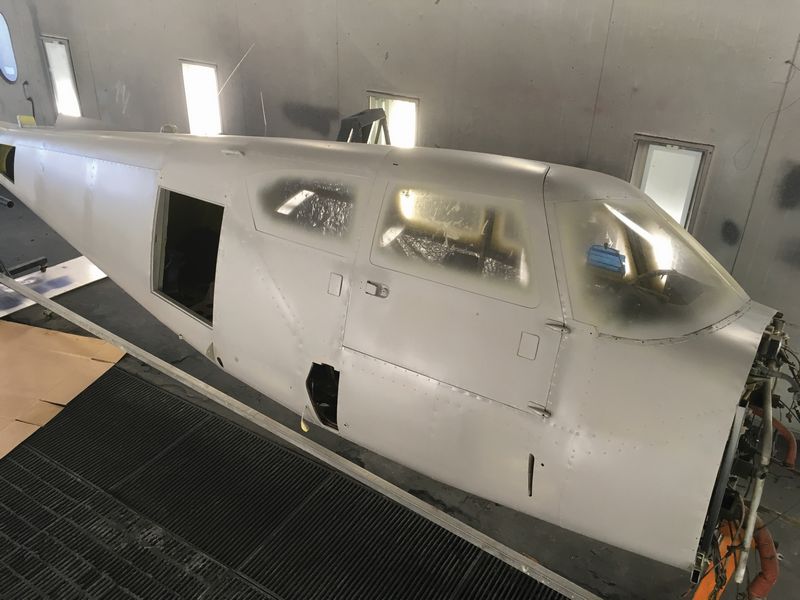
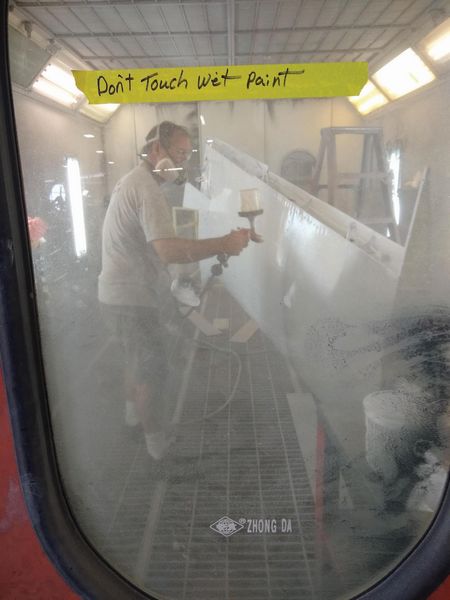
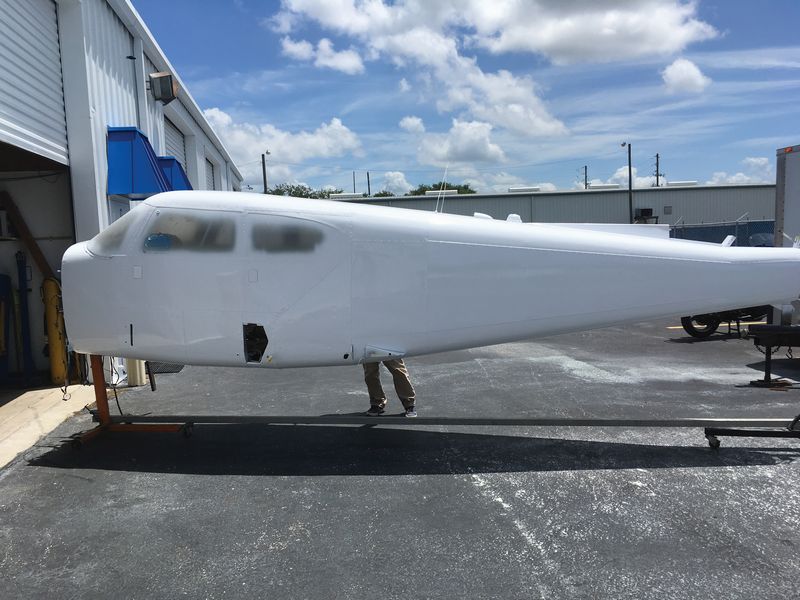
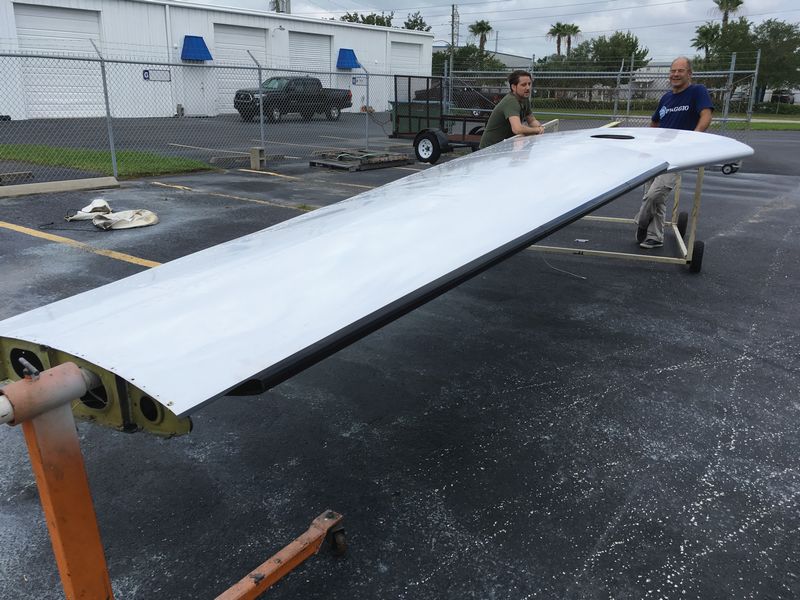
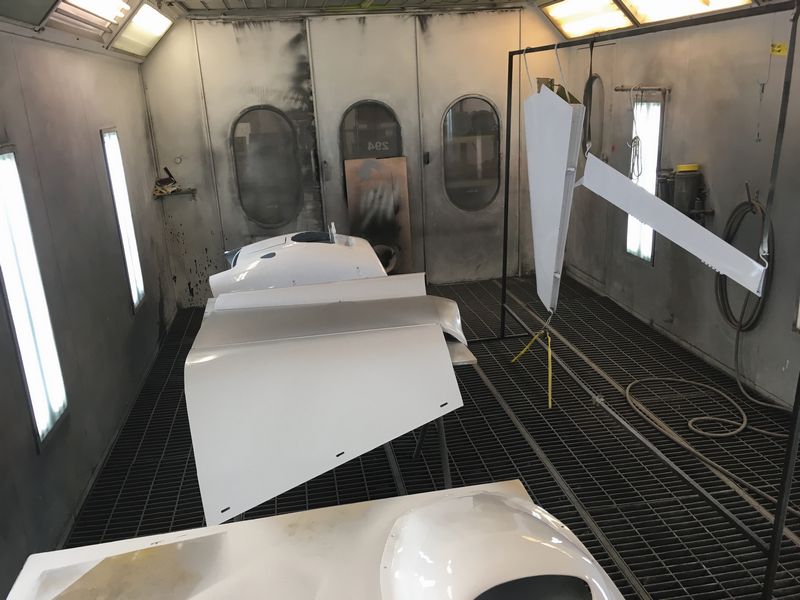
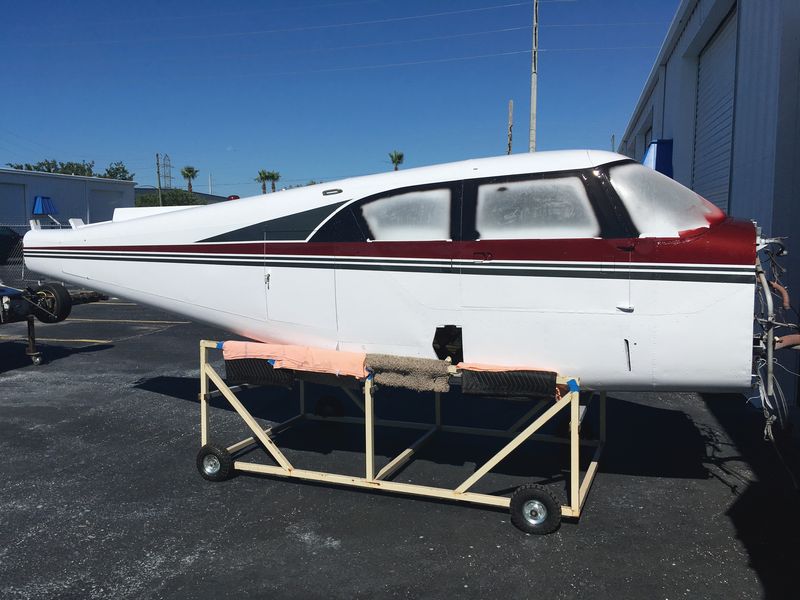
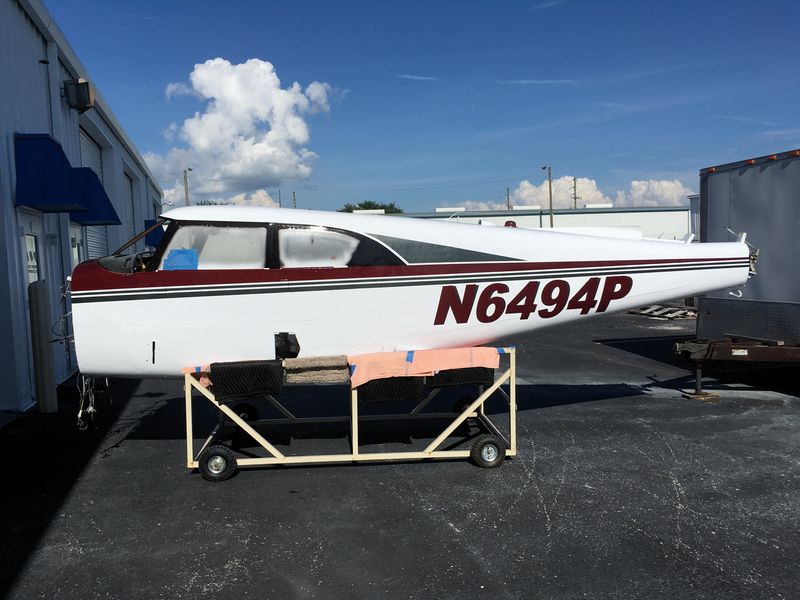
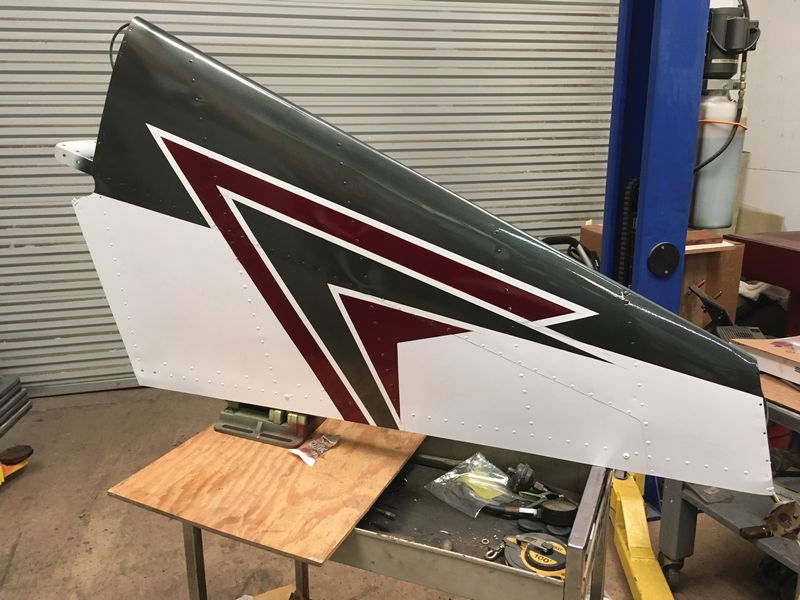
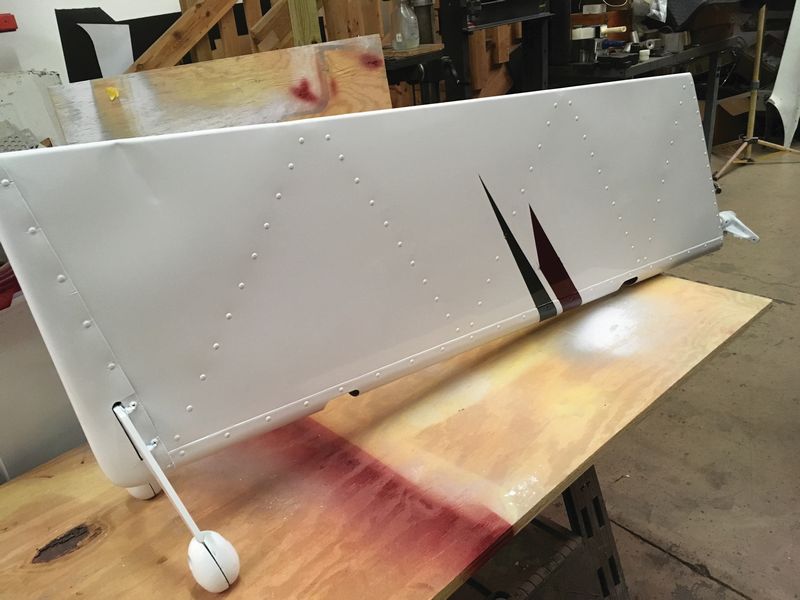
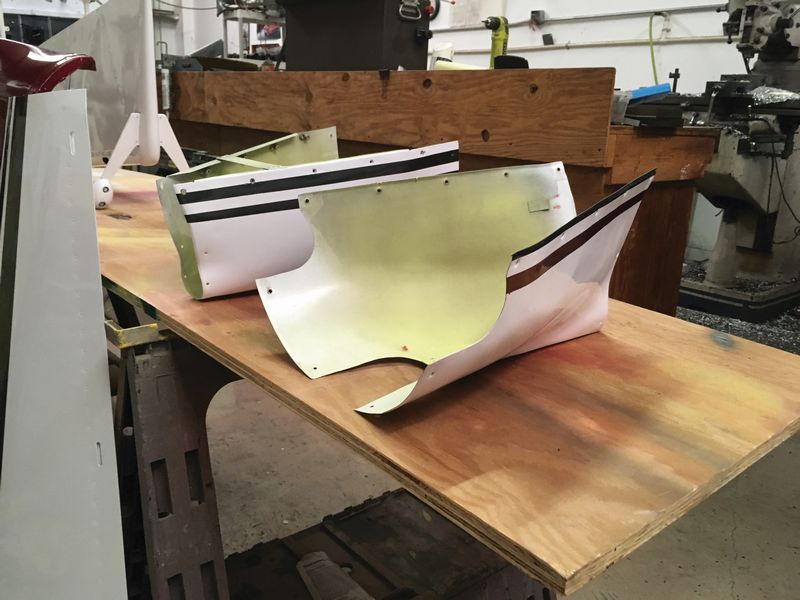
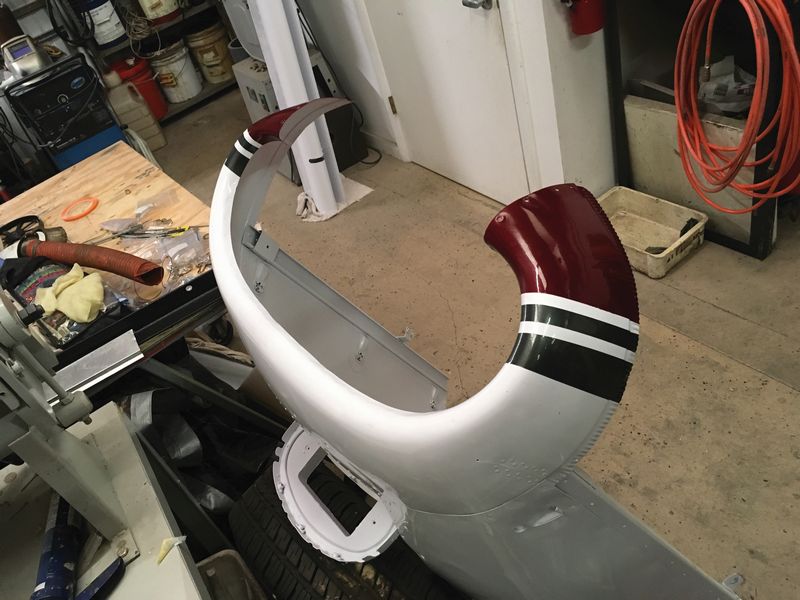
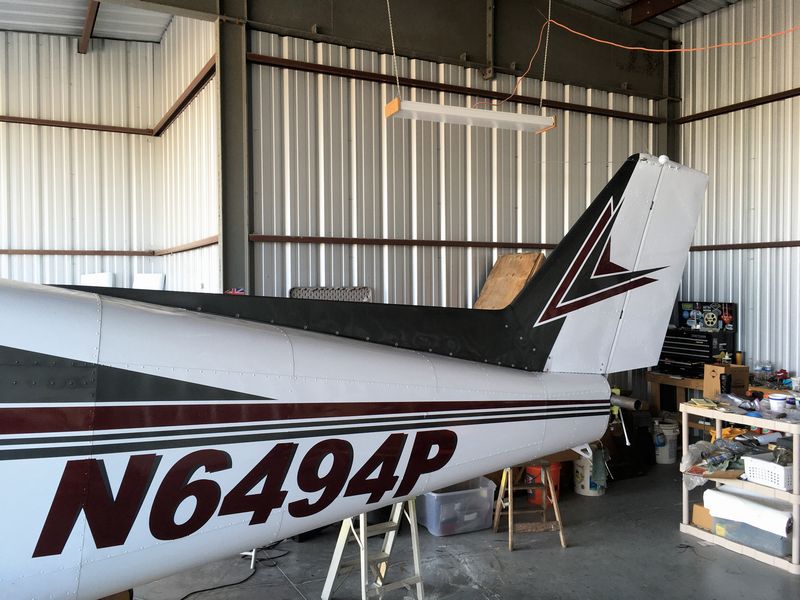
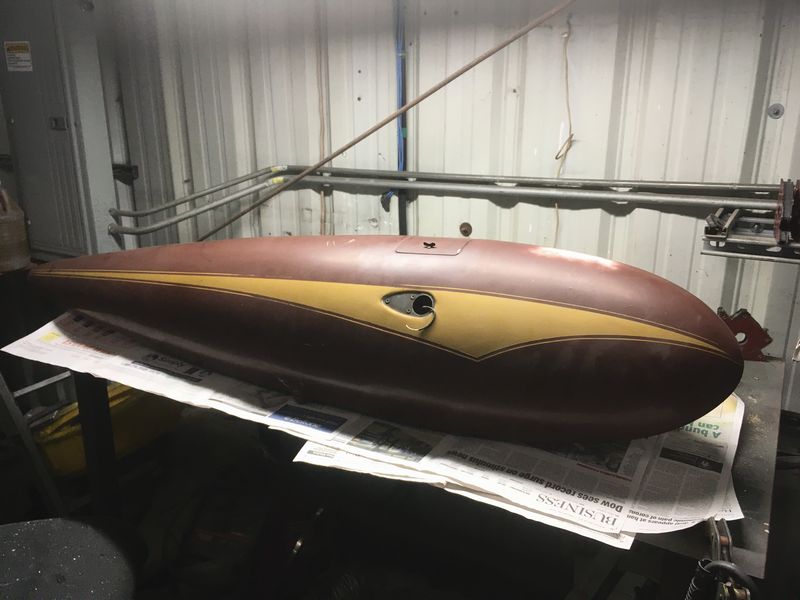
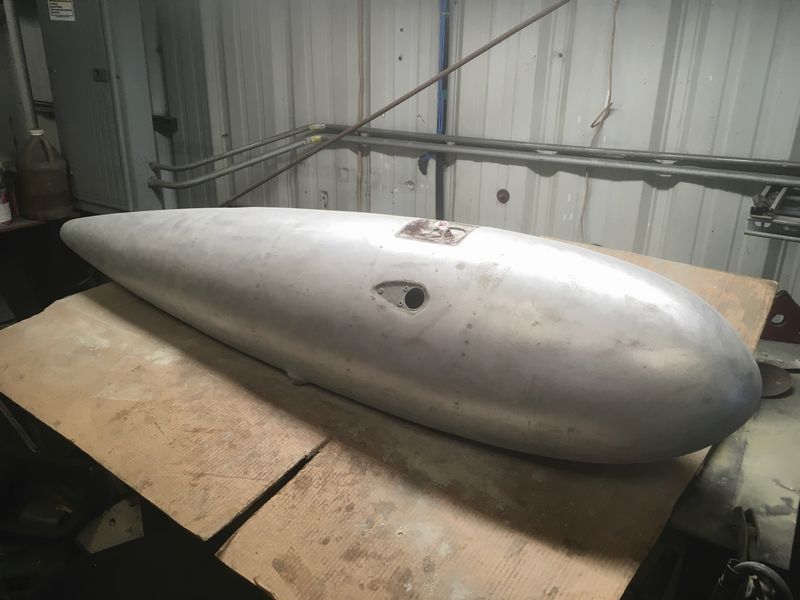
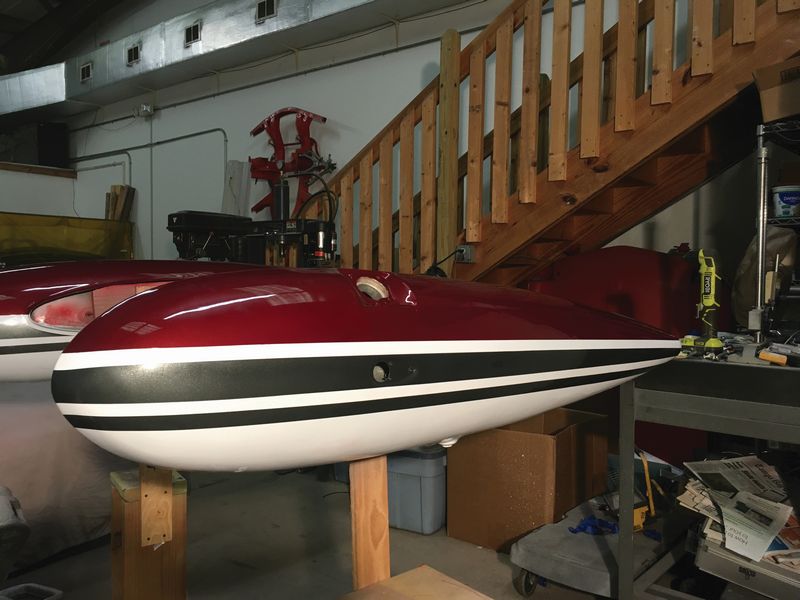
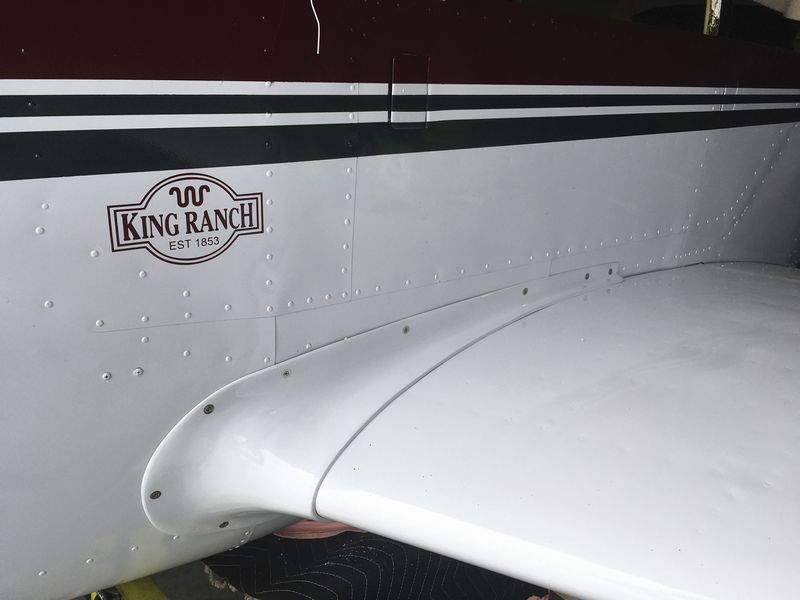
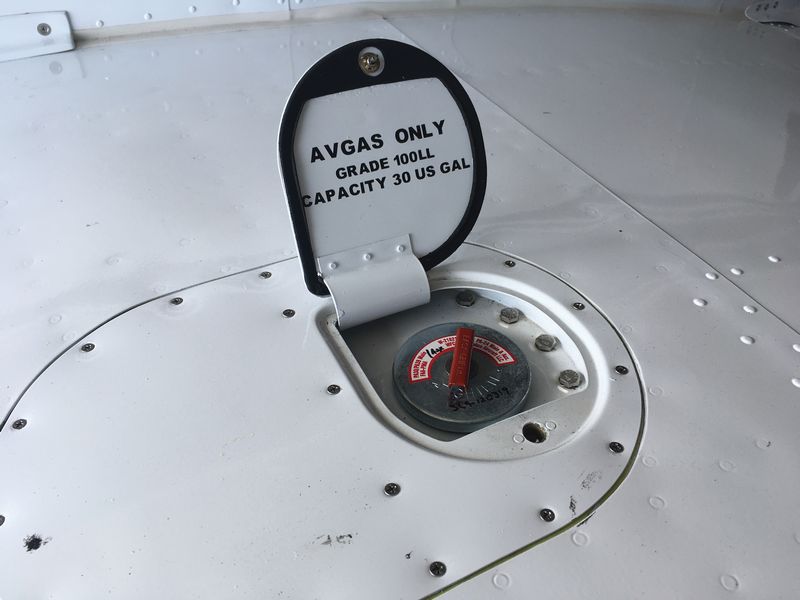
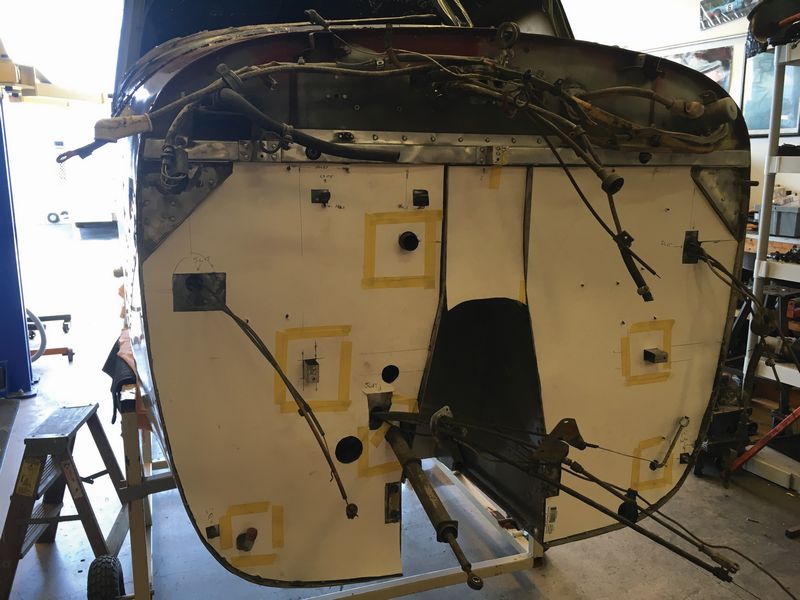
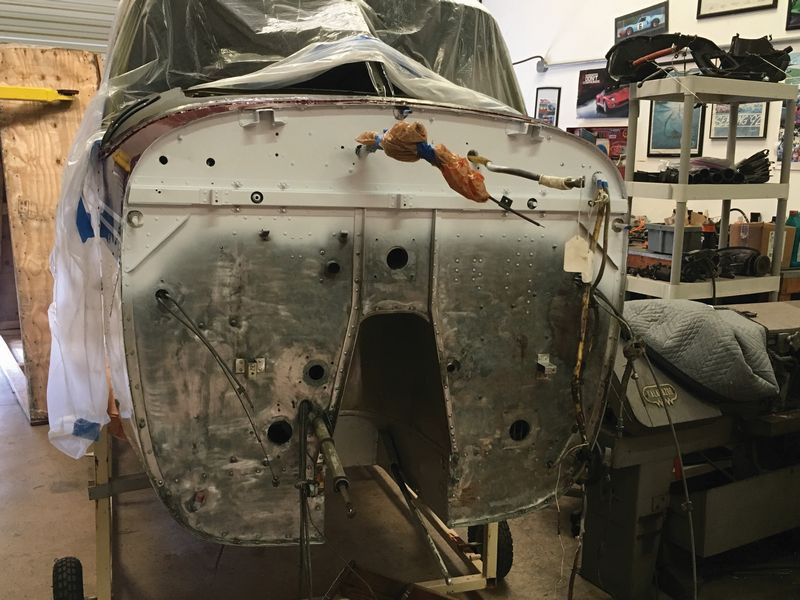
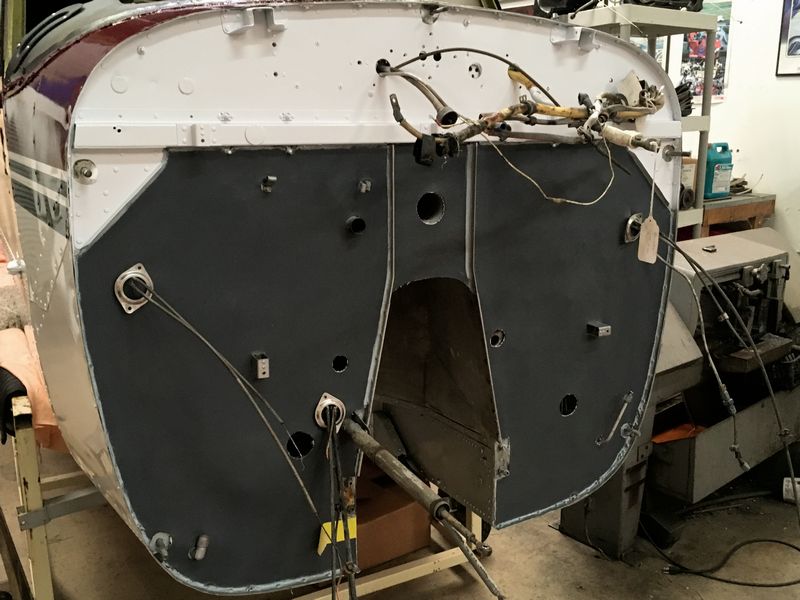
“The fuselage was mounted on a rotisserie that I built consisting of two swivel engine mounts tied together with long square steel tubing. This allowed me to rotate the fuselage from side to side about 20 degrees. It made it really easy, and it was balanced.”“The fuselage was mounted on a rotisserie that I built consisting of two swivel engine mounts tied together with long square steel tubing. This allowed me to rotate the fuselage from side to side about 20 degrees. It made it really easy, and it was balanced.”Paul SotropA wing before and after it was stripped. “My friend and helper Paul Sotrop is finishing the fine details of removing the last bit of paint around the rivets. What we used to strip all the aluminum parts was an aircraft stripper that’s no longer available, but Aircraft Spruce has other strippers. After it was stripped, the fuselage was pressure washed for two reasons: To remove any remaining paint around each rivet, and to flush any aircraft stripper out of the seams.”“A wing before and after it was stripped. “My friend and helper Paul Sotrop is finishing the fine details of removing the last bit of paint around the rivets. What we used to strip all the aluminum parts was an aircraft stripper that’s no longer available, but Aircraft Spruce has other strippers. After it was stripped, the fuselage was pressure washed for two reasons: To remove any remaining paint around each rivet, and to flush any aircraft stripper out of the seams.”“After stripping, the fuselage was etched with Alumiprep 33 (now called Bonderite C-IC 33 Aero). You mix it with water and spray it on; it’s a very light acid etch. You always want to clean it down to bare aluminum.”“After stripping, the fuselage was etched with Alumiprep 33 (now called Bonderite C-IC 33 Aero). You mix it with water and spray it on; it’s a very light acid etch. You always want to clean it down to bare aluminum.”“After stripping, the fuselage was etched with Alumiprep 33 (now called Bonderite C-IC 33 Aero). You mix it with water and spray it on; it’s a very light acid etch. You always want to clean it down to bare aluminum.”“Next comes Bonderite Alodine aluminum treatment. The Alumiprep etches the aluminum; cleans the pores of the metal out. The Alodine seals the aluminum to get it ready for paint. It leaves a yellow tint.” Shown are the fuselage, wings, and control surfaces, post-Alodine.“Next comes Bonderite Alodine aluminum treatment. The Alumiprep etches the aluminum; cleans the pores of the metal out. The Alodine seals the aluminum to get it ready for paint. It leaves a yellow tint.” Shown are the fuselage, wings, and control surfaces, post-Alodine.“Next comes Bonderite Alodine aluminum treatment. The Alumiprep etches the aluminum; cleans the pores of the metal out. The Alodine seals the aluminum to get it ready for paint. It leaves a yellow tint.” Shown are the fuselage, wings, and control surfaces, post-Alodine.(first primer): “Piper manufactured the Comanche line as their first all-metal airplane. All were zinc-chromated during assembly, for corrosion protection. After Piper moved to Vero Beach (at which time the Comanche line was ended), Piper made it optional to have their newer airframes zinc-chromated. I used a zinc chromate aluminum epoxy primer, as my first primer. That’s the stuff that is yellow. It is sprayed on.”(first primer): “Piper manufactured the Comanche line as their first all-metal airplane. All were zinc-chromated during assembly, for corrosion protection. After Piper moved to Vero Beach (at which time the Comanche line was ended), Piper made it optional to have their newer airframes zinc-chromated. I used a zinc chromate aluminum epoxy primer, as my first primer. That’s the stuff that is yellow. It is sprayed on.”(first primer): “Piper manufactured the Comanche line as their first all-metal airplane. All were zinc-chromated during assembly, for corrosion protection. After Piper moved to Vero Beach (at which time the Comanche line was ended), Piper made it optional to have their newer airframes zinc-chromated. I used a zinc chromate aluminum epoxy primer, as my first primer. That’s the stuff that is yellow. It is sprayed on.”(first primer): “Piper manufactured the Comanche line as their first all-metal airplane. All were zinc-chromated during assembly, for corrosion protection. After Piper moved to Vero Beach (at which time the Comanche line was ended), Piper made it optional to have their newer airframes zinc-chromated. I used a zinc chromate aluminum epoxy primer, as my first primer. That’s the stuff that is yellow. It is sprayed on.”(second, epoxy primer): “This is the epoxy primer, prior to topcoat. This one is compatible with the topcoat. This is Axalta Corlar 2.1 Epoxy Primer. After each of these coatings, the surfaces are wet-sanded prior to the next coat.” (second, epoxy primer): “This is the epoxy primer, prior to topcoat. This one is compatible with the topcoat. This is Axalta Corlar 2.1 Epoxy Primer. After each of these coatings, the surfaces are wet-sanded prior to the next coat.”Piehl in the painting booth.(finish coat): “After the epoxy primer is applied and wet-sanded out, we’re going to apply the finish coat and go with all-white. We’re using Axalta Imron 3.5 HG-C Industrial. A little secret of the trade I learned from some old-timers is that when you use Imron 3.5, you use the marine catalyst grade because it gives you a higher gloss. It costs more, but it’s well worth it.”(finish coat): “After the epoxy primer is applied and wet-sanded out, we’re going to apply the finish coat and go with all-white. We’re using Axalta Imron 3.5 HG-C Industrial. A little secret of the trade I learned from some old-timers is that when you use Imron 3.5, you use the marine catalyst grade because it gives you a higher gloss. It costs more, but it’s well worth it.”(finish coat): “After the epoxy primer is applied and wet-sanded out, we’re going to apply the finish coat and go with all-white. We’re using Axalta Imron 3.5 HG-C Industrial. A little secret of the trade I learned from some old-timers is that when you use Imron 3.5, you use the marine catalyst grade because it gives you a higher gloss. It costs more, but it’s well worth it.”(finish coat): “After the epoxy primer is applied and wet-sanded out, we’re going to apply the finish coat and go with all-white. We’re using Axalta Imron 3.5 HG-C Industrial. A little secret of the trade I learned from some old-timers is that when you use Imron 3.5, you use the marine catalyst grade because it gives you a higher gloss. It costs more, but it’s well worth it.”“After careful design and hand masking (tape), I’ve now applied three colors: burgundy, black, and dark gray. I applied each color one at a time. There’s about a two-week period between each one.” Piehl used a fine line tape and said to use quarter-inch wide tape at the most. One interesting extra step that some pilots would not entertain is that Piehl didn’t use any stickers or labels to add the three colors on top of white. Instead, he had “negatives” or stencils created (vinyl with holes/strips cut out), and then he painted using that stencil, the way you might spray paint a yard-sale sign. “There are long stripes on the fuselage and there are multiple stripes on each side. I went to my local vinyl-cutting sign shop and had them create 25-foot-long negatives. It’s one piece, and it’s on a backing, you put it on and peel off the paper. The stripes are tapered from the engine cowl to the tail cone. I had the sign shop cut them to my specifications.”Again, Piehl had the vinyl shop create his N numbers as stencils. “It took me a very long time to lay them out and get them exactly right, with the shadow. It’s a two-step process, a two-color process, there’s a burgundy and a gray in there.”(finish coat): “If you look at photo top left, my wife and I created that detail on our living room floor. I brought home the tail and the rudder [top middle]. Then the cowling [second from top left] and the tail cone [middle, second] had to line up with the fuselage and the top part of the cowl. Lining things up was pretty labor-intensive, but they wound up perfect in the end.”(finish coat): “If you look at photo top left, my wife and I created that detail on our living room floor. I brought home the tail and the rudder [top middle]. Then the cowling [second from top left] and the tail cone [middle, second] had to line up with the fuselage and the top part of the cowl. Lining things up was pretty labor-intensive, but they wound up perfect in the end.”(finish coat): “If you look at photo top left, my wife and I created that detail on our living room floor. I brought home the tail and the rudder [top middle]. Then the cowling [second from top left] and the tail cone [middle, second] had to line up with the fuselage and the top part of the cowl. Lining things up was pretty labor-intensive, but they wound up perfect in the end.”(finish coat): “If you look at photo top left, my wife and I created that detail on our living room floor. I brought home the tail and the rudder [top middle]. Then the cowling [second from top left] and the tail cone [middle, second] had to line up with the fuselage and the top part of the cowl. Lining things up was pretty labor-intensive, but they wound up perfect in the end.”(finish coat): “If you look at photo top left, my wife and I created that detail on our living room floor. I brought home the tail and the rudder [top middle]. Then the cowling [second from top left] and the tail cone [middle, second] had to line up with the fuselage and the top part of the cowl. Lining things up was pretty labor-intensive, but they wound up perfect in the end.”This shows partial assembly of the components from the photos above.Here are the tip tanks, start to finish. Top is original paint, not yet touched. Middle is stripped and ready for primer. Immediately above is taped and painted. “It was interesting after stripping to see the aluminum tanks faired out with Bondo (filler material) from the factory. This was, after all, 1960s aluminum welding fabrication at its best.”Here are the tip tanks, start to finish. Top is original paint, not yet touched. Middle is stripped and ready for primer. Immediately above is taped and painted. “It was interesting after stripping to see the aluminum tanks faired out with Bondo (filler material) from the factory. This was, after all, 1960s aluminum welding fabrication at its best.”Here are the tip tanks, start to finish. Top is original paint, not yet touched. Middle is stripped and ready for primer. Immediately above is taped and painted. “It was interesting after stripping to see the aluminum tanks faired out with Bondo (filler material) from the factory. This was, after all, 1960s aluminum welding fabrication at its best.”“These all show details of where, again, I use the vinyl-cut negatives or stencils.”“These all show details of where, again, I use the vinyl-cut negatives or stencils.”“These all show details of where, again, I use the vinyl-cut negatives or stencils.”“This shows the firewall reconditioning. (Photo immediately above) The final treatment is a silicone and fiberglass heat shield, available at Aircraft Spruce and other places, called Firewall Gray Heat Barrier. It’s bonded on with a high-temperature fireproof RTV. So I cleaned the firewall, I made a stencil for it, cut this heat shield, and applied it. It’s clean-looking that way, and the important thing is the Comanche, with a stock exhaust system, transfers a lot of heat through the firewall because the engine’s two feet in front of it. This prevents any heat from coming through. It’s what is actually used on NASCAR firewalls.”“This shows the firewall reconditioning. (Photo immediately above) The final treatment is a silicone and fiberglass heat shield, available at Aircraft Spruce and other places, called Firewall Gray Heat Barrier. It’s bonded on with a high-temperature fireproof RTV. So I cleaned the firewall, I made a stencil for it, cut this heat shield, and applied it. It’s clean-looking that way, and the important thing is the Comanche, with a stock exhaust system, transfers a lot of heat through the firewall because the engine’s two feet in front of it. This prevents any heat from coming through. It’s what is actually used on NASCAR firewalls.”“This shows the firewall reconditioning. (Photo immediately above) The final treatment is a silicone and fiberglass heat shield, available at Aircraft Spruce and other places, called Firewall Gray Heat Barrier. It’s bonded on with a high-temperature fireproof RTV. So I cleaned the firewall, I made a stencil for it, cut this heat shield, and applied it. It’s clean-looking that way, and the important thing is the Comanche, with a stock exhaust system, transfers a lot of heat through the firewall because the engine’s two feet in front of it. This prevents any heat from coming through. It’s what is actually used on NASCAR firewalls.”


